INSTALLATION AND BREAK-IN PROCEDURES (cont'd)
GROUNDING INSTRUCTIONS
RISK OF ELECTRICAL SHOCK! In the event of a short circuit, grounding reduces the risk of shock by providing an escape wire for the electric cur- rent. This air compressor must be properly grounded.
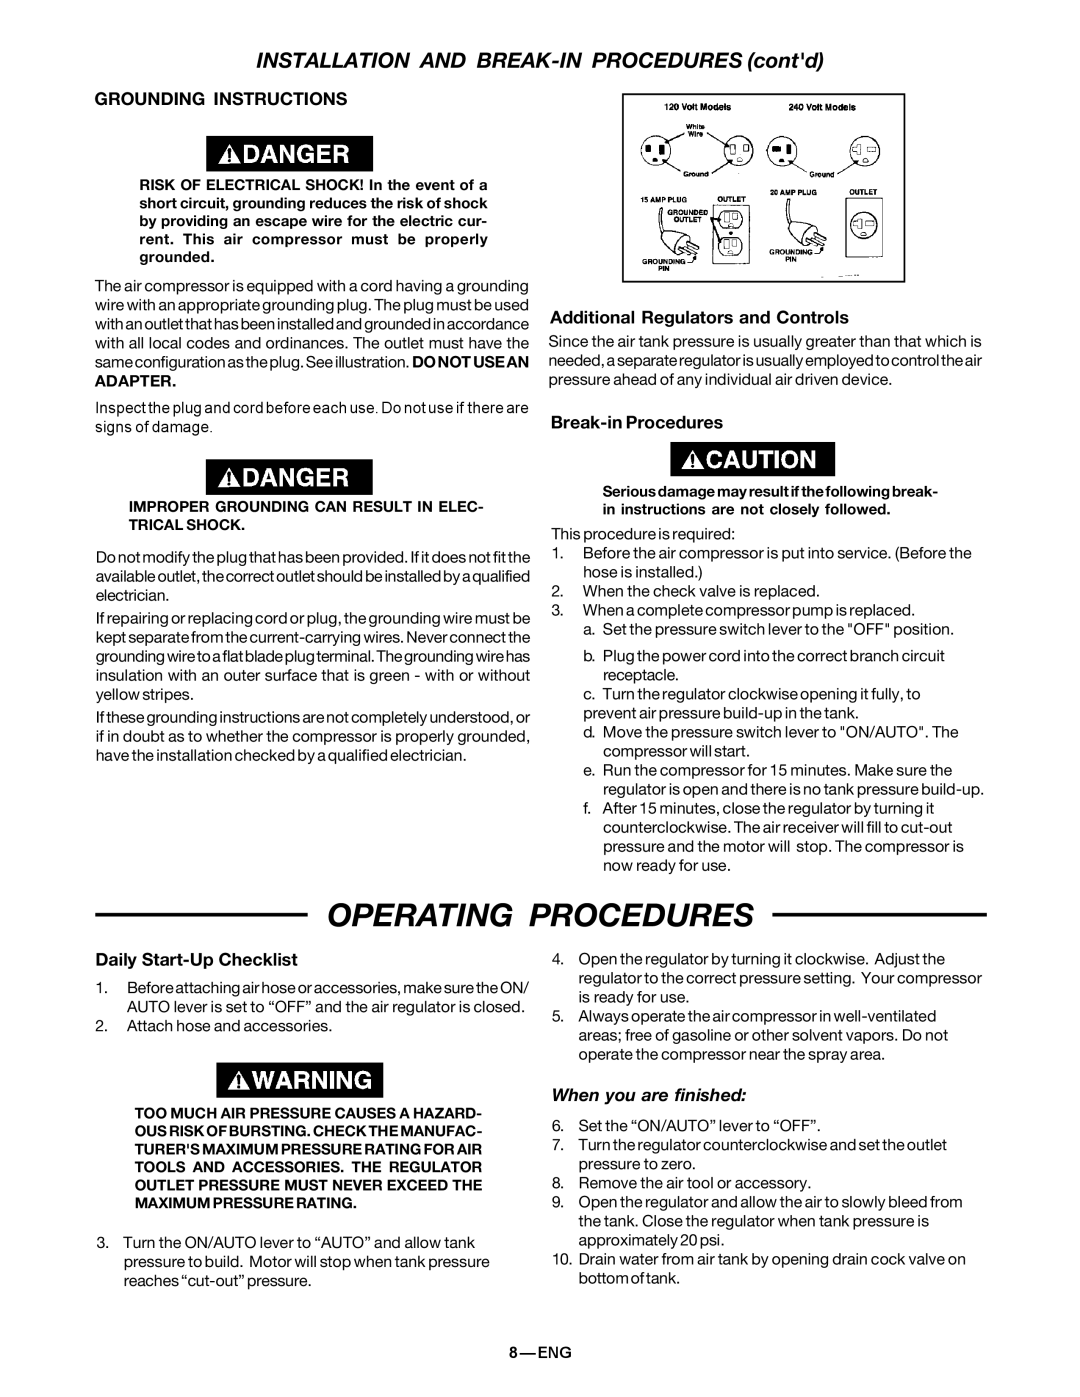
The air compressor is equipped with a cord having a grounding wire with an appropriate grounding plug. The plug must be used with an outlet that has been installed and grounded in accordance with all local codes and ordinances. The outlet must have the same configuration as the plug. See illustration. DO NOT USE AN
ADAPTER.
Inspect the plug and cord before each use. Do not use if there are signs of damage.
IMPROPER GROUNDING CAN RESULT IN ELEC- TRICAL SHOCK.
Do not modify the plug that has been provided. If it does not fit the available outlet, the correct outlet should be installed by a qualified electrician.
If repairing or replacing cord or plug, the grounding wire must be kept separate from the
If these grounding instructions are not completely understood, or if in doubt as to whether the compressor is properly grounded, have the installation checked by a qualified electrician.
Additional Regulators and Controls
Since the air tank pressure is usually greater than that which is needed, a separate regulator is usually employed to control the air pressure ahead of any individual air driven device.
Break-in Procedures
Serious damage may result if the following break- in instructions are not closely followed.
This procedure is required:
1.Before the air compressor is put into service. (Before the hose is installed.)
2.When the check valve is replaced.
3.When a complete compressor pump is replaced.
a.Set the pressure switch lever to the "OFF" position.
b.Plug the power cord into the correct branch circuit receptacle.
c.Turn the regulator clockwise opening it fully, to prevent air pressure
d.Move the pressure switch lever to "ON/AUTO". The compressor will start.
e.Run the compressor for 15 minutes. Make sure the regulator is open and there is no tank pressure
f.After 15 minutes, close the regulator by turning it counterclockwise. The air receiver will fill to
OPERATING PROCEDURES
Daily Start-Up Checklist
1.Before attaching air hose or accessories, make sure the ON/ AUTO lever is set to “OFF” and the air regulator is closed.
2.Attach hose and accessories.
4.Open the regulator by turning it clockwise. Adjust the regulator to the correct pressure setting. Your compressor is ready for use.
5.Always operate the air compressor in
TOO MUCH AIR PRESSURE CAUSES A HAZARD- OUS RISK OF BURSTING. CHECK THE MANUFAC- TURER'S MAXIMUM PRESSURE RATING FOR AIR TOOLS AND ACCESSORIES. THE REGULATOR OUTLET PRESSURE MUST NEVER EXCEED THE MAXIMUM PRESSURE RATING.
3.Turn the ON/AUTO lever to “AUTO” and allow tank pressure to build. Motor will stop when tank pressure reaches
When you are finished:
6.Set the “ON/AUTO” lever to “OFF”.
7.Turn the regulator counterclockwise and set the outlet pressure to zero.
8.Remove the air tool or accessory.
9.Open the regulator and allow the air to slowly bleed from the tank. Close the regulator when tank pressure is approximately 20 psi.
10.Drain water from air tank by opening drain cock valve on bottom of tank.