Getting Started
Your KT6 recorder has been preset to operate using the most popular settings. To change the range, use dip switches (page 6). NOTE: Dip switches can only be changes when unit is off.
Recording Time: 7 day
Range: 0 to 100˚F
A pen(s) and a chart have already been installed for your convenience. All you need to do to start using your KT6 recorder with the settings listed above is follow these quick start instructions:
1.Plug in the AC adapter
2.Plug in thermocouple probe(s).
NOTE: Be sure to observe proper polarity when connecting wires from transmitter.
3. Remove the protective pen cap from red pen
Installation
Before you install your KT6 recorder, read through this entire manual to find out about all the options that are available to you.
Your recorder has been shipped with the following items:
1.One starter box of
2.One 9V alkaline battery
3.One AC adapter
4.One operation manual
5.One or Two bead-wire K-Thermocouple probes
Place the KT6 on a flat,
Chart Installation
Use the following procedure to install or replace a chart in the recorder.
1.Open the door by pressing the door latch.
2.Press the “HOME” key to move the pen to the “Pen Lift” position. The pen is automatically raised off the chart.
3.Remove the old chart, place the appropriate new chart on the Chart Hub - being certain that the edge of the chart slides under the Chart Guide
and insert on Pen Cap Holder.
4.Press the “ON/OFF” key to turn instrument ON. (see “Keypad Operation”)
5.The instrument will enter a 5 second
6.Set the appropriate time by pressing the “CHART ROTATION” key on the lower right of the dial plate. The chart will turn clockwise while the button is depressed. (CAUTION: Do not manually try to turn the chart hub. Doing so may damage instrument). Continue the rotation until the correct hour and day on
the chart is referenced to the timing arrow. (See “Instrument Anatomy)
Wall Mount: Keyhole slots are provided on the KT6 for wall mounting.
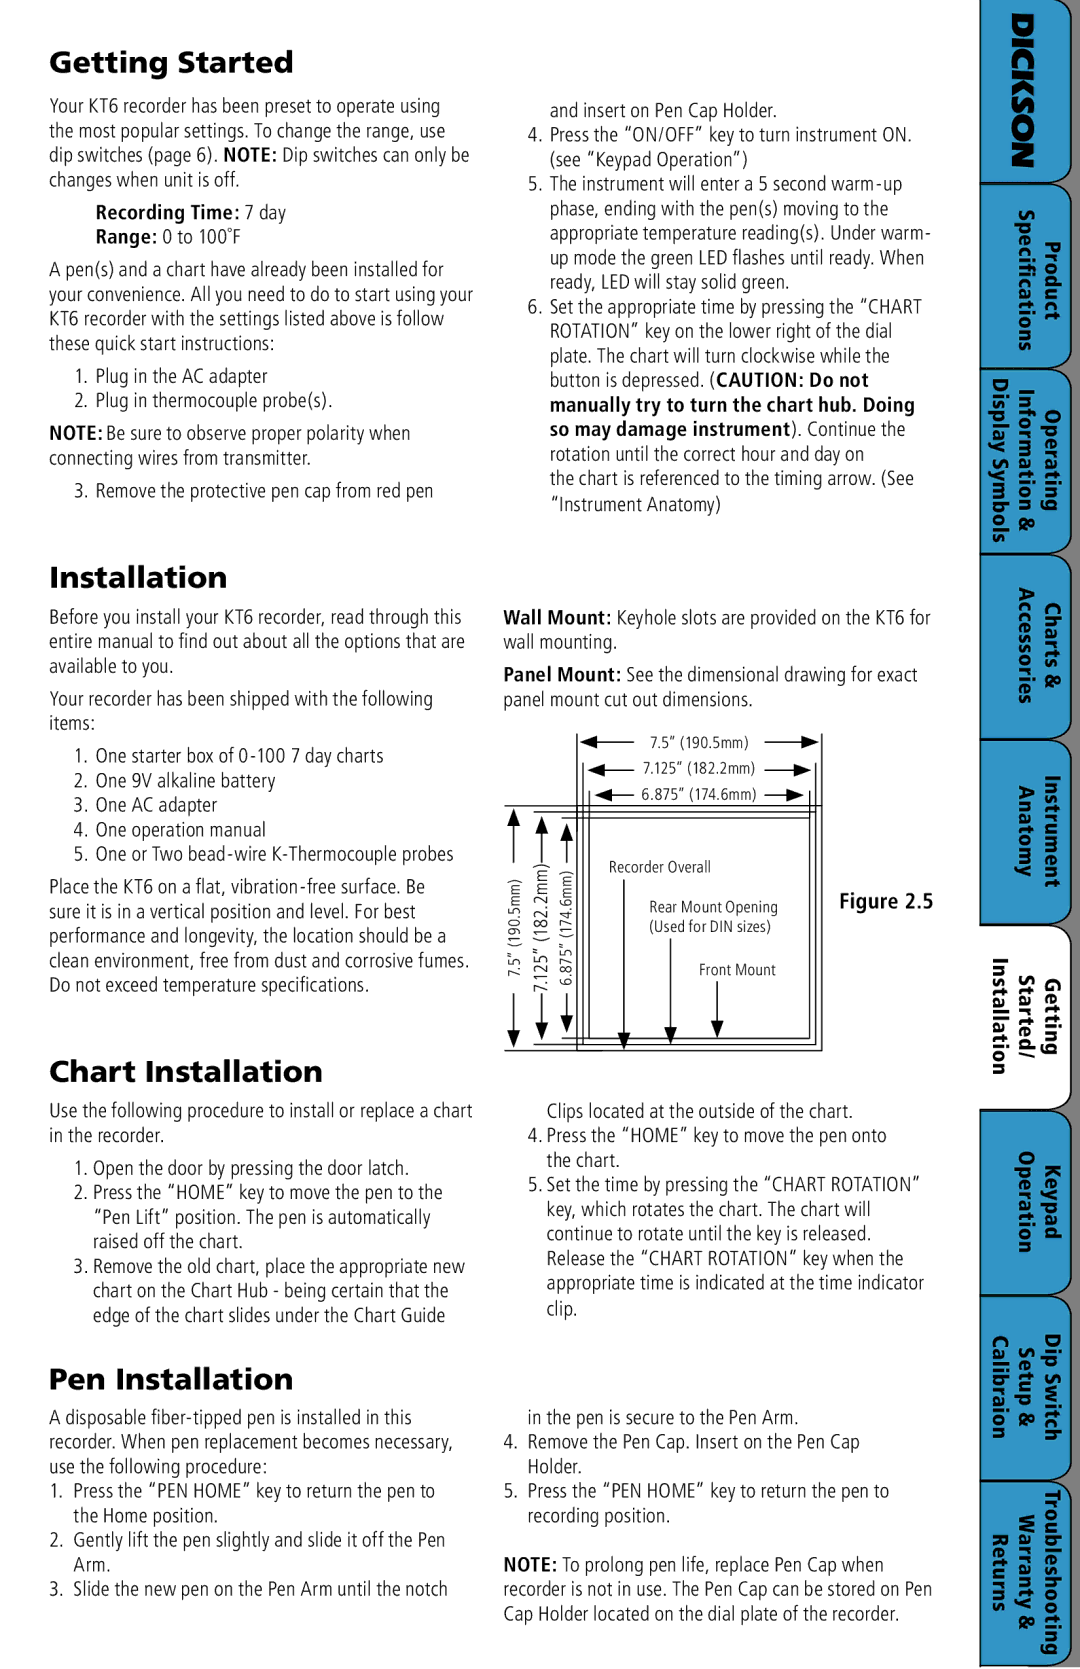
Panel Mount: See the dimensional drawing for exact panel mount cut out dimensions.
|
|
| 7.5” (190.5mm) |
| |
|
|
| 7.125” (182.2mm) |
| |
|
|
| 6.875” (174.6mm) |
| |
(190.5mm)7.5” | (182.2mm)7.125” | (174.6mm)6.875” | Recorder Overall |
| |
Rear Mount Opening | Figure 2.5 | ||||
|
|
| |||
|
|
| (Used for DIN sizes) |
| |
|
|
| Front Mount |
|
Clips located at the outside of the chart.
4.Press the “HOME” key to move the pen onto the chart.
5.Set the time by pressing the “CHART ROTATION” key, which rotates the chart. The chart will continue to rotate until the key is released. Release the “CHART ROTATION” key when the appropriate time is indicated at the time indicator clip.
DICKSON |
| |
| Specifications | Product |
Display Symbols | Operating Information & | |
| Accessories | Charts & |
| Anatomy | Instrument |
Installation | Started/ | Getting |
| Operation | Keypad |
|
| Dip |
Pen Installation
Adisposable
1. Press the “PEN HOME” key to return the pen to the Home position.
2. Gently lift the pen slightly and slide it off the Pen Arm.
3. Slide the new pen on the Pen Arm until the notch
in the pen is secure to the Pen Arm.
4.Remove the Pen Cap. Insert on the Pen Cap Holder.
5.Press the “PEN HOME” key to return the pen to recording position.
NOTE: To prolong pen life, replace Pen Cap when recorder is not in use. The Pen Cap can be stored on Pen Cap Holder located on the dial plate of the recorder.
Calibraion | Setup & | Switch |
Returns | Warranty & | Troubleshooting |