Keypad Operation
DICKSON |
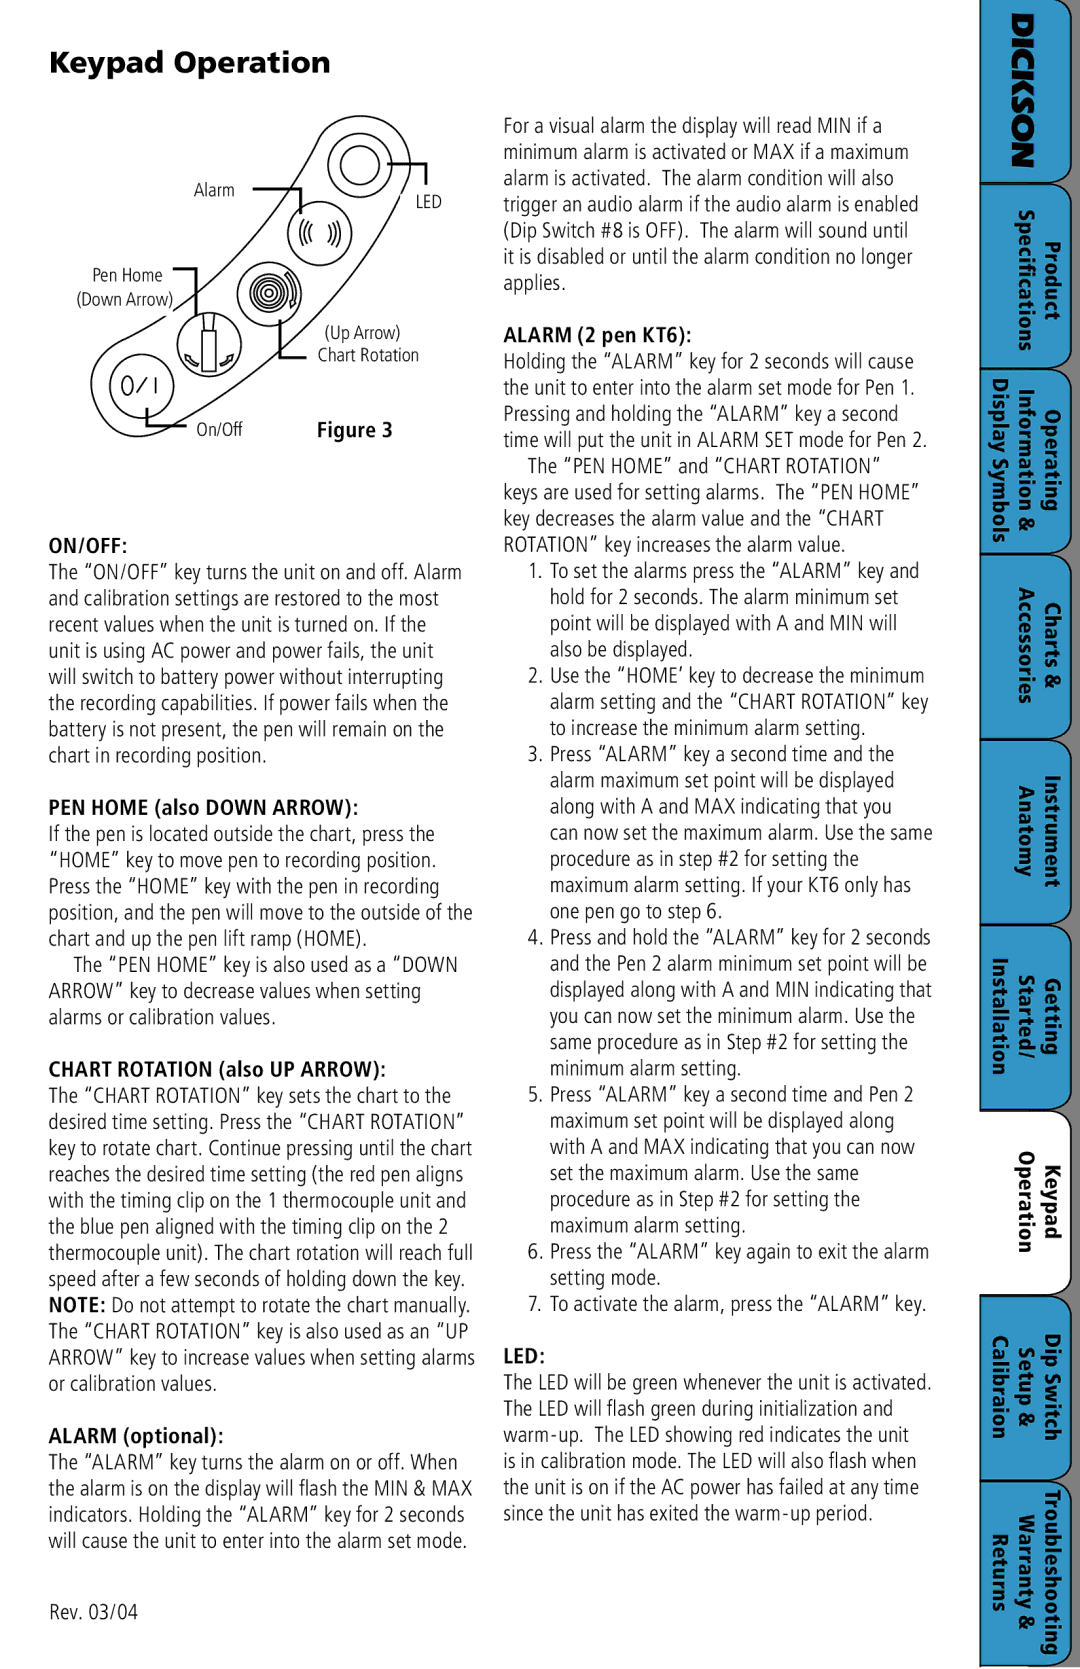
Alarm
Pen Home
(Down Arrow)
On/Off
LED
(Up Arrow)
Chart Rotation
Figure 3
For a visual alarm the display will read MIN if a minimum alarm is activated or MAX if a maximum alarm is activated. The alarm condition will also trigger an audio alarm if the audio alarm is enabled (Dip Switch #8 is OFF). The alarm will sound until it is disabled or until the alarm condition no longer applies.
ALARM (2 pen KT6):
Holding the “ALARM” key for 2 seconds will cause the unit to enter into the alarm set mode for Pen 1. Pressing and holding the “ALARM” key a second time will put the unit in ALARM SET mode for Pen 2.
Specifications | Product |
Information Display |
|
ON/OFF:
The “ON/OFF” key turns the unit on and off. Alarm and calibration settings are restored to the most recent values when the unit is turned on. If the unit is using AC power and power fails, the unit will switch to battery power without interrupting the recording capabilities. If power fails when the battery is not present, the pen will remain on the chart in recording position.
PEN HOME (also DOWN ARROW):
If the pen is located outside the chart, press the “HOME” key to move pen to recording position. Press the “HOME” key with the pen in recording position, and the pen will move to the outside of the chart and up the pen lift ramp (HOME).
The “PEN HOME” key is also used as a “DOWN ARROW” key to decrease values when setting alarms or calibration values.
CHART ROTATION (also UP ARROW):
The “CHART ROTATION” key sets the chart to the desired time setting. Press the “CHART ROTATION” key to rotate chart. Continue pressing until the chart reaches the desired time setting (the red pen aligns with the timing clip on the 1 thermocouple unit and the blue pen aligned with the timing clip on the 2 thermocouple unit). The chart rotation will reach full speed after a few seconds of holding down the key. NOTE: Do not attempt to rotate the chart manually. The “CHART ROTATION” key is also used as an “UP ARROW” key to increase values when setting alarms or calibration values.
ALARM (optional):
The “ALARM” key turns the alarm on or off. When the alarm is on the display will flash the MIN & MAX indicators. Holding the “ALARM” key for 2 seconds will cause the unit to enter into the alarm set mode.
Rev. 03/04
The “PEN HOME” and “CHART ROTATION” keys are used for setting alarms. The “PEN HOME” key decreases the alarm value and the “CHART ROTATION” key increases the alarm value.
1.To set the alarms press the “ALARM” key and hold for 2 seconds. The alarm minimum set point will be displayed with A and MIN will also be displayed.
2.Use the “HOME’ key to decrease the minimum alarm setting and the “CHART ROTATION” key to increase the minimum alarm setting.
3.Press “ALARM” key a second time and the alarm maximum set point will be displayed along with A and MAX indicating that you can now set the maximum alarm. Use the same procedure as in step #2 for setting the maximum alarm setting. If your KT6 only has one pen go to step 6.
4.Press and hold the “ALARM” key for 2 seconds and the Pen 2 alarm minimum set point will be displayed along with A and MIN indicating that you can now set the minimum alarm. Use the same procedure as in Step #2 for setting the minimum alarm setting.
5.Press “ALARM” key a second time and Pen 2 maximum set point will be displayed along with A and MAX indicating that you can now set the maximum alarm. Use the same procedure as in Step #2 for setting the maximum alarm setting.
6.Press the “ALARM” key again to exit the alarm setting mode.
7.To activate the alarm, press the “ALARM” key.
LED:
The LED will be green whenever the unit is activated. The LED will flash green during initialization and
Symbols | & | Operating |
| Accessories | Charts & |
| Anatomy | Instrument |
Installation | Started/ | Getting |
| Operation | Keypad |
Calibraion | Setup & | Dip Switch |
Returns | Warranty & | Troubleshooting |