Installation
DIN Front/Rear-mount
This product can be properly installed either from “Front” (conventional DIN
Before installing this product
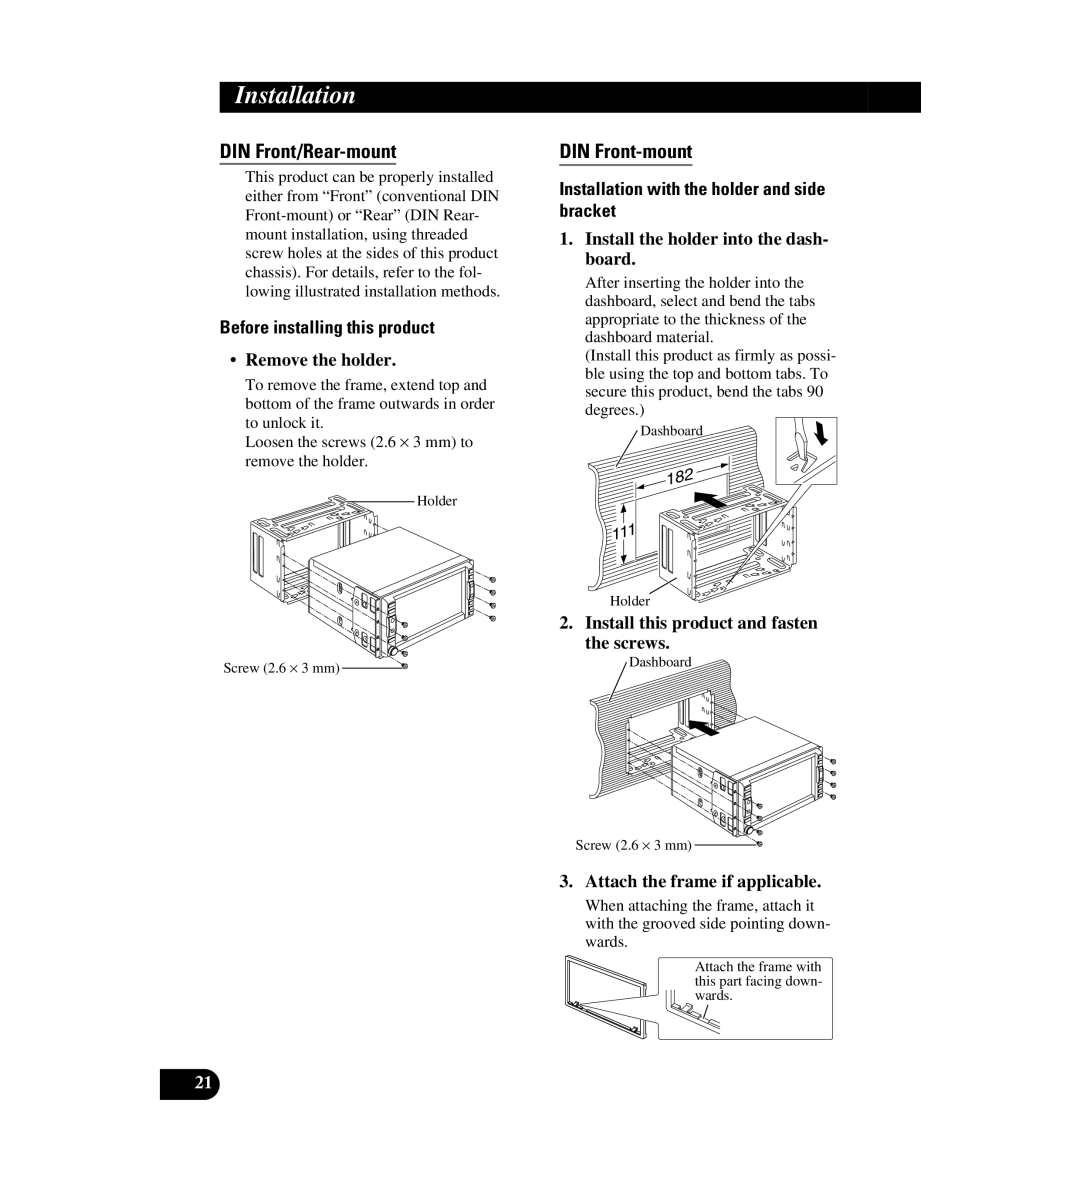
•Remove the holder.
To remove the frame, extend top and bottom of the frame outwards in order
to unlock it.
Loosen the screws (2.6 ⋅ 3 mm) to remove the holder.
Holder
Screw (2.6 ⋅ 3 mm) ![]()
![]()
DIN Front-mount
Installation with the holder and side bracket
1.Install the holder into the dash- board.
After inserting the holder into the dashboard, select and bend the tabs appropriate to the thickness of the dashboard material.
(Install this product as firmly as possi- ble using the top and bottom tabs. To secure this product, bend the tabs 90 degrees.)
Dashboard
182
111
Holder
2. Install this product and fasten the screws.
Dashboard
Screw (2.6 ⋅ 3 mm) ![]()
![]()
3.Attach the frame if applicable.
When attaching the frame, attach it with the grooved side pointing down- wards.
Attach the frame with this part facing down- wards.
21