Storing/Copying/Naming a Preset
Once the Preset has been modified to your liking, you may store your settings to any of the 40 User Preset locations (Presets
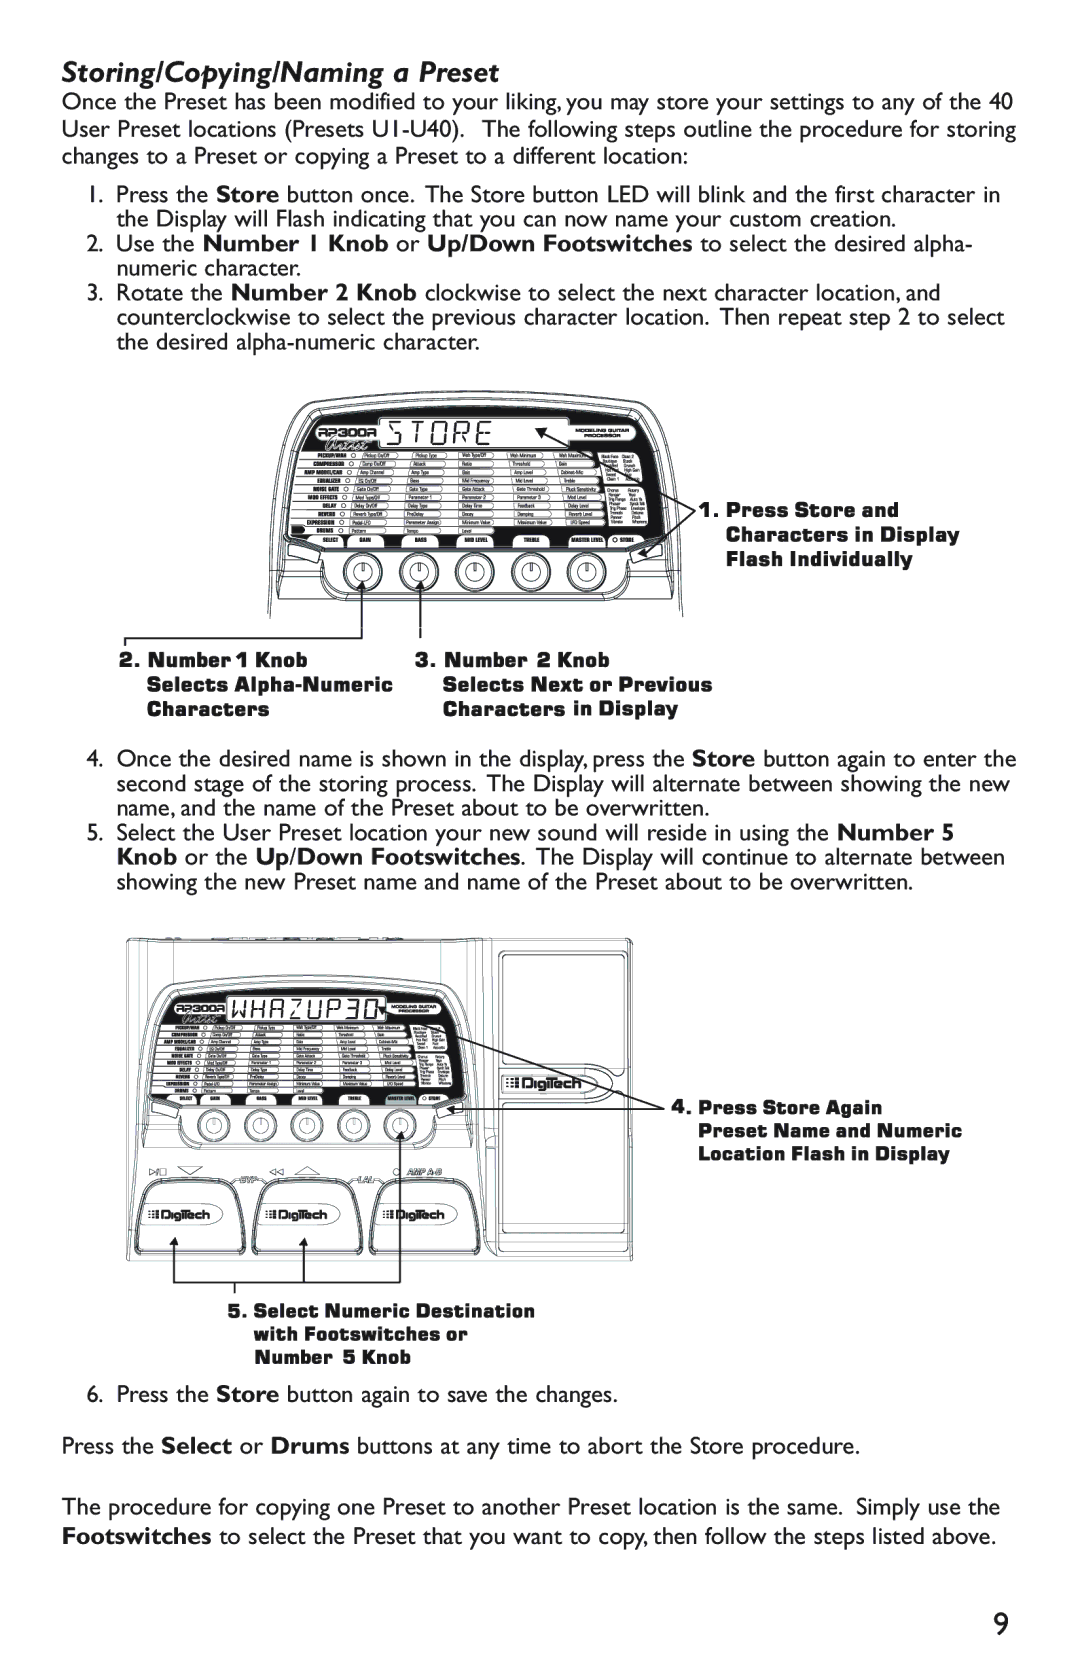
1.Press the Store button once. The Store button LED will blink and the first character in the Display will Flash indicating that you can now name your custom creation.
2.Use the Number 1 Knob or Up/Down Footswitches to select the desired alpha- numeric character.
3.Rotate the Number 2 Knob clockwise to select the next character location, and counterclockwise to select the previous character location. Then repeat step 2 to select the desired


 Store
Store
4.Once the desired name is shown in the display, press the Store button again to enter the second stage of the storing process. The Display will alternate between showing the new name, and the name of the Preset about to be overwritten.
5.Select the User Preset location your new sound will reside in using the Number 5 Knob or the Up/Down Footswitches. The Display will continue to alternate between showing the new Preset name and name of the Preset about to be overwritten.
6. Press the Store button again to save the changes.
Press the Select or Drums buttons at any time to abort the Store procedure.
The procedure for copying one Preset to another Preset location is the same. Simply use the Footswitches to select the Preset that you want to copy, then follow the steps listed above.
9