
DF2603 specifications
The Dimplex DF2603 is an innovative electric fire that brings both warmth and aesthetic appeal to any living space. Designed with modern technology and functionality in mind, this heater stands out for its unique combination of efficiency, design, and convenience.One of the key features of the DF2603 is its realistic flame effect. The Optiflame® technology creates a mesmerizing illusion of flickering flames, providing a cozy ambiance without the need for actual combustion. This feature can be operated independently of the heat settings, allowing users to enjoy the visual effects year-round, regardless of the season.
In terms of heating performance, the Dimplex DF2603 is equipped with powerful fan-assisted heating. It delivers a substantial output, ensuring that spaces are warmed evenly and quickly. This electric fire is capable of providing up to 2 kW of heat, making it suitable for various room sizes. Additionally, users can select from multiple heat settings, allowing them to customize their comfort level according to their needs.
Energy efficiency is another important quality of the DF2603. The model comes with a thermal cut-off feature that prevents overheating, ensuring safety and efficiency during use. Moreover, the heater operates quietly, making it an excellent choice for bedrooms or living rooms where peace and tranquility are desired.
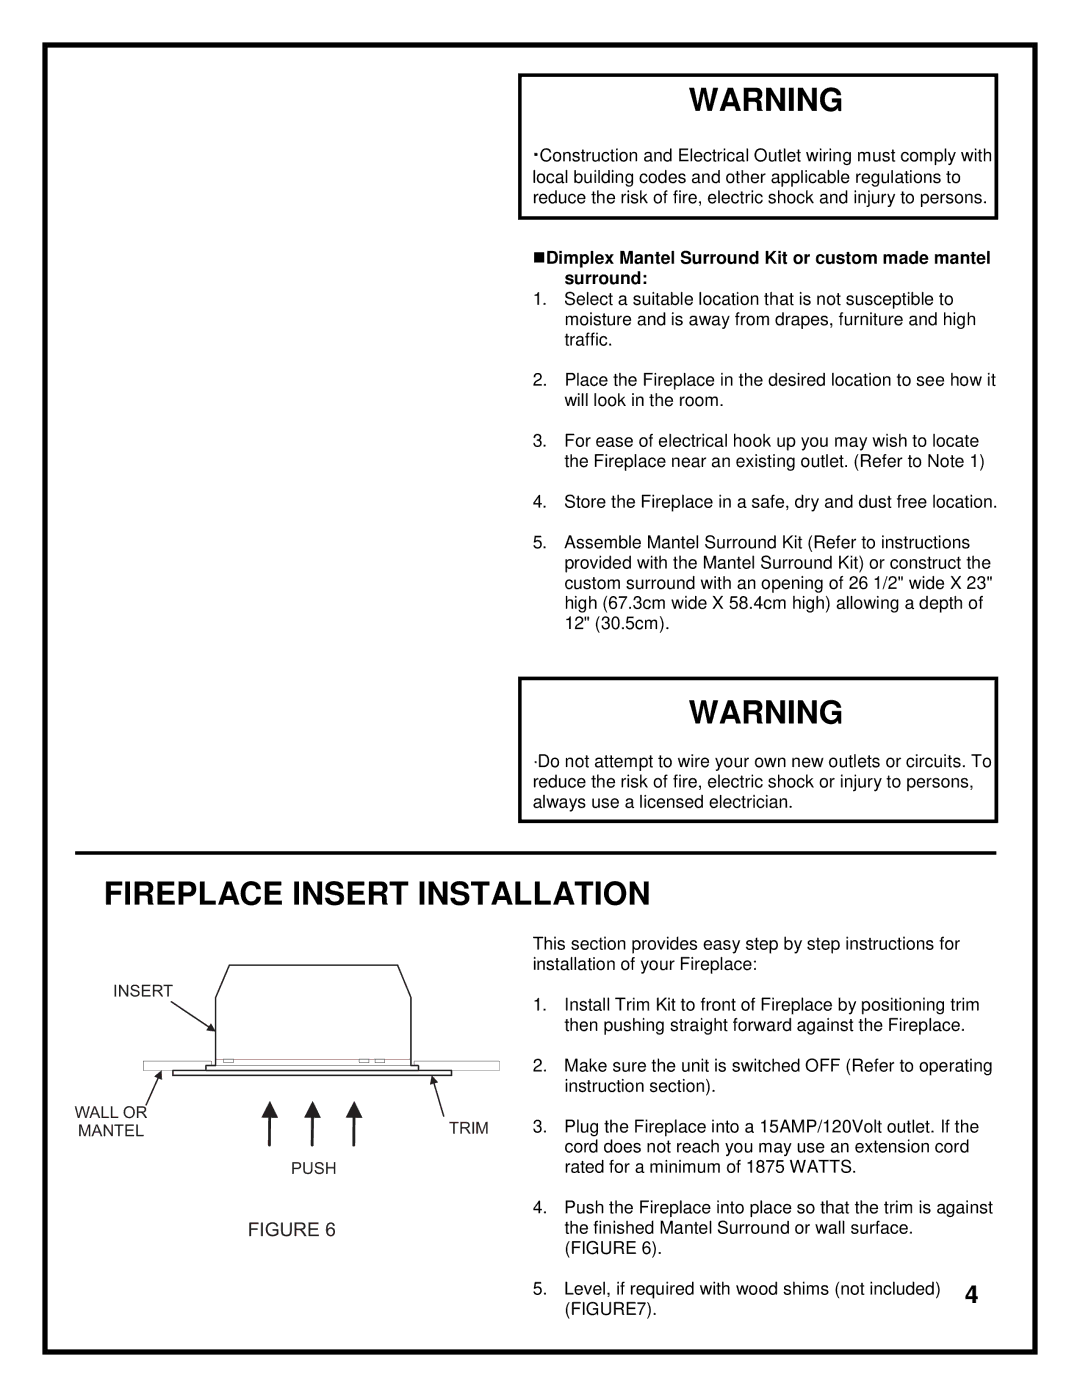
The design of the Dimplex DF2603 is contemporary and stylish, available in various finishes. Its sleek, minimalist appearance complements any decor style, from traditional to ultra-modern. Furthermore, the unit is easy to install and does not require any flue or chimney, making it an ideal option for those living in apartments or homes without traditional fireplace setups.
User-friendly controls enhance the experience further. The DF2603 includes remote control functionality, allowing users to adjust settings from a distance. This feature adds convenience, especially during those chilly evenings when getting up may not be preferable.
In summary, the Dimplex DF2603 electric fire is a blend of efficiency, safety, and aesthetic charm. With its realistic flame effects, powerful heating capabilities, modern design, and smart features, it’s the perfect addition to any home looking for an efficient heating solution that also serves as a stunning focal point. Whether for warmth or atmosphere, this model delivers on all fronts.