DM 2610013190 06-11:DM 2610013190 06-11.qxp 6/6/11 10:43 AM Page 15
RIP CUTS
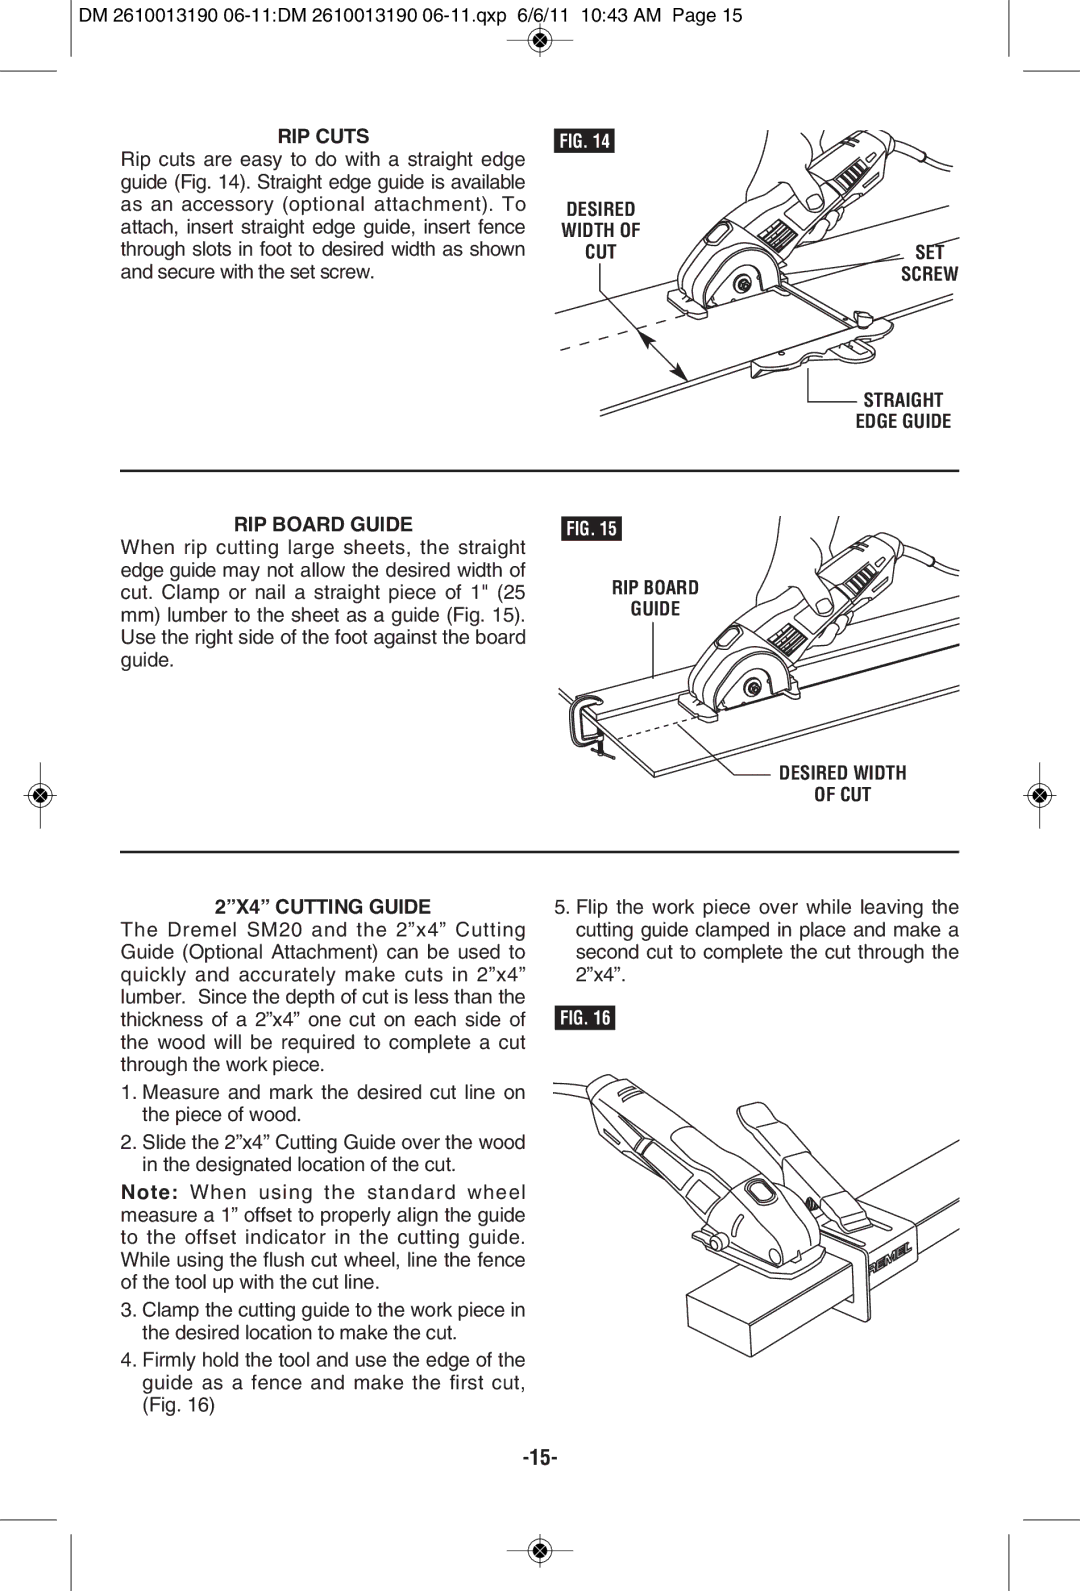
Rip cuts are easy to do with a straight edge guide (Fig. 14). Straight edge guide is available as an accessory (optional attachment). To attach, insert straight edge guide, insert fence through slots in foot to desired width as shown and secure with the set screw.
FIG. 14
DESIRED
WIDTH OF
CUT
SET
SCREW
![]() STRAIGHT
STRAIGHT
EDGE GUIDE
RIP BOARD GUIDE
When rip cutting large sheets, the straight edge guide may not allow the desired width of cut. Clamp or nail a straight piece of 1" (25
mm)lumber to the sheet as a guide (Fig. 15). Use the right side of the foot against the board guide.
FIG. 15
RIP BOARD
GUIDE
DESIRED WIDTH
OF CUT
2”x4” CUTTING GUIDE
The Dremel SM20 and the 2”x4” Cutting Guide (Optional Attachment) can be used to quickly and accurately make cuts in 2”x4” lumber. Since the depth of cut is less than the thickness of a 2”x4” one cut on each side of the wood will be required to complete a cut through the work piece.
1.Measure and mark the desired cut line on the piece of wood.
2.Slide the 2”x4” Cutting Guide over the wood in the designated location of the cut.
Note: When using the standard wheel measure a 1” offset to properly align the guide to the offset indicator in the cutting guide. While using the flush cut wheel, line the fence of the tool up with the cut line.
3.Clamp the cutting guide to the work piece in the desired location to make the cut.
4.Firmly hold the tool and use the edge of the guide as a fence and make the first cut, (Fig. 16)
5.Flip the work piece over while leaving the cutting guide clamped in place and make a second cut to complete the cut through the 2”x4”.
FIG. 16
