INPUT menu
Item
Description
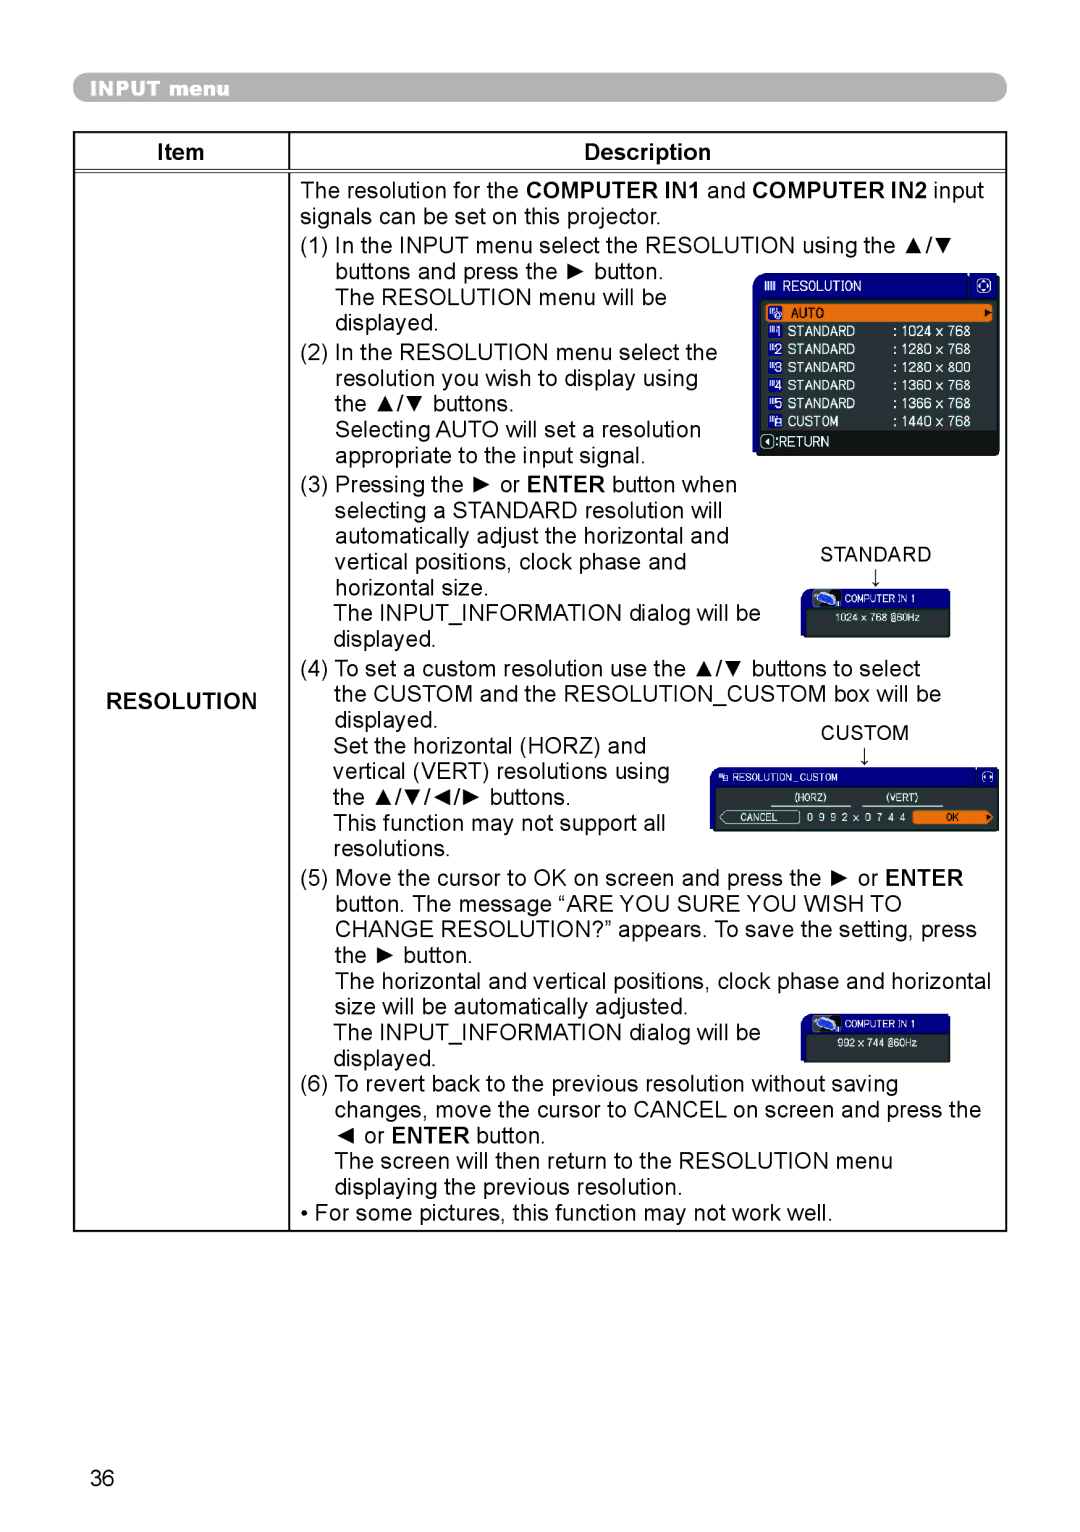
The resolution for the COMPUTER IN1 and COMPUTER IN2 input signals can be set on this projector.
(1)In the INPUT menu select the RESOLUTION using the ▲/▼ buttons and press the ► button.
The RESOLUTION menu will be displayed.
(2)In the RESOLUTION menu select the resolution you wish to display using the ▲/▼ buttons.
Selecting AUTO will set a resolution appropriate to the input signal.
(3)Pressing the ► or ENTER button when selecting a STANDARD resolution will automatically adjust the horizontal and vertical positions, clock phase and horizontal size.
The INPUT_INFORMATION dialog will be displayed.
STANDARD
↓
RESOLUTION
(4)To set a custom resolution use the ▲/▼ buttons to select the CUSTOM and the RESOLUTION_CUSTOM box will be
displayed.
Set the horizontal (HORZ) and vertical (VERT) resolutions using the ▲/▼/◄/► buttons.
This function may not support all resolutions.
(5)Move the cursor to OK on screen and press the ► or ENTER button. The message “ARE YOU SURE YOU WISH TO CHANGE RESOLUTION?” appears. To save the setting, press the ► button.
The horizontal and vertical positions, clock phase and horizontal size will be automatically adjusted.
The INPUT_INFORMATION dialog will be displayed.
(6)To revert back to the previous resolution without saving changes, move the cursor to CANCEL on screen and press the
◄ or ENTER button.
The screen will then return to the RESOLUTION menu displaying the previous resolution.
• For some pictures, this function may not work well.
36