Manuals
/
Dukane
/
TV and Video
/
CRT Television
Dukane
None
owner manual
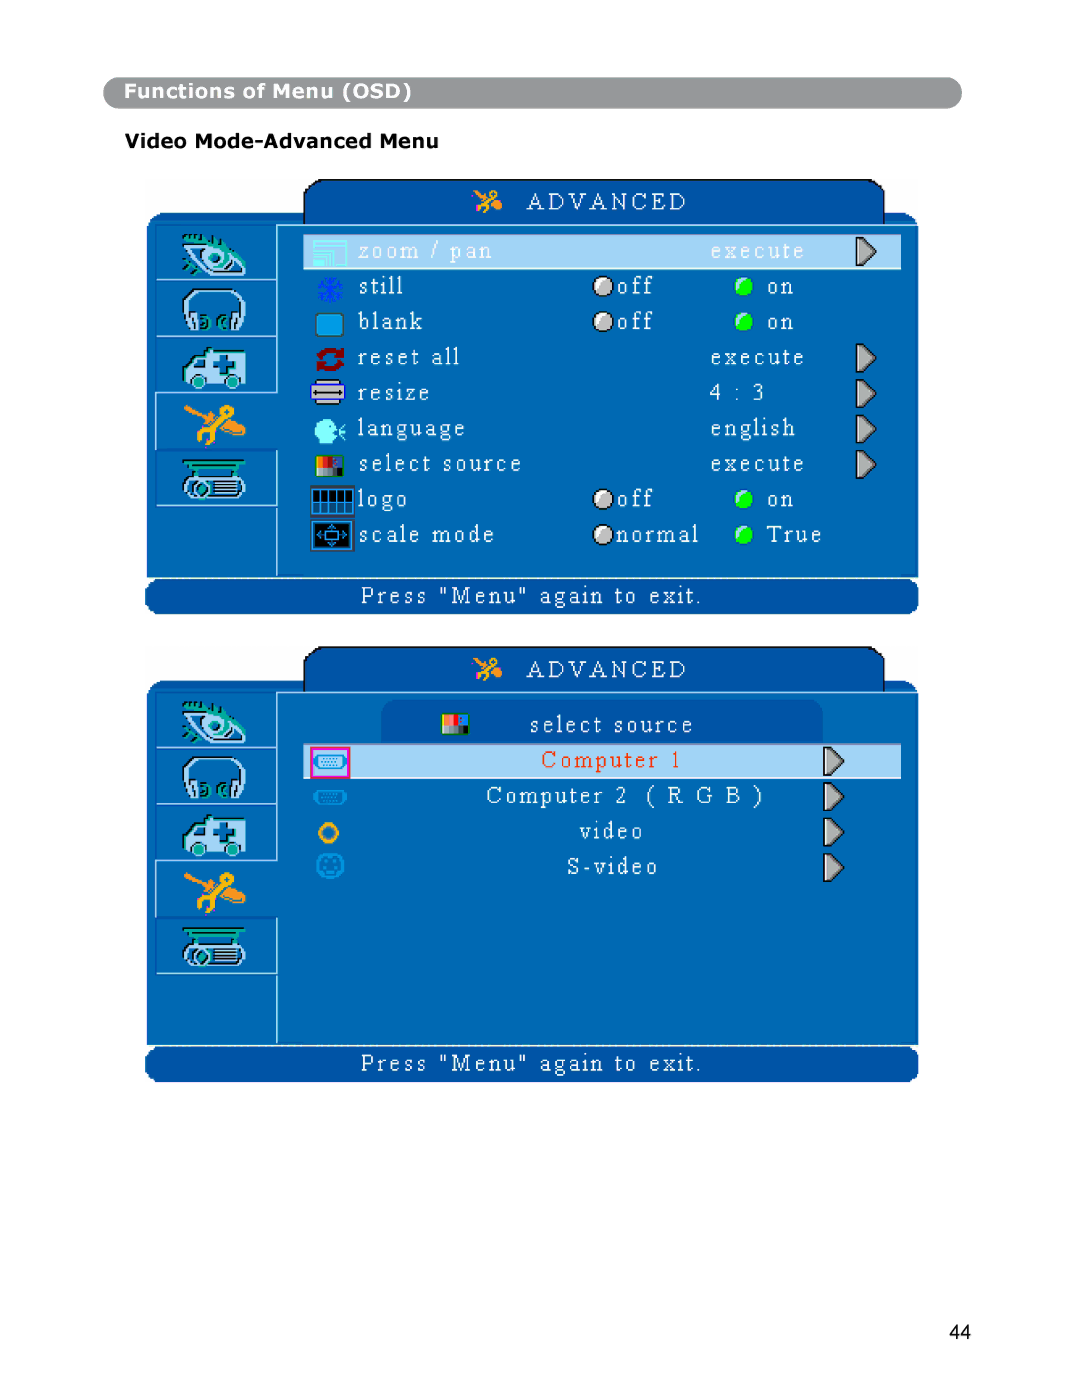
Video Mode-Advanced Menu
Models:
None
1
44
52
52
Download
52 pages
18.92 Kb
41
42
43
44
45
46
47
48
Page 44
Image 44
Functions of Menu (OSD)
Video
Mode-Advanced
Menu
44
Page 43
Page 45
Page 44
Image 44
Page 43
Page 45
Contents
DIGITAL-MULTIMEDIA Projector
Contents
Safety Instructions
Typical Symbols
If a problem should occur
Do not install on an unstable surface
Do not open the cabinet
Do not modify
Do not shine the laser beam onto yourself or other
Do not look through the lens when the lamp is on
Avoid shock or impact on the projector
Replace the batteries with the same type only
Care and maintenance
Ask your dealer for details about internal cleaning
Do not touch the power plug with wet hands
Location of product safety labels
Projector
Main Unit
Zoom Ring
Focus Ring
IR sensor
Front adjustable foot
Foot adjust button
Lens cover
Control panel keypad
Power button
Control panel
Input
Blank
Power indicator
Lamp indicator
Menu
Menu-up /down, Menu-right / left
Monitor out connector
Video connector
Rear View / IO Board
Computer
USB mouse connector
Power socket
Power switch
Audio out
Bottom View
Remote Control Power
Esc
Vol +
Keystone +
Remote Control Batteries Installation
Setting Up the Projector
Front projection Rear
Installationcontiuned
Size and Projection Distance
Screen Distancem Inch Tele Zoom min Wide Zoom max
Adjusting the Image Position
Moving the projector
Carry bag
Connect the computer cable
Connect the audio cable if necessary
Laptop PC
USB,B-type USB,A-type
USB Mouse
Video Connect to a video source
Video
Turning on the projector Procedure
Basic Operation
Turning off the Projector Procedure
Correcting Keystone Distortion
Adjust the Screen Image Adjusting the image size
Adjusting the image height
Power
Keypad Operating
Computer Mode-Picture Menu
Picture
Computer Mode-Audio Menu
Computer Mode-SETTING Menu
Setting
Computer Mode-ADVANCED Menu
Reset all
Blank on
Presentation
Computer Mode-PRESENTATION Menu
Reset Lamp Timer
Video Mode-Picture Menu
Video Mode-Audio Menu
Video Mode-Setting Menu
Video Mode-Advanced Menu
Blank on
Video Mode-PRESENTATION Menu
Maintenance and Troubleshooting
Ceiling Mounted Installation Guide
Change Air Filter
Cleaning the projector
Cleaning the lens
Lamp Replacement
Indicators
Power Lamp Conditions Green Red
Symptom Possible cause Remedy
List of Supported Monitor Displays
Top
Page
Image
Contents