Setup: Ethernet Setup | Page 16 |
Step 1: Connect the cables
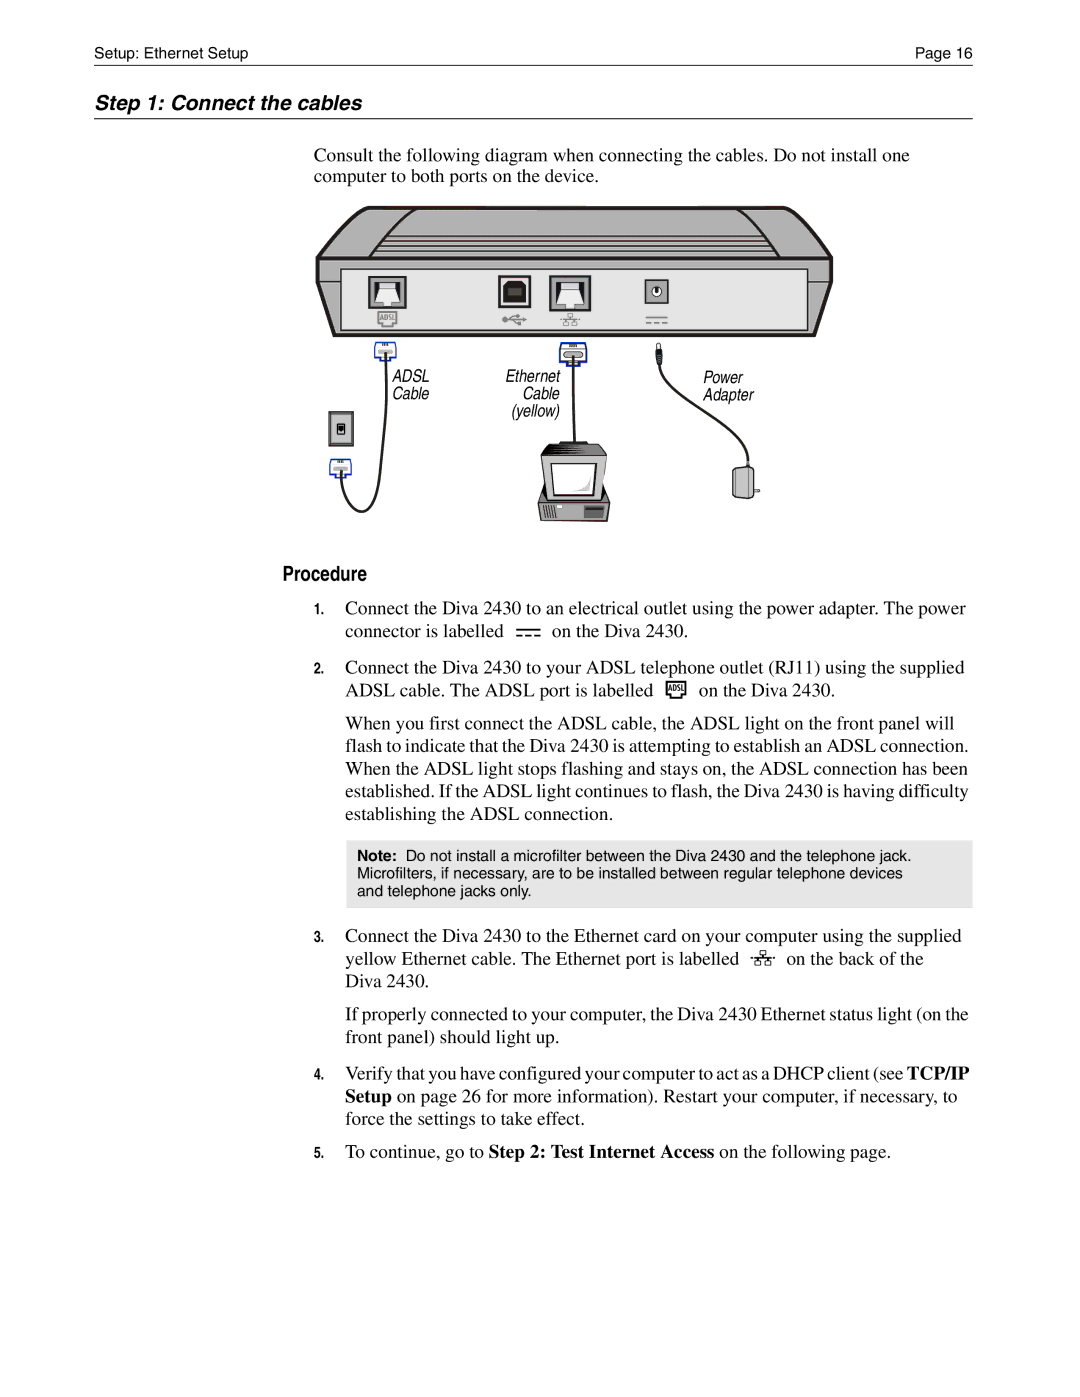
Consult the following diagram when connecting the cables. Do not install one computer to both ports on the device.
|
|
|
|
|
|
|
|
|
|
|
|
|
|
|
|
|
|
|
|
|
|
|
|
|
|
|
|
|
|
|
|
|
|
|
|
|
|
|
|
|
|
|
|
|
|
|
|
|
|
|
|
|
|
|
|
|
|
|
|
|
|
|
|
|
|
|
|
|
|
|
|
|
|
|
|
|
|
|
|
|
|
|
|
|
|
|
|
|
|
|
|
|
|
|
|
|
|
|
|
|
|
|
|
|
|
|
|
|
|
|
|
|
|
|
|
|
|
|
|
|
|
|
|
|
|
|
|
|
|
|
|
|
|
|
|
|
|
|
|
|
|
|
|
|
|
|
|
|
|
|
|
|
|
|
|
|
|
|
|
|
|
|
|
|
|
|
|
|
|
|
|
|
|
|
|
|
|
|
|
|
|
|
|
|
|
|
|
|
|
|
|
|
|
|
|
|
|
|
|
|
|
|
|
|
|
|
|
|
|
|
|
|
|
|
|
|
|
|
|
|
|
|
|
|
|
|
|
|
|
|
|
|
|
|
|
|
|
|
|
|
|
|
|
|
|
|
|
|
|
|
|
|
|
|
|
|
|
|
|
|
|
|
|
|
|
|
|
| ADSL | Ethernet |
|
|
|
|
|
|
|
| Power |
| |||||||
|
|
|
|
| Cable |
| Cable |
|
|
|
|
|
|
|
| Adapter |
| ||||||
|
|
|
|
|
|
|
|
| (yellow) |
|
|
|
|
|
|
|
|
|
|
|
| ||
|
|
|
|
|
|
|
|
|
|
|
|
|
|
|
|
|
|
|
|
| |||
|
|
|
|
|
|
|
|
|
|
|
|
|
|
|
|
|
|
|
|
|
|
|
|
|
|
|
|
|
|
|
|
|
|
|
|
|
|
|
|
|
|
|
|
|
|
|
|
|
|
|
|
|
|
|
|
|
|
|
|
|
|
|
|
|
|
|
|
|
|
|
|
|
|
|
|
|
|
|
|
|
|
|
|
|
|
|
|
|
|
|
|
|
|
|
|
|
|
|
|
|
|
|
|
|
|
|
|
|
|
|
|
|
|
|
|
|
|
|
|
|
|
|
|
|
|
|
|
|
|
|
|
|
|
|
|
|
|
|
|
|
|
|
|
|
|
|
|
|
|
|
|
|
|
|
|
|
|
|
|
|
|
|
|
|
|
|
|
Procedure
1.Connect the Diva 2430 to an electrical outlet using the power adapter. The power
connector is labelled ![]() on the Diva 2430.
on the Diva 2430.
2.Connect the Diva 2430 to your ADSL telephone outlet (RJ11) using the supplied
ADSL cable. The ADSL port is labelled ![]() on the Diva 2430.
on the Diva 2430.
When you first connect the ADSL cable, the ADSL light on the front panel will flash to indicate that the Diva 2430 is attempting to establish an ADSL connection. When the ADSL light stops flashing and stays on, the ADSL connection has been established. If the ADSL light continues to flash, the Diva 2430 is having difficulty establishing the ADSL connection.
Note: Do not install a microfilter between the Diva 2430 and the telephone jack. Microfilters, if necessary, are to be installed between regular telephone devices and telephone jacks only.
3.Connect the Diva 2430 to the Ethernet card on your computer using the supplied
yellow Ethernet cable. The Ethernet port is labelled ![]()
![]()
![]() on the back of the Diva 2430.
on the back of the Diva 2430.
If properly connected to your computer, the Diva 2430 Ethernet status light (on the front panel) should light up.
4.Verify that you have configured your computer to act as a DHCP client (see TCP/IP Setup on page 26 for more information). Restart your computer, if necessary, to force the settings to take effect.
5.To continue, go to Step 2: Test Internet Access on the following page.