Setup: USB Setup | Page 11 |
Step 1: Connect the Cables
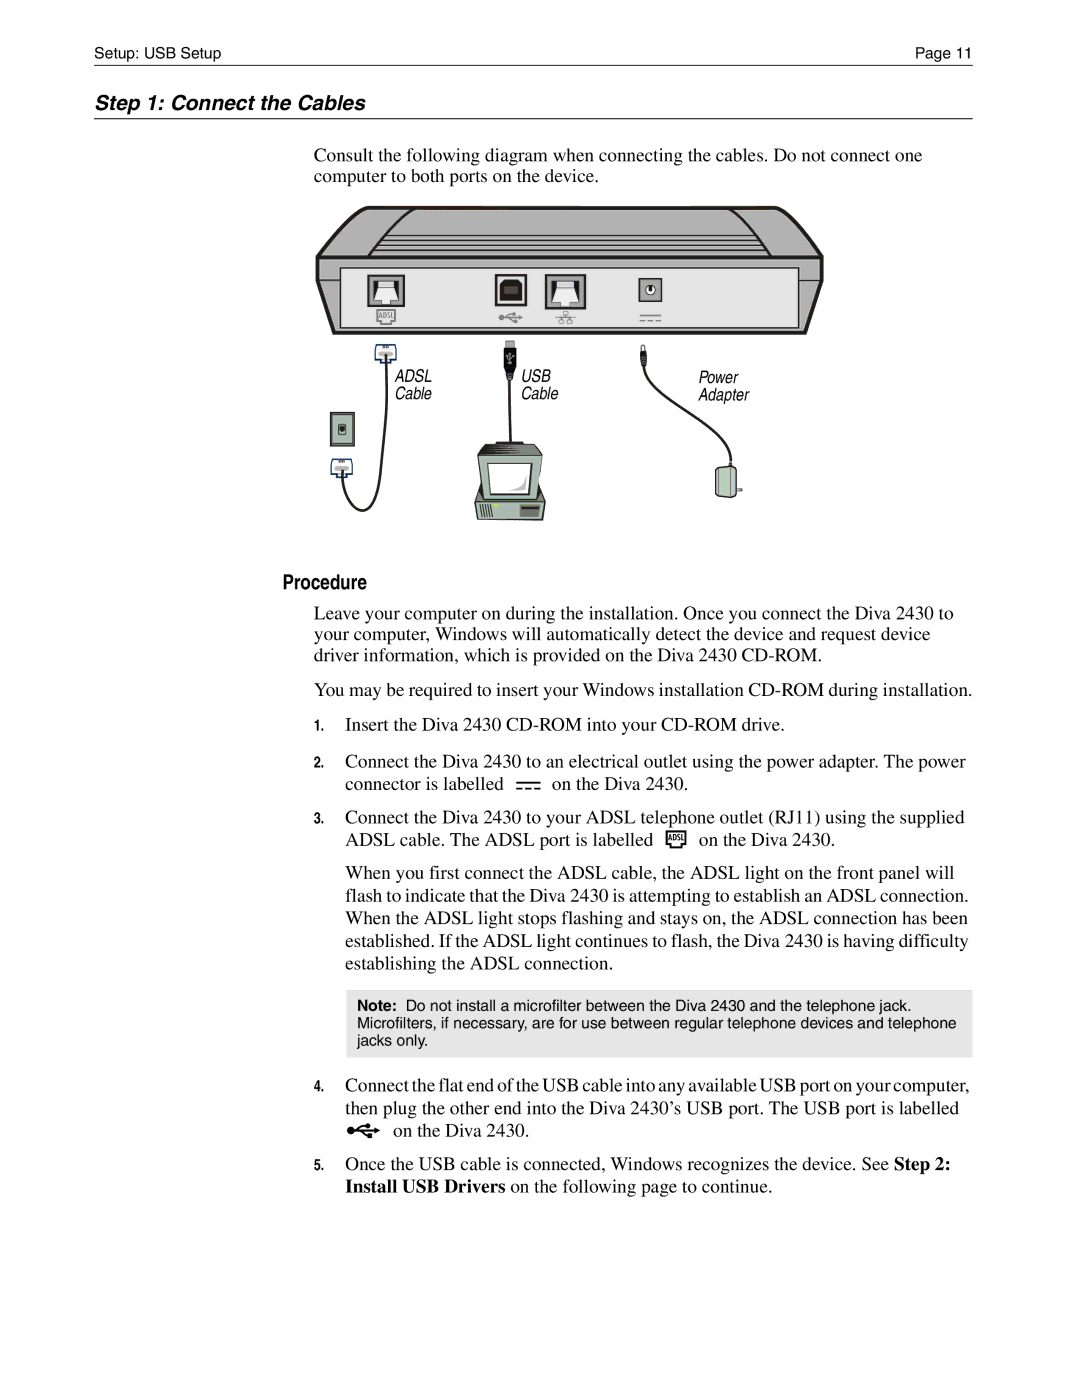
Consult the following diagram when connecting the cables. Do not connect one computer to both ports on the device.
ADSL | USB | Power |
Cable | Cable | Adapter |
Procedure
Leave your computer on during the installation. Once you connect the Diva 2430 to your computer, Windows will automatically detect the device and request device driver information, which is provided on the Diva 2430
You may be required to insert your Windows installation
1.Insert the Diva 2430
2.Connect the Diva 2430 to an electrical outlet using the power adapter. The power
connector is labelled ![]() on the Diva 2430.
on the Diva 2430.
3.Connect the Diva 2430 to your ADSL telephone outlet (RJ11) using the supplied
ADSL cable. The ADSL port is labelled ![]() on the Diva 2430.
on the Diva 2430.
When you first connect the ADSL cable, the ADSL light on the front panel will flash to indicate that the Diva 2430 is attempting to establish an ADSL connection. When the ADSL light stops flashing and stays on, the ADSL connection has been established. If the ADSL light continues to flash, the Diva 2430 is having difficulty establishing the ADSL connection.
Note: Do not install a microfilter between the Diva 2430 and the telephone jack. Microfilters, if necessary, are for use between regular telephone devices and telephone jacks only.
4.Connect the flat end of the USB cable into any available USB port on your computer, then plug the other end into the Diva 2430’s USB port. The USB port is labelled ![]()
![]()
![]() on the Diva 2430.
on the Diva 2430.
5.Once the USB cable is connected, Windows recognizes the device. See Step 2: Install USB Drivers on the following page to continue.