
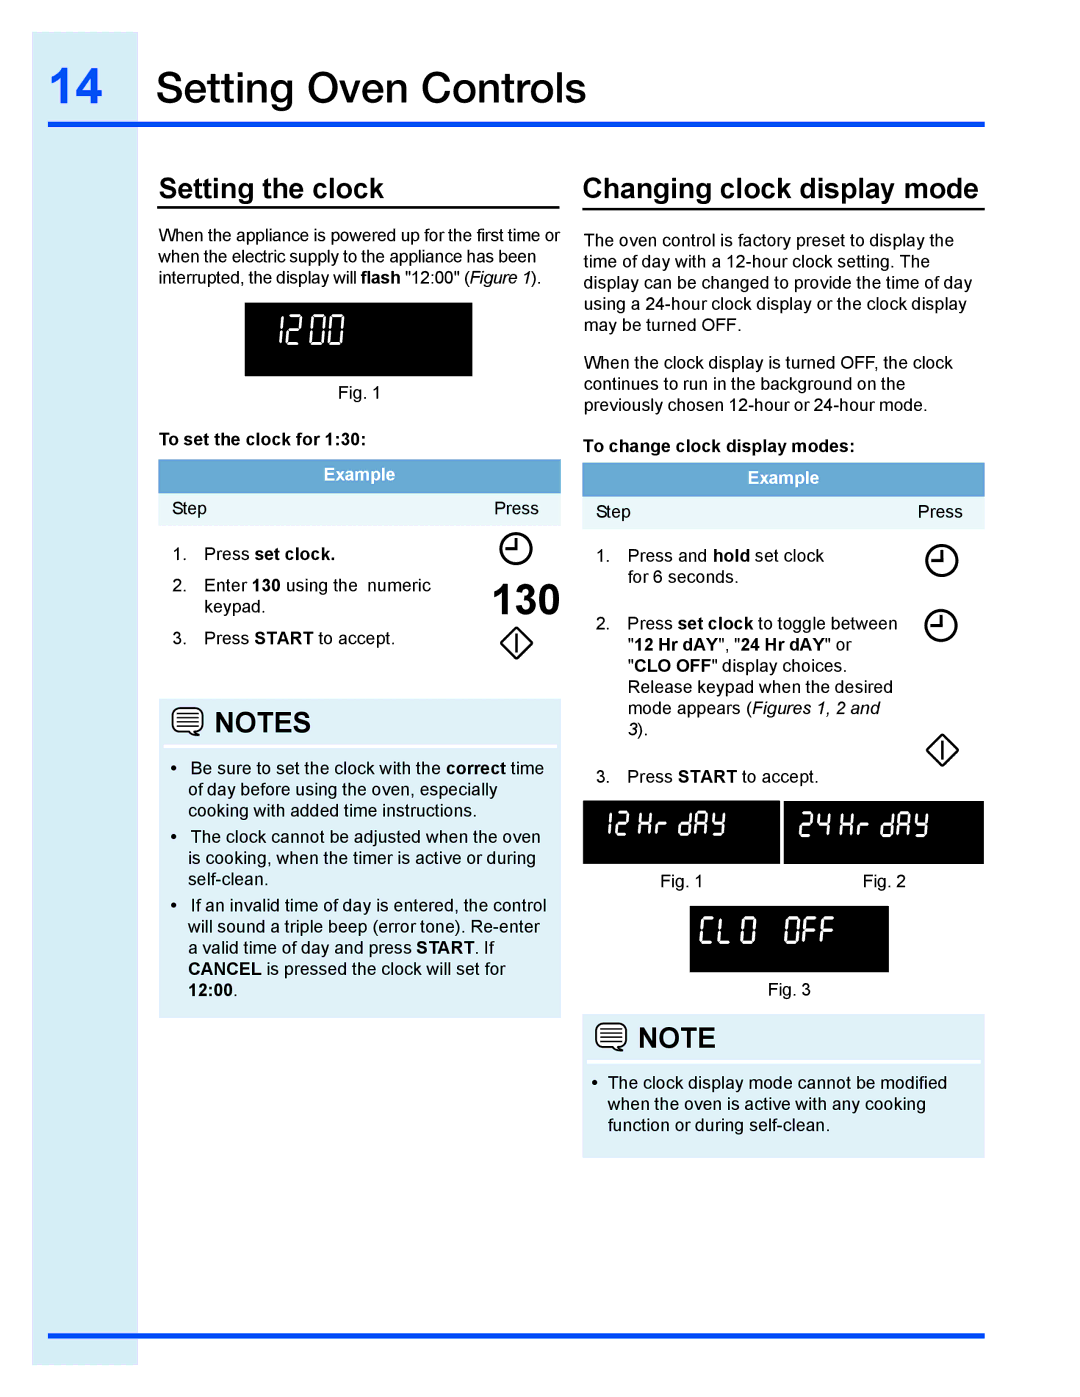
EI30GF35JS specifications
The Electrolux EI30GF35JS is a powerful and versatile 30-inch gas range that stands out for its combination of sleek design, innovative technology, and exceptional cooking performance. This model is ideal for home chefs who seek superior functionality without compromising style.One of the standout features of the EI30GF35JS is its True Convection cooking system. This advanced technology ensures even heat distribution throughout the oven, significantly reducing cooking times and enhancing the quality of baked goods. With a built-in fan that circulates hot air, users can bake multiple dishes simultaneously without the worry of uneven cooking.
The EI30GF35JS also boasts a high-performance gas cooktop featuring five sealed burners, including a powerful 18,000 BTU burner that excels at boiling water quickly and searing meats to perfection. Each burner is carefully designed to provide precise heat control, allowing for a range of cooking techniques — from simmering delicate sauces to achieving a restaurant-quality sauté.
Another notable characteristic of this gas range is its large capacity oven, which provides ample space for cooking large meals. The oven features a self-cleaning option that utilizes high temperatures to burn away food residue, making maintenance a breeze. Additionally, the unit is equipped with a built-in temperature probe that allows users to monitor the internal temperature of their oven dishes for perfect results every time.
For added convenience, the EI30GF35JS has an intuitive control panel with easy-to-read knobs and a digital display, enabling users to adjust settings with precision. Its sleek stainless-steel finish adds a modern touch to any kitchen decor and is designed to resist fingerprints and smudges, ensuring it stays looking pristine.
In terms of safety, the Electrolux EI30GF35JS is equipped with an Auto Shut-Off feature, which enhances peace of mind by automatically turning off the oven after a set period of inactivity. The range also includes a child lock feature to keep little ones safe while cooking.
Overall, the Electrolux EI30GF35JS is a thoughtfully designed gas range that caters to the needs of culinary enthusiasts. With its array of advanced features, innovative technologies, and emphasis on style and performance, it is an excellent choice for anyone looking to elevate their cooking experience. Whether baking, roasting, or simmering, this range delivers consistent results and makes cooking a true pleasure.