Installing Your Cooker
Your stability bracket
You can buy a stability bracket from your supplier and it can fitted as follows:
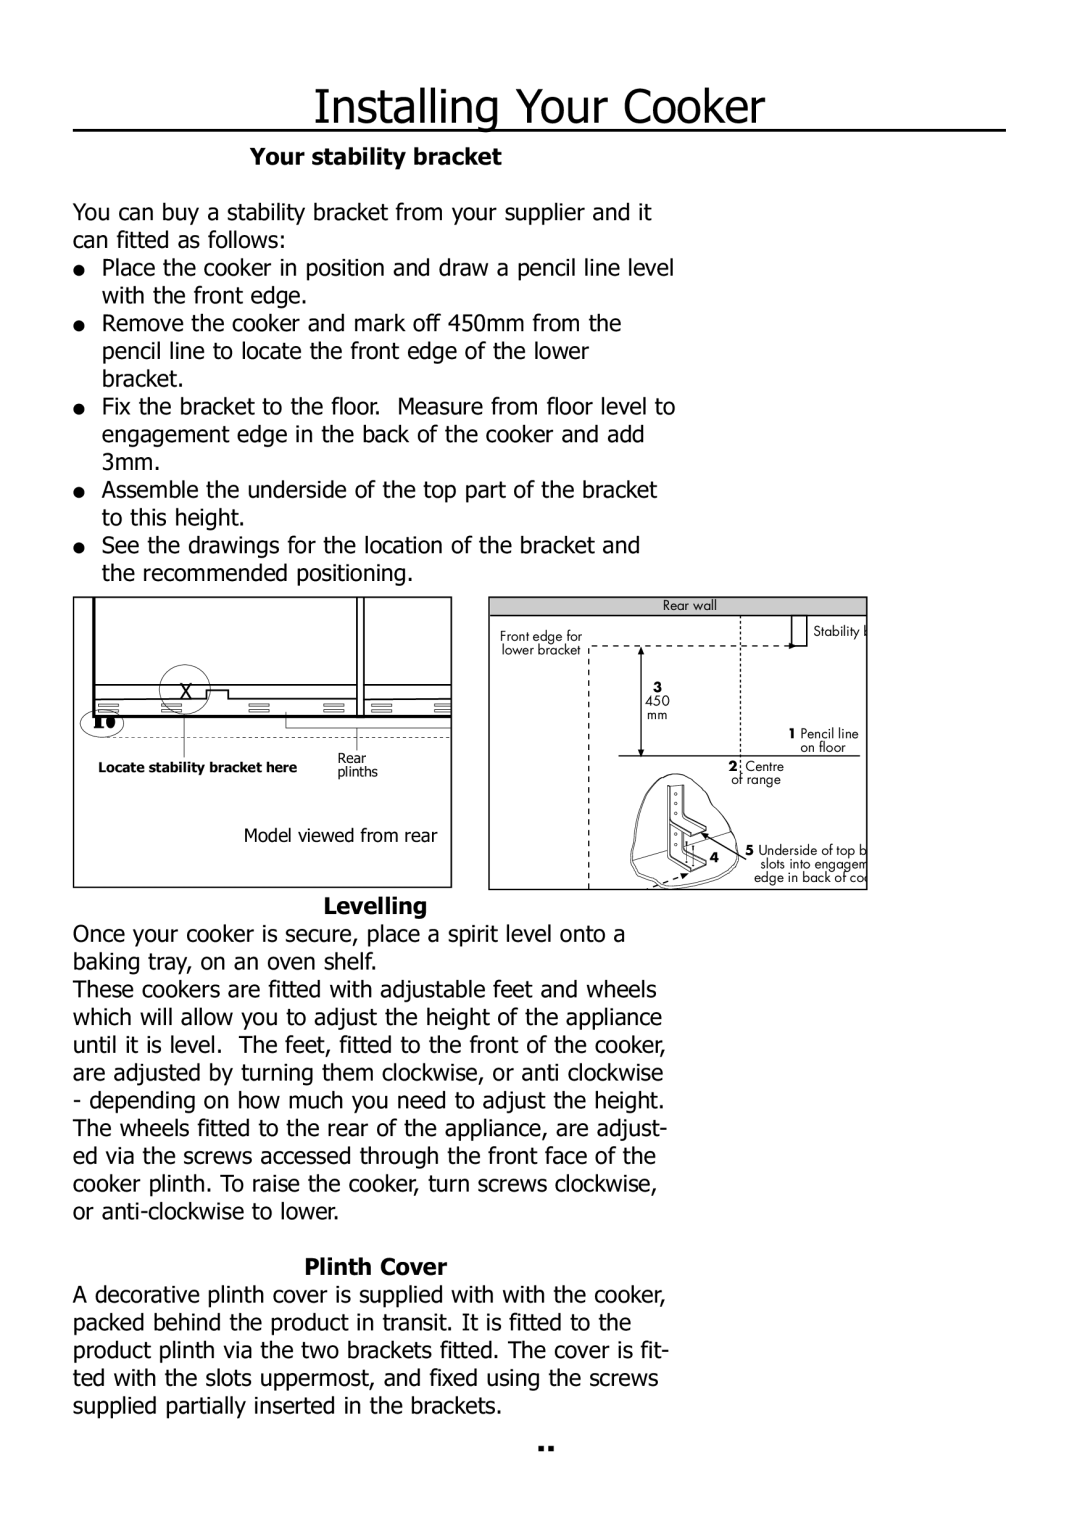
●Place the cooker in position and draw a pencil line level with the front edge.
●Remove the cooker and mark off 450mm from the pencil line to locate the front edge of the lower bracket.
●Fix the bracket to the floor. Measure from floor level to engagement edge in the back of the cooker and add 3mm.
●Assemble the underside of the top part of the bracket to this height.
●See the drawings for the location of the bracket and the recommended positioning.
| Rear wall | ||
Front edge for |
|
| Stability b |
lower bracket |
|
|
|
X |
| 3 |
|
|
| 450 |
|
|
| mm |
|
|
|
| 1 Pencil line |
| Rear |
| on floor |
Locate stability bracket here |
| 2 Centre | |
plinths |
| ||
|
| of range | |
|
|
| |
Model viewed from rear |
| 5 Underside of top b | |
|
| 4 | |
|
| slots into engagem | |
|
|
| edge in back of coo |
Levelling
Once your cooker is secure, place a spirit level onto a baking tray, on an oven shelf.
These cookers are fitted with adjustable feet and wheels which will allow you to adjust the height of the appliance until it is level. The feet, fitted to the front of the cooker, are adjusted by turning them clockwise, or anti clockwise
-depending on how much you need to adjust the height. The wheels fitted to the rear of the appliance, are adjust- ed via the screws accessed through the front face of the cooker plinth. To raise the cooker, turn screws clockwise, or
Plinth Cover
A decorative plinth cover is supplied with with the cooker, packed behind the product in transit. It is fitted to the product plinth via the two brackets fitted. The cover is fit- ted with the slots uppermost, and fixed using the screws supplied partially inserted in the brackets.
28
