Connectivity Module |
How to create a Favorites folder for ASCO device pages and copy it to another computer
To create a favorites folder and copy it to another user’s computer, the administrator should follow these steps:
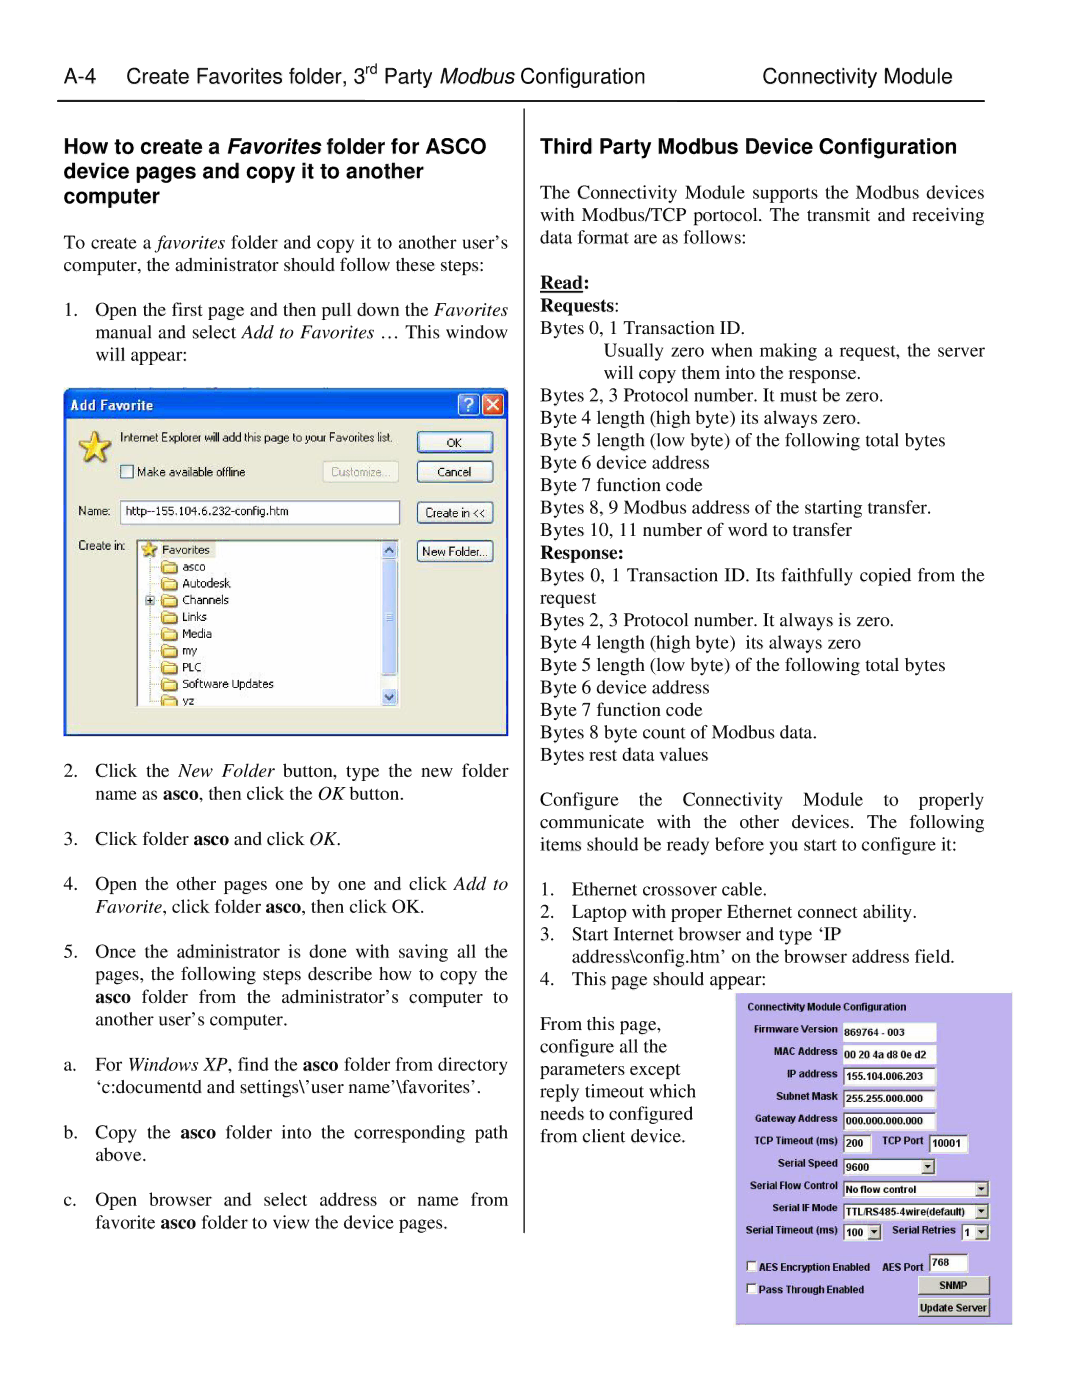
1.Open the first page and then pull down the Favorites manual and select Add to Favorites … This window will appear:
2.Click the New Folder button, type the new folder name as asco, then click the OK button.
3.Click folder asco and click OK.
4.Open the other pages one by one and click Add to Favorite, click folder asco, then click OK.
5.Once the administrator is done with saving all the pages, the following steps describe how to copy the asco folder from the administrator’s computer to another user’s computer.
a.For Windows XP, find the asco folder from directory ‘c:documentd and settings\’user name’\favorites’.
b.Copy the asco folder into the corresponding path above.
c.Open browser and select address or name from favorite asco folder to view the device pages.
Third Party Modbus Device Configuration
The Connectivity Module supports the Modbus devices with Modbus/TCP portocol. The transmit and receiving data format are as follows:
Read:
Requests:
Bytes 0, 1 Transaction ID.
Usually zero when making a request, the server will copy them into the response.
Bytes 2, 3 Protocol number. It must be zero. Byte 4 length (high byte) its always zero.
Byte 5 length (low byte) of the following total bytes Byte 6 device address
Byte 7 function code
Bytes 8, 9 Modbus address of the starting transfer. Bytes 10, 11 number of word to transfer
Response:
Bytes 0, 1 Transaction ID. Its faithfully copied from the request
Bytes 2, 3 Protocol number. It always is zero. Byte 4 length (high byte) its always zero
Byte 5 length (low byte) of the following total bytes Byte 6 device address
Byte 7 function code
Bytes 8 byte count of Modbus data. Bytes rest data values
Configure the Connectivity Module to properly communicate with the other devices. The following items should be ready before you start to configure it:
1.Ethernet crossover cable.
2.Laptop with proper Ethernet connect ability.
3.Start Internet browser and type ‘IP address\config.htm’ on the browser address field.
4.This page should appear:
From this page, | xxx | |
configure all the | ||
| ||
parameters except |
| |
reply timeout which |
| |
needs to configured |
| |
from client device. |
|