
CF990VNB00, CF990BS00 specifications
The Emerson CF990VNB00 and CF990BS00 ceiling fans represent a blend of modern aesthetics and functional efficiency, making them ideal choices for any home or office setting. Known for their superior craftsmanship and innovative design, these models are tailored to enhance comfort while complementing the décor of various spaces.One of the standout features of the Emerson CF990 series is its powerful motor. Equipped with a robust motor, these fans deliver reliable air movement, ensuring that even large rooms maintain a comfortable temperature. The energy-efficient motor design is not only effective but also minimizes energy consumption, making it an environmentally friendly choice.
Both models also showcase a sleek and contemporary design, featuring a variety of finish options to suit diverse tastes. The CF990VNB00 comes with a timeless Venetian Bronze finish, while the CF990BS00 boasts a modern Brushed Steel finish. This versatility allows homeowners to pick a fan that perfectly matches their interior design scheme, whether it’s classic, modern, or transitional.
A particularly noteworthy aspect of the CF990 series is its WhisperWind technology. This technology ensures a silent operation even at high speeds, allowing users to enjoy a breeze without the distracting noise often associated with traditional ceiling fans. This feature makes the fans perfect for bedrooms, living rooms, or any other area where tranquility is desired.
The CF990 fans also come equipped with a user-friendly remote control that allows for easy operation from anywhere in the room. Users can easily change fan speeds, switch between forward and reverse rotation modes, and control the integrated light fixture (available in certain configurations) without having to get up.
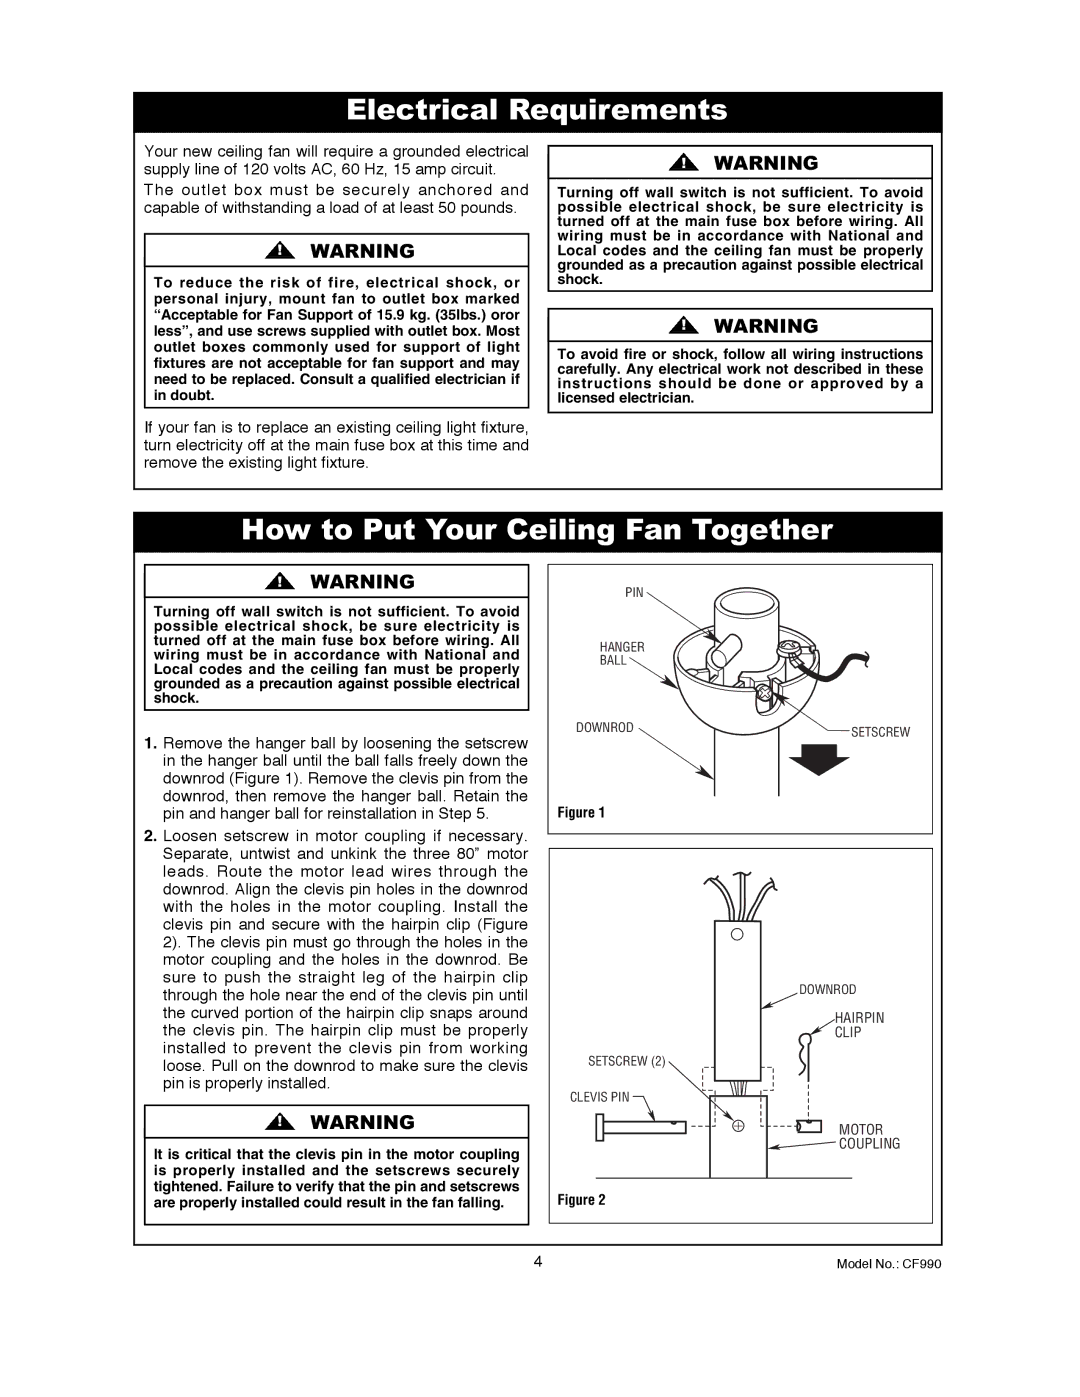
Moreover, the CF990 series is designed for easy installation and maintenance. With a straightforward mounting system, these ceiling fans can be installed quickly, even by those with minimal DIY experience. Their durable, high-quality materials ensure longevity, making them a reliable addition to any home.
In summary, the Emerson CF990VNB00 and CF990BS00 ceiling fans combine style, efficiency, and advanced technology to create a product that delivers both comfort and elegance. With features such as a powerful motor, WhisperWind technology, versatile design options, and user-friendly controls, these ceiling fans are a smart investment for enhancing indoor comfort and aesthetic appeal.