WALL MOUNT INSTALLATION
Refer to Figure 7 for measurements in order to locate (3) mount- ing holes on wall. Figure 7 is the front view of the heater.
On Solid Wall
1.After locating mounting holes, attach (3) #10 x 1" (25mm) screws provided into the wall. Do not completely tighten screwheads to the wall, leave a 1/8" (3mm) gap between screwheads and wall.
2.Mount heater onto the (3) screwheads and complete tightening screwheads into the wall.
3.Connect the gas line.
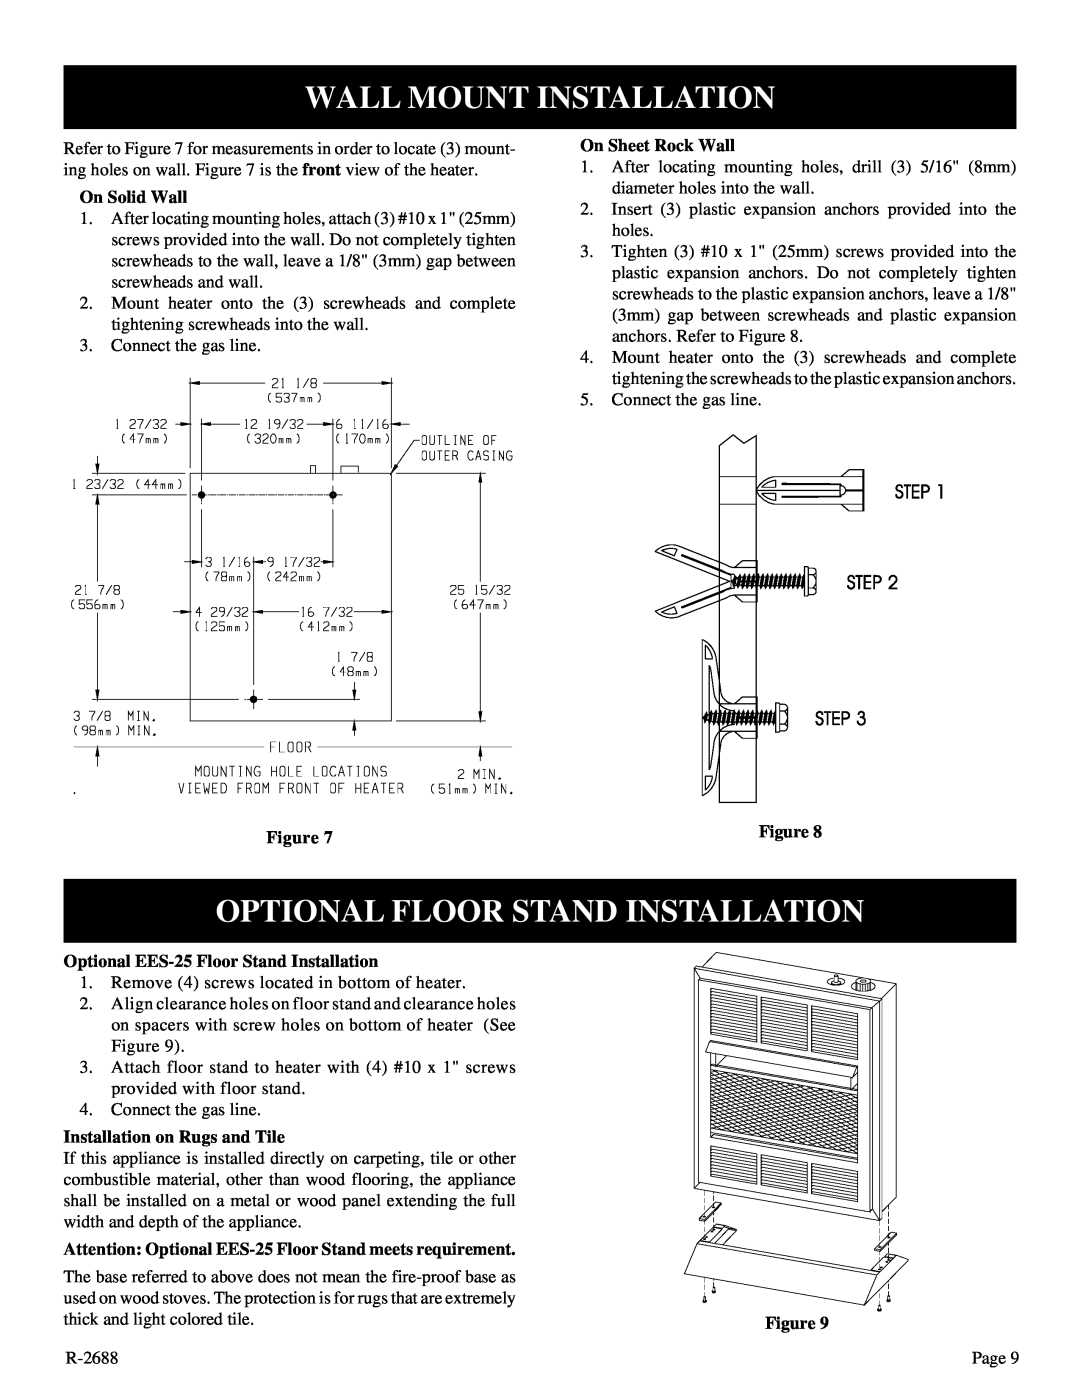
On Sheet Rock Wall
1.After locating mounting holes, drill (3) 5/16" (8mm) diameter holes into the wall.
2.Insert (3) plastic expansion anchors provided into the holes.
3.Tighten (3) #10 x 1" (25mm) screws provided into the plastic expansion anchors. Do not completely tighten screwheads to the plastic expansion anchors, leave a 1/8" (3mm) gap between screwheads and plastic expansion anchors. Refer to Figure 8.
4.Mount heater onto the (3) screwheads and complete tightening the screwheads to the plastic expansion anchors.
5.Connect the gas line.
Figure 7 | Figure 8 |
|
OPTIONAL FLOOR STAND INSTALLATION
Optional EES-25 Floor Stand Installation
1. Remove (4) screws located in bottom of heater.
2.Align clearance holes on floor stand and clearance holes on spacers with screw holes on bottom of heater (See Figure 9).
3.Attach floor stand to heater with (4) #10 x 1" screws provided with floor stand.
4.Connect the gas line.
Installation on Rugs and Tile
If this appliance is installed directly on carpeting, tile or other combustible material, other than wood flooring, the appliance shall be installed on a metal or wood panel extending the full width and depth of the appliance.
Attention: Optional
The base referred to above does not mean the |
|
used on wood stoves. The protection is for rugs that are extremely |
|
thick and light colored tile. | Figure 9 |
Page 9 |