Installing
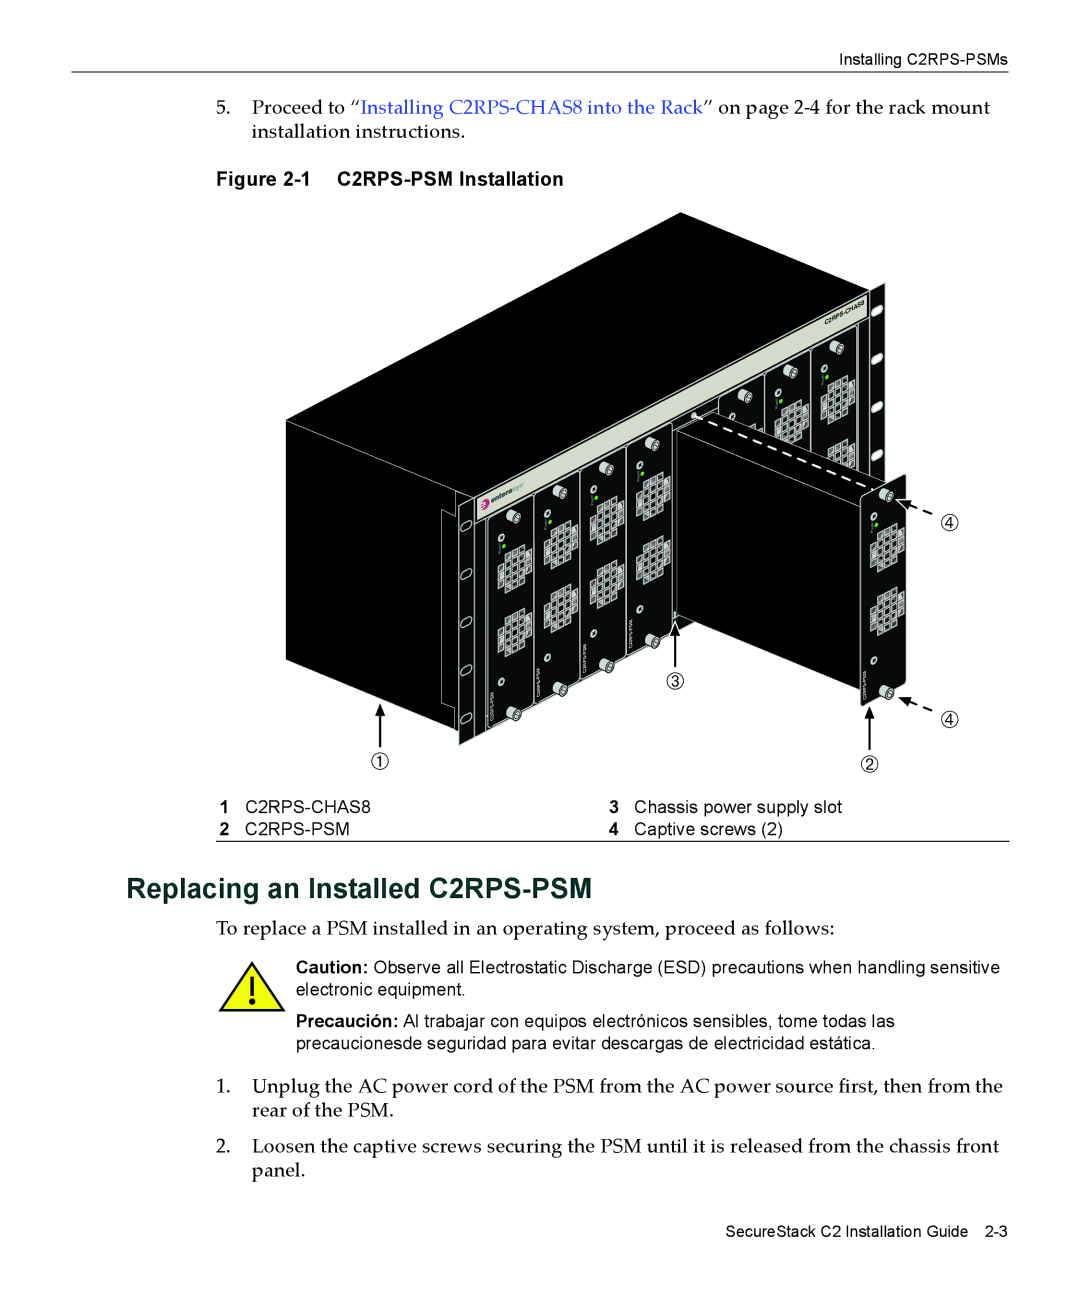
5.Proceed to “Installing C2RPS‐CHAS8 into the Rack” on page 2‐4 for the rack mount installation instructions.
Figure 2-1 C2RPS-PSM Installation
weroP ![]()
![]()
![]()
![]()
![]() weroP
weroP ![]()
![]()
weroP ![]()
![]()
![]()
![]()
![]()
![]()
![]() weroP
weroP ![]()
![]()
![]()
![]()
![]()
![]()
![]()
![]() weroP
weroP ![]()
![]()
![]()
![]()
![]() weroP
weroP ![]()
![]()
| PSMC2RPS- | |||
|
|
|
| Â |
| À |
|
|
|
1 |
| 3 | Chassis power supply slot | |
2 |
| 4 | Captive screws (2) |
![]() weroP
weroP ![]()
Á
![]()
![]() Ã
Ã
![]() Ã
Ã
Replacing an Installed C2RPS-PSM
To replace a PSM installed in an operating system, proceed as follows:
Caution: Observe all Electrostatic Discharge (ESD) precautions when handling sensitive electronic equipment.
Precaución: Al trabajar con equipos electrónicos sensibles, tome todas las precaucionesde seguridad para evitar descargas de electricidad estática.
1.Unplug the AC power cord of the PSM from the AC power source first, then from the rear of the PSM.
2.Loosen the captive screws securing the PSM until it is released from the chassis front panel.
SecureStack C2 Installation Guide