Manuals
/
Enviro
/
Household Appliance
/
Stove
Enviro
C-11023
owner manual
Parts Diagram Components
Models:
C-11023
1
33
36
36
Download
36 pages
21.74 Kb
29
30
31
32
33
34
35
36
Troubleshooting
Install
Parts list
Wiring Diagram
Warranty
Tools Required to Clean Unit
Door Glass Replacement
Thermostat / Switch Mode
Page 33
Image 33
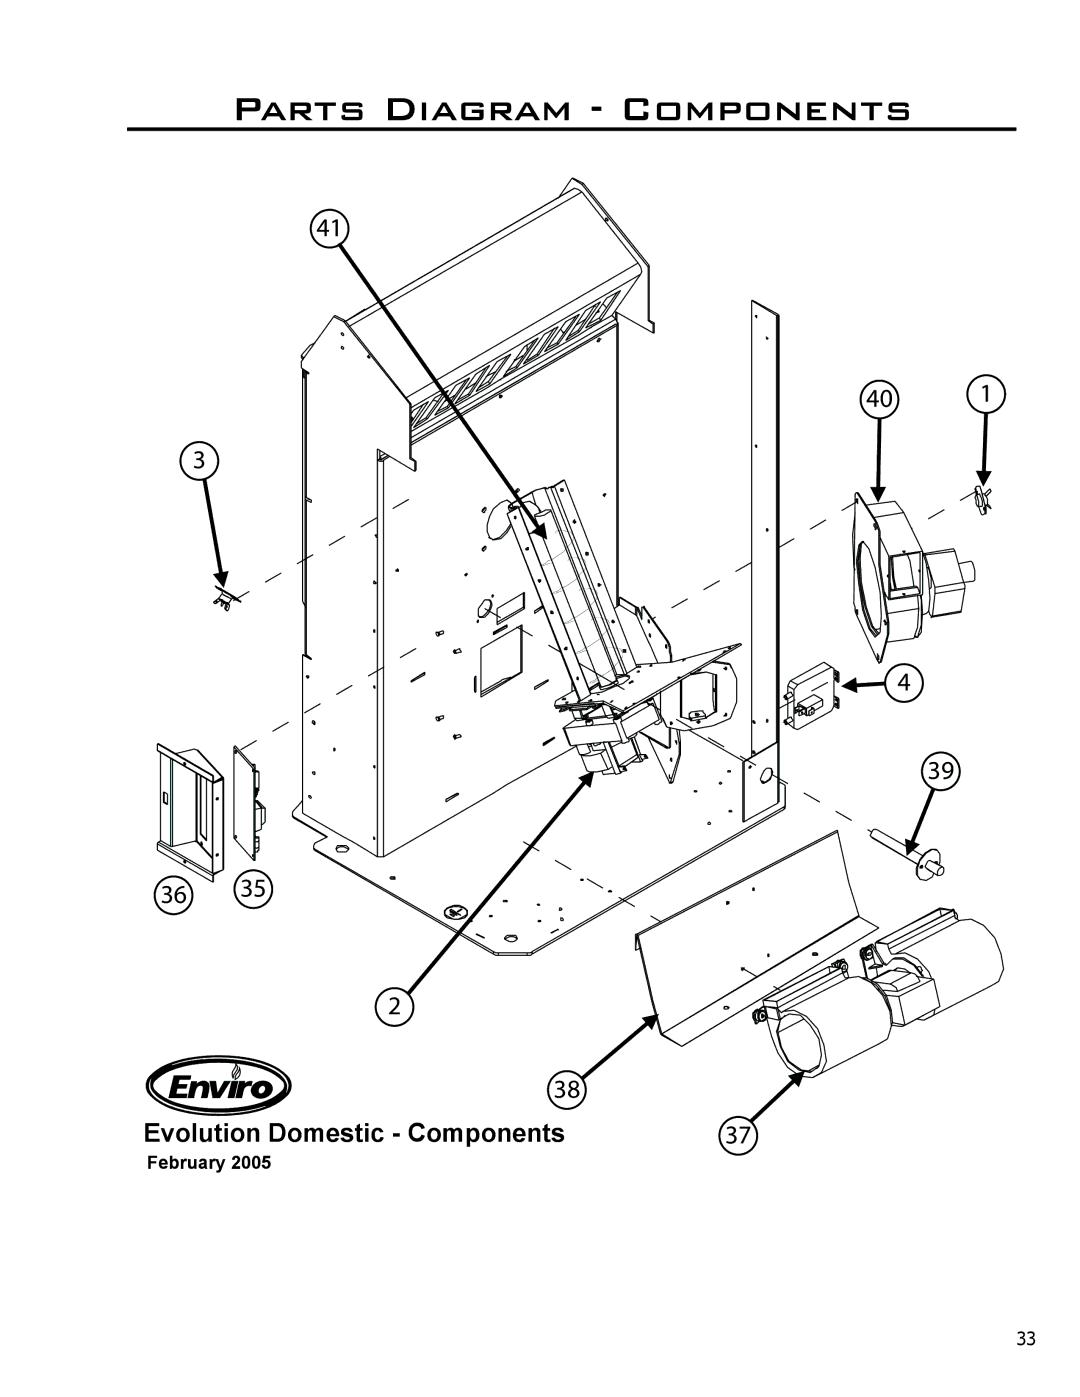
Parts Diagram - Components
��
�
��
��
�
��
Evolution Domestic - Components
February 2005
��
�
�
��
��
33
Page 32
Page 34
Page 33
Image 33
Page 32
Page 34
Contents
Evolution
Table of Contents
Introduction
I. Pellet Standards
Store pellets at least 36 1 m away from the pellet stove
USE of Cordwood is Prohibited by LAW
Keep ASH PAN Free of RAW Fuel
Operating Instructions
Reasons WHY the Unit Overheated
Initial START-UP See above
Thermostat / Switch Mode
Tools Required to Clean Unit
Routine Cleaning and Maintenance
Burner POT and Liner 2-3 days
Heat Exchanger Tubes 2-3 days
ASH PAN weekly
Door Glass Cleaning 2-3 days
Fresh AIR Intake biannually
Exhaust Passages biannually
Cleaning Plated Surfaces
Post Season CLEAN-UP
Door Glass Replacement
Brick Panel
Screws to take out to remove stove from pallet
Installation
147 mm
Maximum Alcove depth Inches
Installing Hearth Pad Pedestal onto EF5
Vent Termination Requirements
Exhaust
Fresh Air Intake
Horizontal Exhaust Through Wall Installation
Elbow with a rodent screen may
Inside Vertical Installation
Outside Vertical Installation
Exterior Blower Kit
Through vent hole
Through Wall Installation with Exterior Blower Kit
EF5
REQUIRED, please follow the instructions below
If you wish to adjust the slider damper externally not
Slider/Damper Plate in Unit
Special Notes
Stove will not operate when hot
Troubleshooting
Do not
What to do if
200 F 93 C high limit temperature sensor has tripped
Exhaust motor will not function normally
Light # 2 on Heat output bar flashing
Convection blower will not function normally
Control settings Heat Level has no effect on the fire
Ignitor- the pellets will not light
Stove keeps going out
5V DC
Wiring Diagram
Reference Number Description Part Number
Parts List
Parts List
Parts Diagram Components
SteelDiagramParts
Warranty
To the Dealer
To the Distributor
Name of Owner Address
Installation Data Sheet
Top
Page
Image
Contents