Secure the side of the 52" rail table to the front rail brackets using the two M8 x 20 carriage bolts, 10mm flat washers, 8mm lock washers and nuts. Finger tighten. Attach 52" rail table to the support bracket (Fig. 15) using the M10 x 25 bolts. Secure each bolt with a flat washer, lock washer, and nut. Tighten snug only.
FIG. 14
M10 WASHER
FIG. 15
STEP 21. Attach lower support rails.
You will need: 4 - 8mm carriage bolts 4 - 8mm flat washers
4 - 8mm lock washers
4 - 8mm nuts
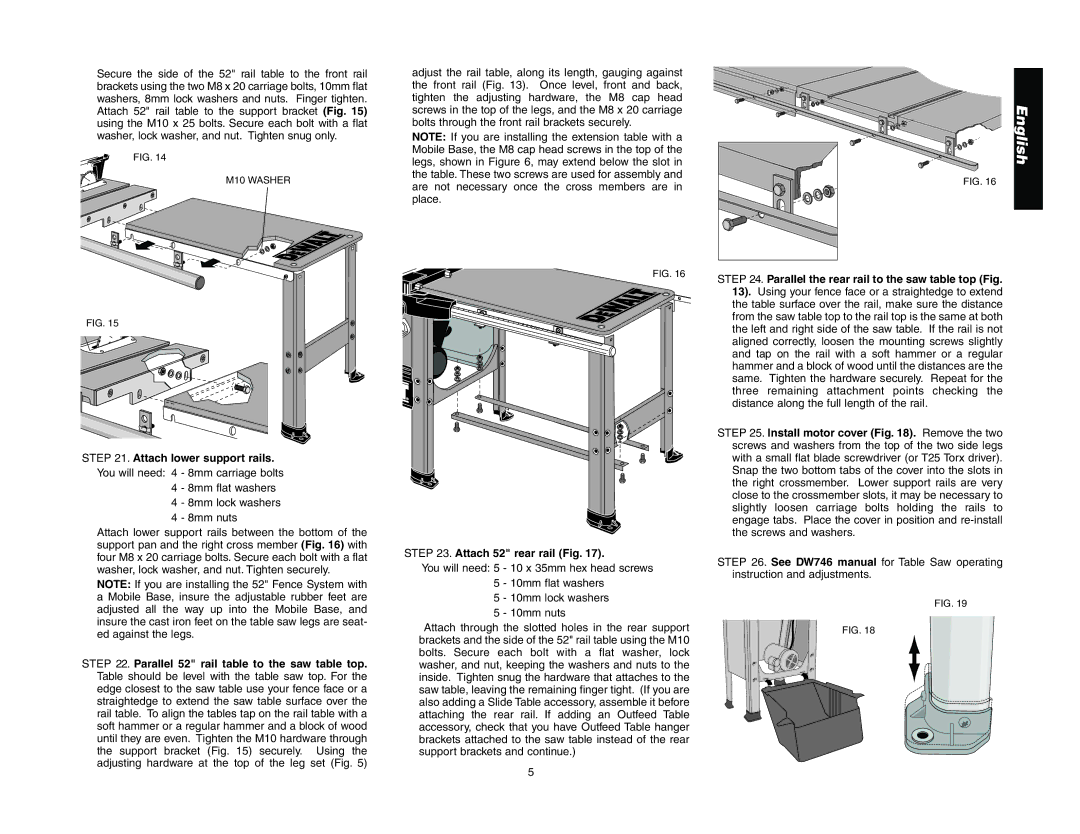
Attach lower support rails between the bottom of the support pan and the right cross member (Fig. 16) with four M8 x 20 carriage bolts. Secure each bolt with a flat washer, lock washer, and nut. Tighten securely.
NOTE: If you are installing the 52" Fence System with a Mobile Base, insure the adjustable rubber feet are adjusted all the way up into the Mobile Base, and insure the cast iron feet on the table saw legs are seat- ed against the legs.
STEP 22. Parallel 52" rail table to the saw table top. Table should be level with the table saw top. For the edge closest to the saw table use your fence face or a straightedge to extend the saw table surface over the rail table. To align the tables tap on the rail table with a soft hammer or a regular hammer and a block of wood until they are even. Tighten the M10 hardware through the support bracket (Fig. 15) securely. Using the adjusting hardware at the top of the leg set (Fig. 5)
adjust the rail table, along its length, gauging against the front rail (Fig. 13). Once level, front and back, tighten the adjusting hardware, the M8 cap head screws in the top of the legs, and the M8 x 20 carriage bolts through the front rail brackets securely.
NOTE: If you are installing the extension table with a Mobile Base, the M8 cap head screws in the top of the legs, shown in Figure 6, may extend below the slot in the table. These two screws are used for assembly and are not necessary once the cross members are in place.
FIG. 16
STEP 23. Attach 52" rear rail (Fig. 17).
You will need: 5 - 10 x 35mm hex head screws 5 - 10mm flat washers
5 - 10mm lock washers
5 - 10mm nuts
Attach through the slotted holes in the rear support brackets and the side of the 52" rail table using the M10 bolts. Secure each bolt with a flat washer, lock washer, and nut, keeping the washers and nuts to the inside. Tighten snug the hardware that attaches to the saw table, leaving the remaining finger tight. (If you are also adding a Slide Table accessory, assemble it before attaching the rear rail. If adding an Outfeed Table accessory, check that you have Outfeed Table hanger brackets attached to the saw table instead of the rear support brackets and continue.)
English
FIG. 16
STEP 24. Parallel the rear rail to the saw table top (Fig. 13). Using your fence face or a straightedge to extend the table surface over the rail, make sure the distance from the saw table top to the rail top is the same at both the left and right side of the saw table. If the rail is not aligned correctly, loosen the mounting screws slightly and tap on the rail with a soft hammer or a regular hammer and a block of wood until the distances are the same. Tighten the hardware securely. Repeat for the three remaining attachment points checking the distance along the full length of the rail.
STEP 25. Install motor cover (Fig. 18). Remove the two screws and washers from the top of the two side legs with a small flat blade screwdriver (or T25 Torx driver). Snap the two bottom tabs of the cover into the slots in the right crossmember. Lower support rails are very close to the crossmember slots, it may be necessary to slightly loosen carriage bolts holding the rails to engage tabs. Place the cover in position and
STEP 26. See DW746 manual for Table Saw operating instruction and adjustments.
FIG. 19
FIG. 18
5
