Connections
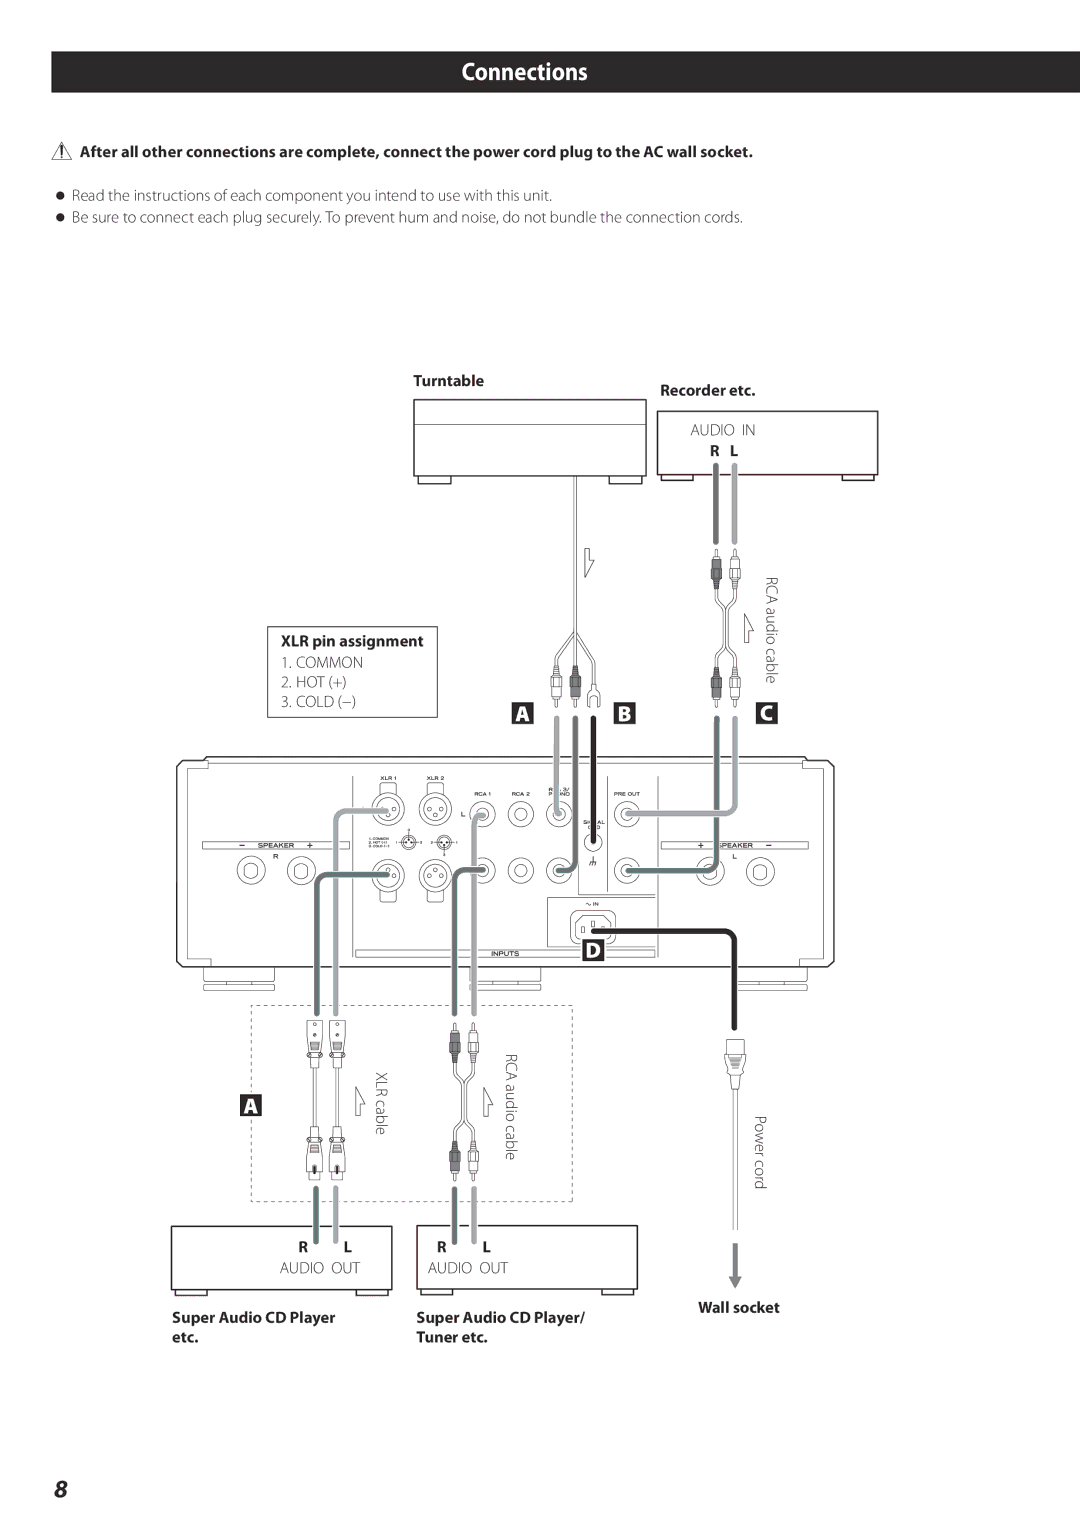
![]() After all other connections are complete, connect the power cord plug to the AC wall socket.
After all other connections are complete, connect the power cord plug to the AC wall socket.
oRead the instructions of each component you intend to use with this unit.
oBe sure to connect each plug securely. To prevent hum and noise, do not bundle the connection cords.
Turntable | Recorder etc. | |||||||||||||||||||
|
|
|
|
|
|
|
|
|
| |||||||||||
|
|
|
|
|
|
|
|
|
|
|
|
|
|
|
|
|
|
|
|
|
|
|
|
|
|
|
|
|
|
|
|
| AUDIO IN | ||||||||
|
|
|
|
|
|
|
|
|
|
|
| |||||||||
|
|
|
|
|
|
|
|
|
|
|
|
|
| R L | ||||||
|
|
|
|
|
|
|
|
|
|
|
|
|
|
|
|
|
|
|
|
|
|
|
|
|
|
|
|
|
|
|
|
|
|
|
|
|
|
|
|
|
|
|
|
|
|
|
|
|
|
|
|
|
|
|
|
|
|
|
|
|
|
|
XLR pin assignment
1.COMMON
2.HOT (+)
3.COLD (−)
A
B
D
RCA audio cable
C
A
R L
AUDIO OUT
Super Audio CD Player etc.
XLR cable | RCA audio cable | Power cord |
R | L |
|
|
| AUDIO OUT |
| |||||||
|
|
|
|
|
|
|
|
| Wall socket | |
Super Audio CD Player/ | ||||||||||
| ||||||||||
Tuner etc. |
| |||||||||
8
