If the flame needs adjusting:
1.Turn the oven off. Wait for the oven burner to cool down.
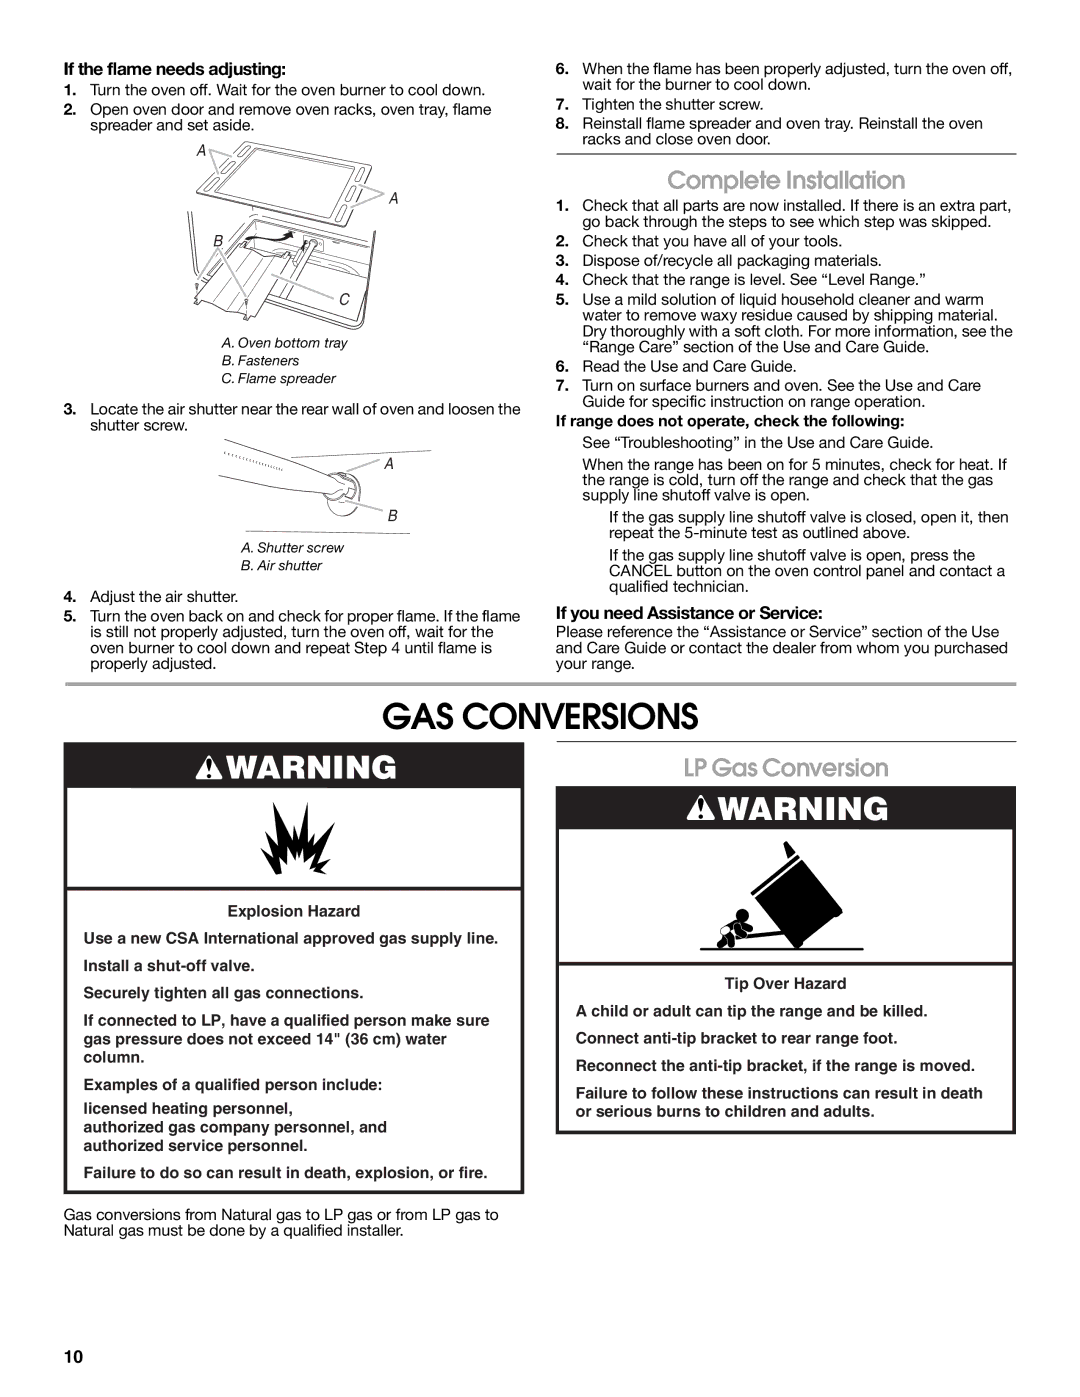
2.Open oven door and remove oven racks, oven tray, flame spreader and set aside.
A
A
B
![]() C
C
A. Oven bottom tray
B.Fasteners
C.Flame spreader
3.Locate the air shutter near the rear wall of oven and loosen the shutter screw.
A
B
A. Shutter screw
B. Air shutter
4.Adjust the air shutter.
5.Turn the oven back on and check for proper flame. If the flame is still not properly adjusted, turn the oven off, wait for the oven burner to cool down and repeat Step 4 until flame is properly adjusted.
6.When the flame has been properly adjusted, turn the oven off, wait for the burner to cool down.
7.Tighten the shutter screw.
8.Reinstall flame spreader and oven tray. Reinstall the oven racks and close oven door.
Complete Installation
1.Check that all parts are now installed. If there is an extra part, go back through the steps to see which step was skipped.
2.Check that you have all of your tools.
3.Dispose of/recycle all packaging materials.
4.Check that the range is level. See “Level Range.”
5.Use a mild solution of liquid household cleaner and warm water to remove waxy residue caused by shipping material. Dry thoroughly with a soft cloth. For more information, see the “Range Care” section of the Use and Care Guide.
6.Read the Use and Care Guide.
7.Turn on surface burners and oven. See the Use and Care Guide for specific instruction on range operation.
If range does not operate, check the following:
■See “Troubleshooting” in the Use and Care Guide.
■When the range has been on for 5 minutes, check for heat. If the range is cold, turn off the range and check that the gas supply line shutoff valve is open.
■If the gas supply line shutoff valve is closed, open it, then repeat the
■If the gas supply line shutoff valve is open, press the CANCEL button on the oven control panel and contact a qualified technician.
If you need Assistance or Service:
Please reference the “Assistance or Service” section of the Use and Care Guide or contact the dealer from whom you purchased your range.
GAS CONVERSIONS
![]() WARNING
WARNING
Explosion Hazard
Use a new CSA International approved gas supply line.
Install a
Securely tighten all gas connections.
If connected to LP, have a qualified person make sure gas pressure does not exceed 14" (36 cm) water column.
Examples of a qualified person include:
licensed heating personnel,
authorized gas company personnel, and authorized service personnel.
Failure to do so can result in death, explosion, or fire.
Gas conversions from Natural gas to LP gas or from LP gas to Natural gas must be done by a qualified installer.
LP Gas Conversion
![]() WARNING
WARNING
Tip Over Hazard
A child or adult can tip the range and be killed.
Connect
Reconnect the
Failure to follow these instructions can result in death or serious burns to children and adults.
10