16 | |||
|
|
|
|
1.Turn off power to the
2.Select and install standoffs to properly position the module on the
3.Touch a grounded metal part of the rack to discharge any buildup of static electricity.
4.Remove the module from its
5.Check that keying pins in the bus connector are properly positioned.
6.Check the stacking order; make sure an XT bus card will not be placed between two AT bus cards or it will interrupt the bus’s signals.
7.Hold the module by its edges and orient it so that the bus connector pins line up with the matching connector on the stack.
8.Press the module evenly onto the
9.Verify that all the connections are properly made
10.Switch on the power
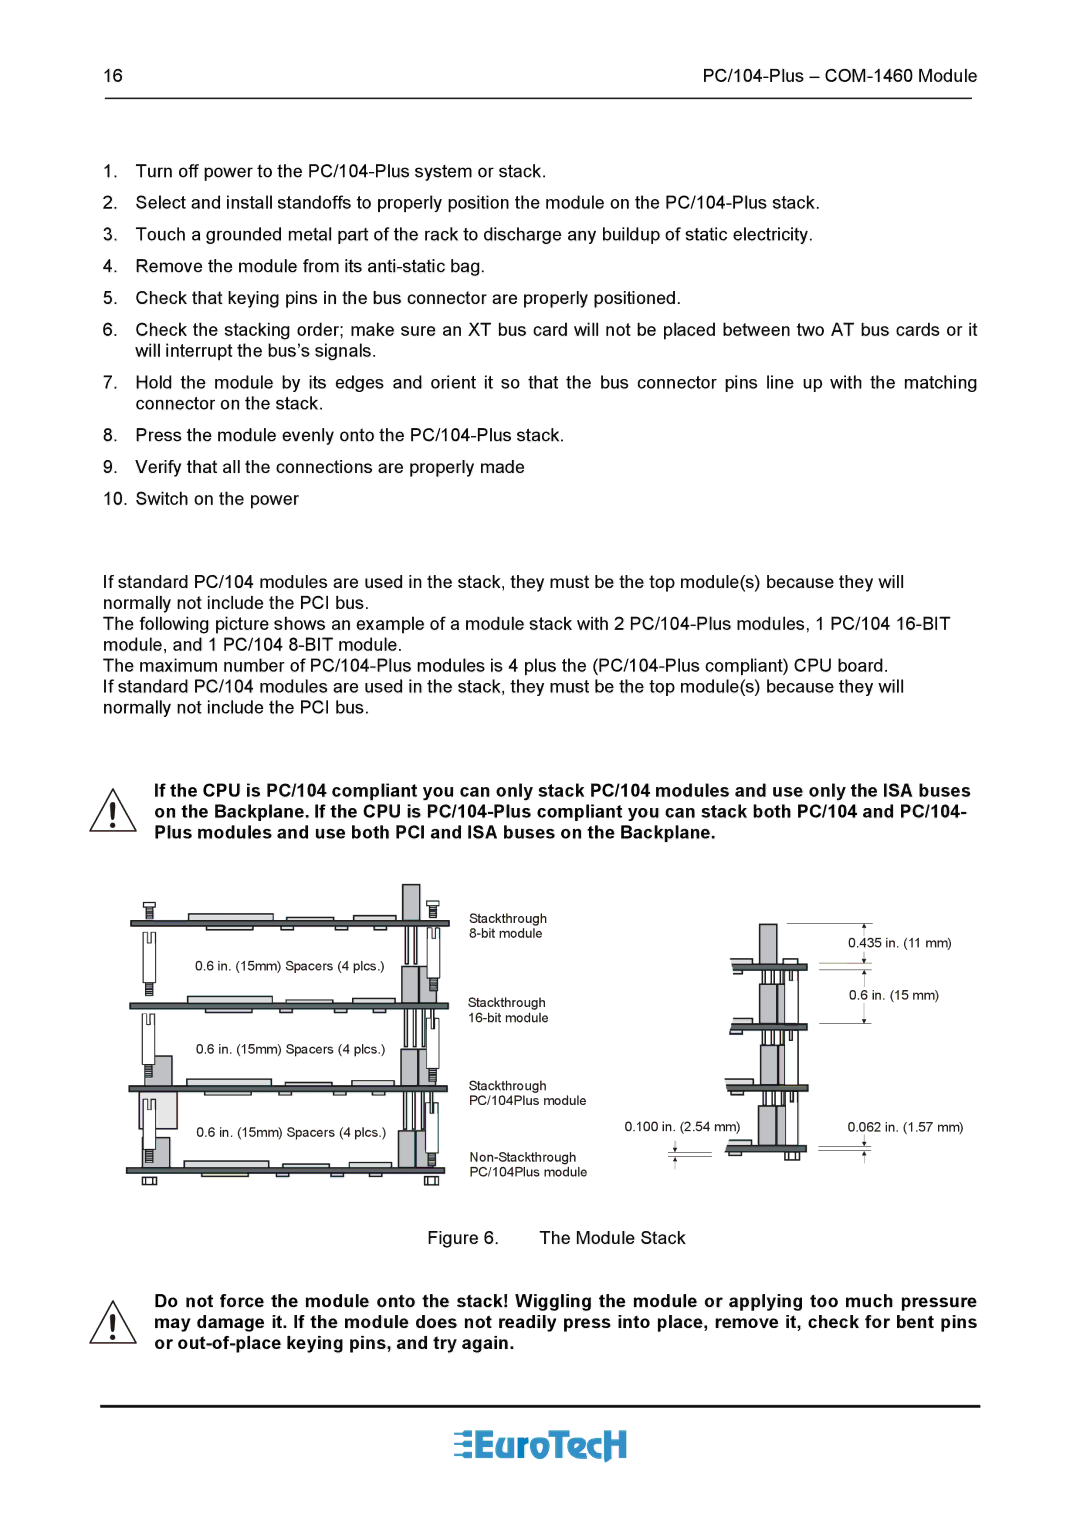
If standard PC/104 modules are used in the stack, they must be the top module(s) because they will normally not include the PCI bus.
The following picture shows an example of a module stack with 2
The maximum number of
If the CPU is PC/104 compliant you can only stack PC/104 modules and use only the ISA buses on the Backplane. If the CPU is
| Stackthrough |
|
|
|
|
| ||||
|
|
|
|
| ||||||
| 0.435 in. (11 mm) | |||||||||
|
|
|
|
|
|
| ||||
0.6 in. (15mm) Spacers (4 plcs.) |
|
|
|
|
|
|
|
|
|
|
|
|
|
|
|
|
|
|
|
| |
| Stackthrough | 0.6 |
| in. (15 mm) | ||||||
|
| |||||||||
|
|
|
|
| ||||||
0.6 in. (15mm) Spacers (4 plcs.) |
|
|
|
|
|
|
|
|
|
|
| Stackthrough |
|
|
|
| |||||
| PC/104Plus module |
|
|
|
| |||||
0.6 in. (15mm) Spacers (4 plcs.) | 0.100 in. (2.54 mm) | 0.062 in. (1.57 mm) | ||||||||
|
|
|
|
|
|
|
|
|
| |
|
|
|
|
|
|
|
|
|
| |
|
|
|
|
|
|
|
|
|
| |
| PC/104Plus module |
|
|
|
|
|
| |||
|
|
|
|
|
| |||||
Figure 6. The Module Stack
Do not force the module onto the stack! Wiggling the module or applying too much pressure may damage it. If the module does not readily press into place, remove it, check for bent pins or