Page 9
Coupling the Tiller to the Base Frame:
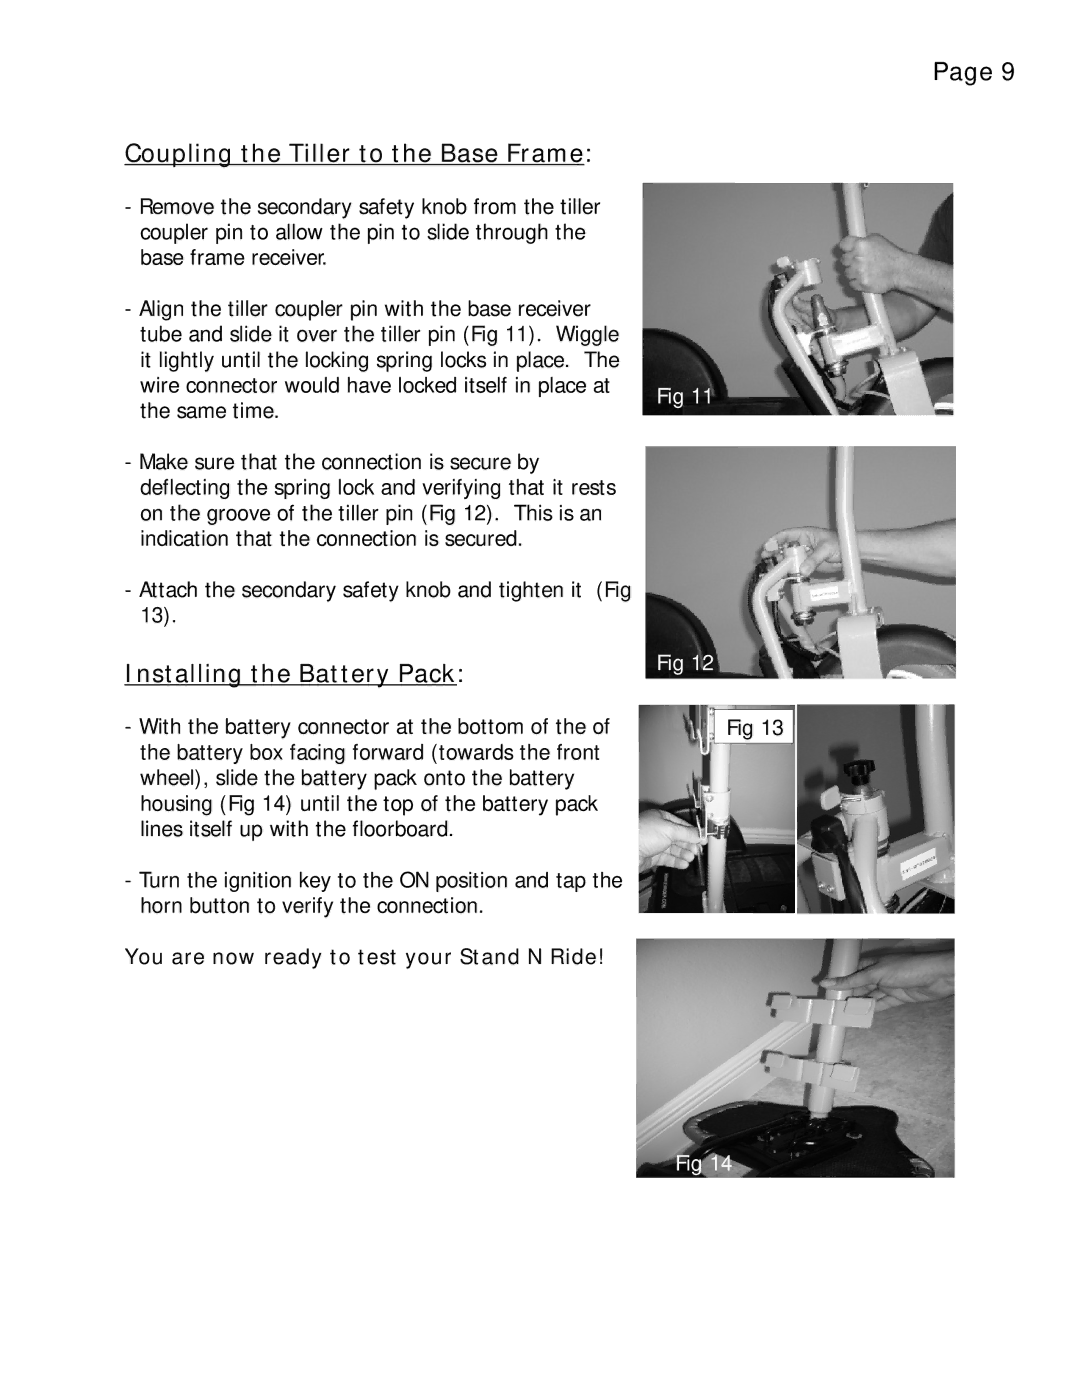
-Remove the secondary safety knob from the tiller coupler pin to allow the pin to slide through the base frame receiver.
-Align the tiller coupler pin with the base receiver tube and slide it over the tiller pin (Fig 11). Wiggle it lightly until the locking spring locks in place. The wire connector would have locked itself in place at the same time.
-Make sure that the connection is secure by deflecting the spring lock and verifying that it rests on the groove of the tiller pin (Fig 12). This is an indication that the connection is secured.
-Attach the secondary safety knob and tighten it (Fig 13).
Installing the Battery Pack:
-With the battery connector at the bottom of the of the battery box facing forward (towards the front wheel), slide the battery pack onto the battery housing (Fig 14) until the top of the battery pack lines itself up with the floorboard.
-Turn the ignition key to the ON position and tap the horn button to verify the connection.
You are now ready to test your Stand N Ride!
Fig 11
Fig 12
Fig 13
Fig 14
