Page 7
Assembly Instructions
Your Stand N Ride is shipped in two boxes: 1 containing the tiller and 1 containing the base frame.
After you have removed the Stand N Ride components from the protective packaging, you are ready to set up your scooter for riding by following these steps:
Tiller Assembly:
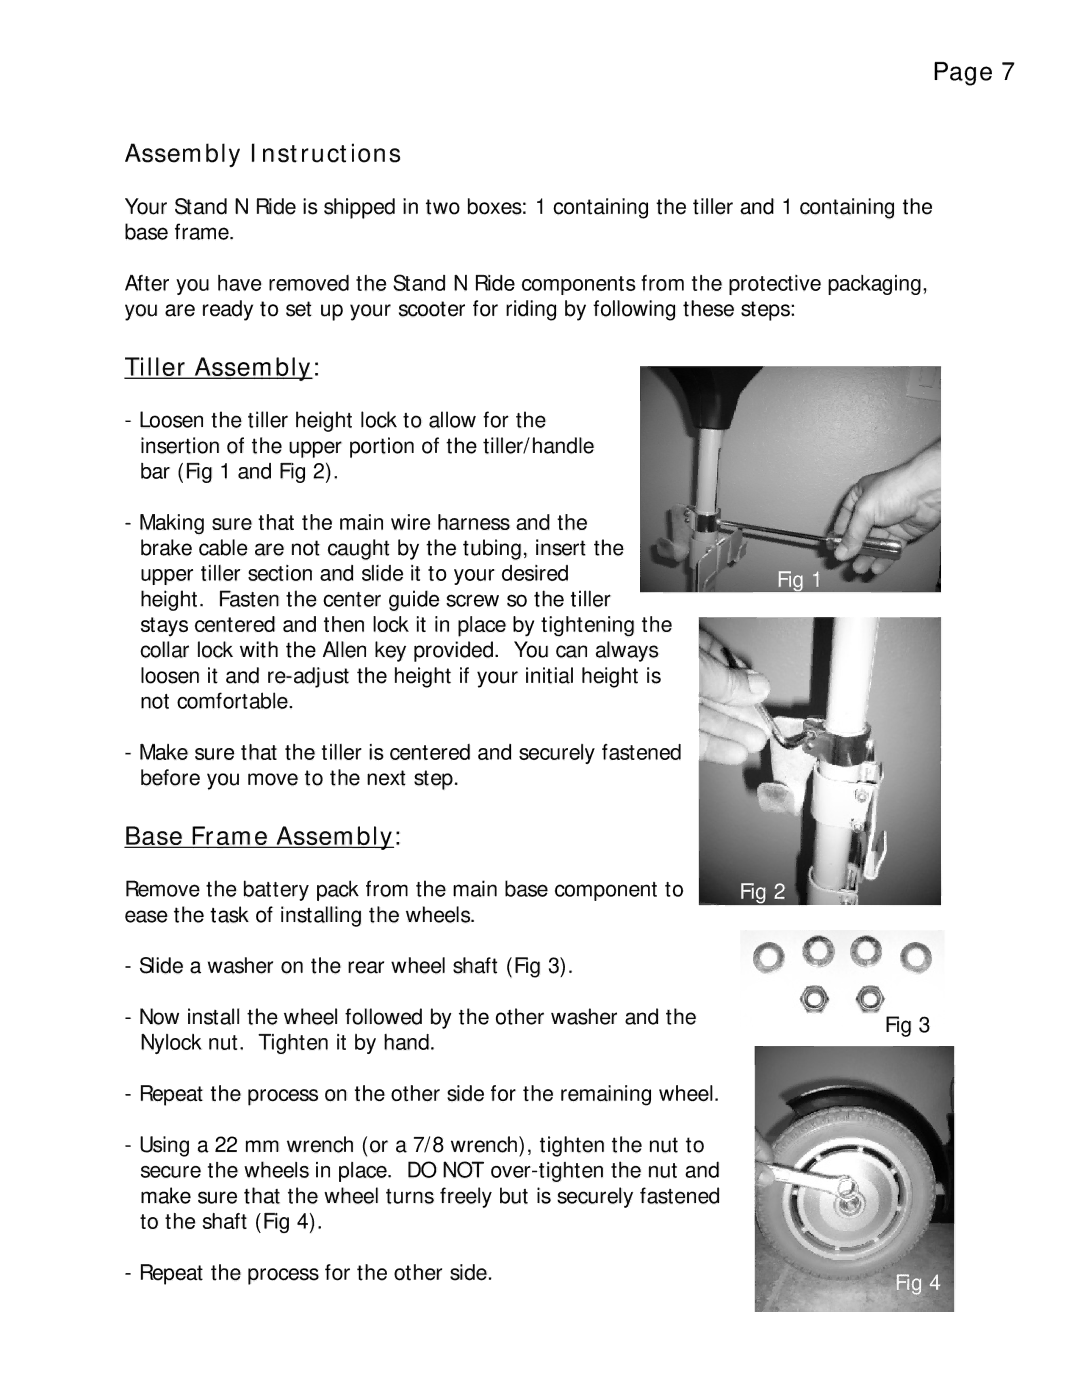
- Loosen the tiller height lock to allow for the insertion of the upper portion of the tiller/handle bar (Fig 1 and Fig 2).
- Making sure that the main wire harness and the |
|
brake cable are not caught by the tubing, insert the |
|
upper tiller section and slide it to your desired | Fig 1 |
height. Fasten the center guide screw so the tiller |
|
stays centered and then lock it in place by tightening the |
|
collar lock with the Allen key provided. You can always |
|
loosen it and |
|
not comfortable. |
|
-Make sure that the tiller is centered and securely fastened before you move to the next step.
Base Frame Assembly:
Remove the battery pack from the main base component to | Fig 2 |
ease the task of installing the wheels. |
|
-Slide a washer on the rear wheel shaft (Fig 3).
-Now install the wheel followed by the other washer and the Nylock nut. Tighten it by hand.
-Repeat the process on the other side for the remaining wheel.
-Using a 22 mm wrench (or a 7/8 wrench), tighten the nut to secure the wheels in place. DO NOT
-Repeat the process for the other side.
Fig 3
Fig 4