Page 8
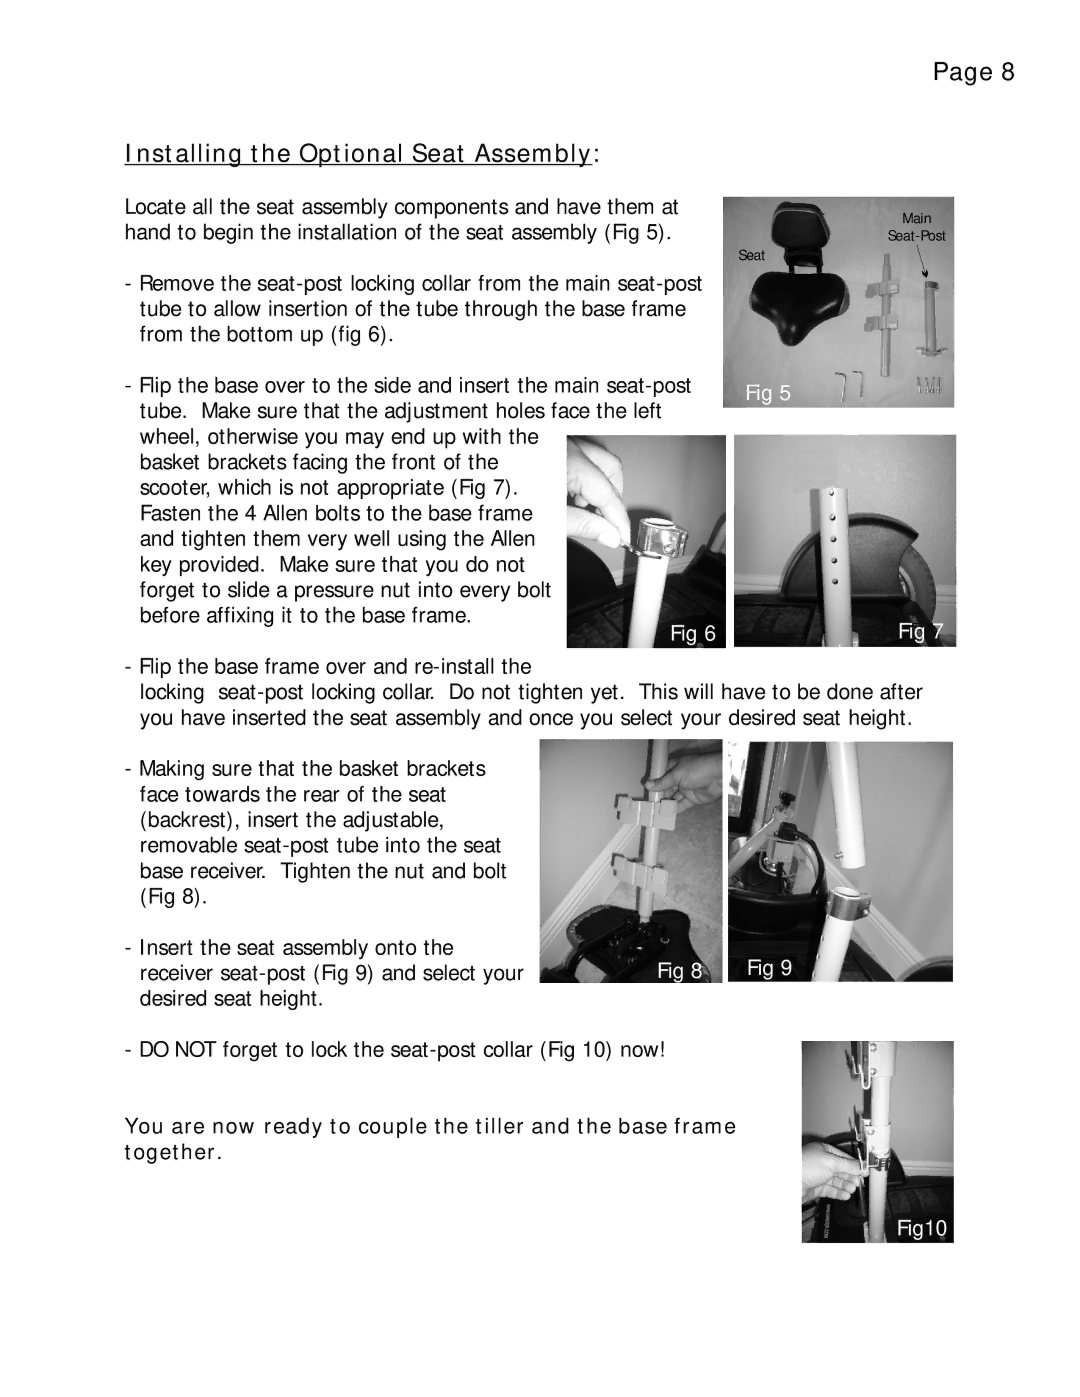
Installing the Optional Seat Assembly:
Locate all the seat assembly components and have them at hand to begin the installation of the seat assembly (Fig 5).
Seat
-Remove the
- Flip the base over to the side and insert the main | Fig 5 | |
tube. Make sure that the adjustment holes face the left | ||
| ||
wheel, otherwise you may end up with the |
| |
basket brackets facing the front of the |
| |
scooter, which is not appropriate (Fig 7). |
| |
Fasten the 4 Allen bolts to the base frame |
| |
and tighten them very well using the Allen |
| |
key provided. Make sure that you do not |
| |
forget to slide a pressure nut into every bolt |
| |
before affixing it to the base frame. |
| |
Fig 6 |
|
Main
Fig 7
-Flip the base frame over and
locking
-Making sure that the basket brackets face towards the rear of the seat (backrest), insert the adjustable, removable
-Insert the seat assembly onto the
receiver | Fig 8 | Fig 9 |
desired seat height. |
|
|
- DO NOT forget to lock the
You are now ready to couple the tiller and the base frame together.
Fig10