Preparing the Motherboard
Installing the CPU
Be very careful when handling the CPU. Make sure not to bend or break any pins within the socket. Hold the processor only by the edges and do not touch the bottom of the processor.
Use the following procedure to install the CPU onto the motherboard.
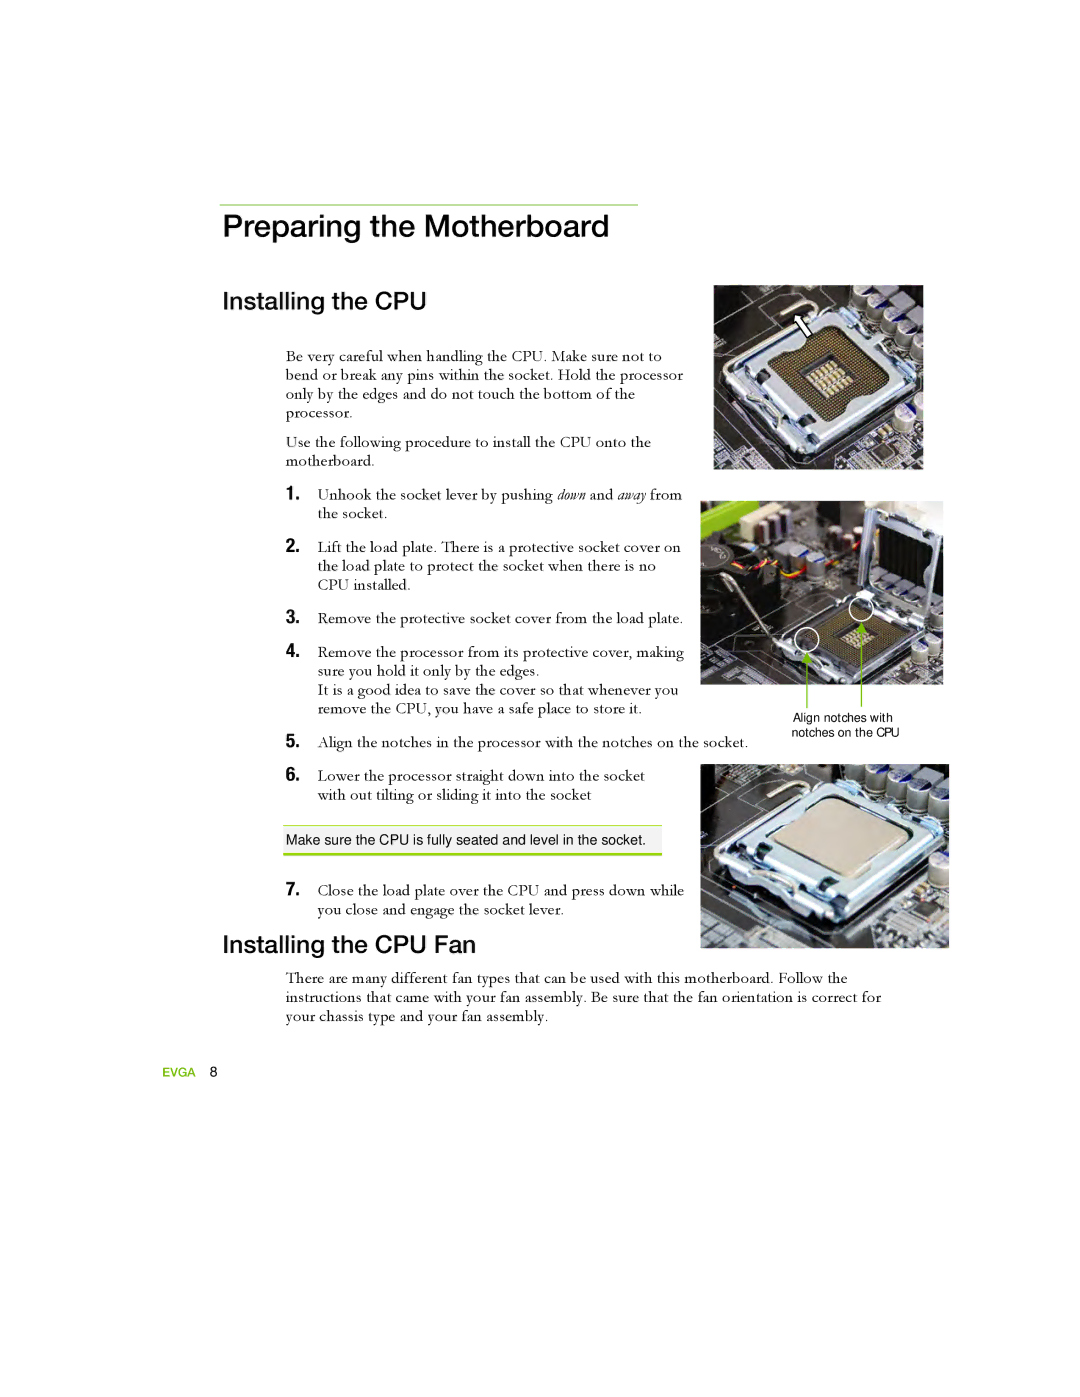
1.Unhook the socket lever by pushing down and away from the socket.
2.Lift the load plate. There is a protective socket cover on the load plate to protect the socket when there is no CPU installed.
3.Remove the protective socket cover from the load plate.
4.Remove the processor from its protective cover, making sure you hold it only by the edges.
It is a good idea to save the cover so that whenever you remove the CPU, you have a safe place to store it.
5.Align the notches in the processor with the notches on the socket.
6.Lower the processor straight down into the socket with out tilting or sliding it into the socket
Make sure the CPU is fully seated and level in the socket.
Align notches with notches on the CPU
7.Close the load plate over the CPU and press down while you close and engage the socket lever.
Installing the CPU Fan
There are many different fan types that can be used with this motherboard. Follow the instructions that came with your fan assembly. Be sure that the fan orientation is correct for your chassis type and your fan assembly.