STABILIZER ADJUSTMENT
Stabilizer adjustment instruction:
An uneven floor or improper stabilizer level can cause the treadmill to wobble during use as well as the incline adjustment to function incorrectly. Please follow the procedure described below to make sure the treadmill stabilizer is adjusted correctly prior to use. You may need the assistance of another person to perform this adjustment.
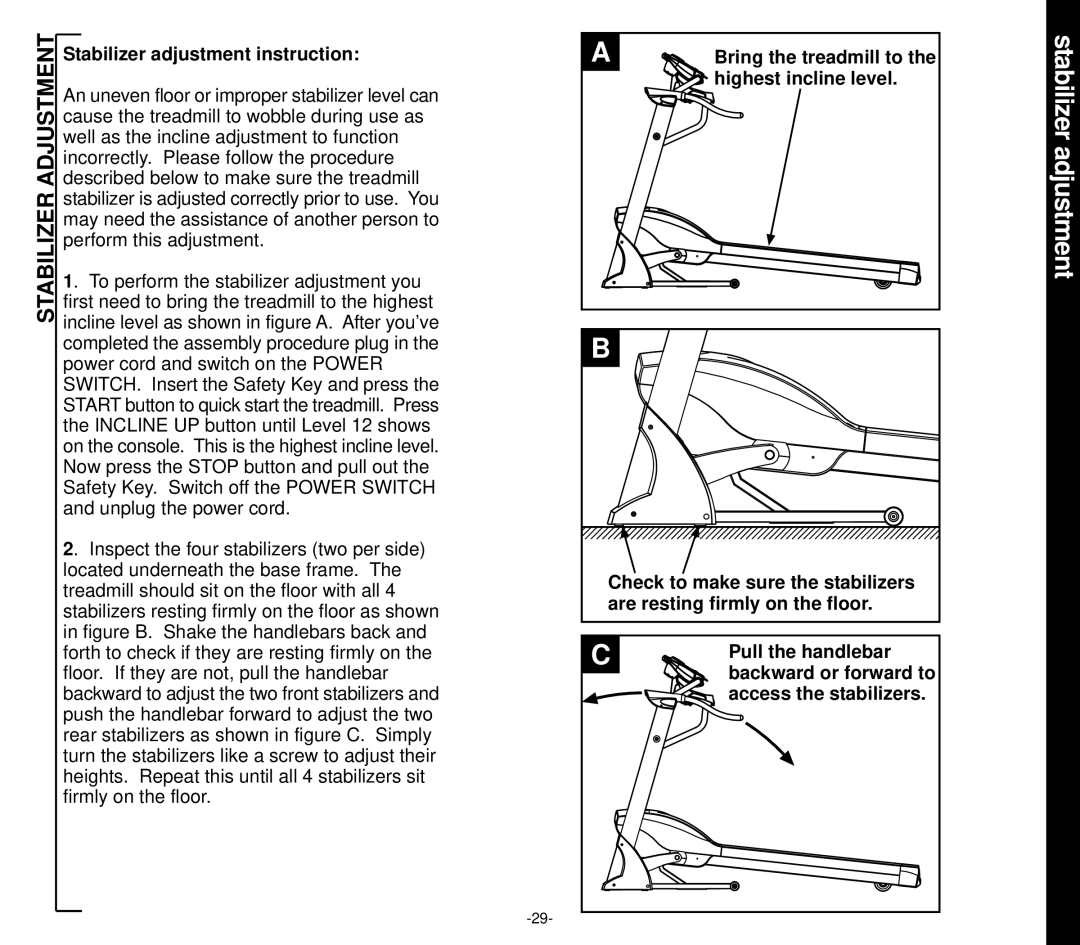
1. To perform the stabilizer adjustment you first need to bring the treadmill to the highest incline level as shown in figure A. After you’ve completed the assembly procedure plug in the power cord and switch on the POWER SWITCH. Insert the Safety Key and press the START button to quick start the treadmill. Press the INCLINE UP button until Level 12 shows on the console. This is the highest incline level. Now press the STOP button and pull out the Safety Key. Switch off the POWER SWITCH and unplug the power cord.
2. Inspect the four stabilizers (two per side) located underneath the base frame. The treadmill should sit on the floor with all 4 stabilizers resting firmly on the floor as shown in figure B. Shake the handlebars back and forth to check if they are resting firmly on the floor. If they are not, pull the handlebar backward to adjust the two front stabilizers and push the handlebar forward to adjust the two rear stabilizers as shown in figure C. Simply turn the stabilizers like a screw to adjust their heights. Repeat this until all 4 stabilizers sit firmly on the floor.
A | Bring the treadmill to the |
| highest incline level. |
B |
|
Check to make sure the stabilizers are resting firmly on the floor.
C | Pull the handlebar |
| backward or forward to |
| access the stabilizers. |
