Setup
there will be room to tighten the nut on the upper hole, on the underside of the front panel.
C.Drill two 11/32 inch diameter holes on the front panel as shown in Figure 7.
D.Align the two holes in the mounting bracket with the front panel of the unit. Install
E.Insert the handle assembly into the mounting bracket as shown in Figure 8.
|
| Figure 8 |
|
1. | Handle assembly | 3. | Clevis pin |
2. | Mounting bracket | 4. | Hairpin |
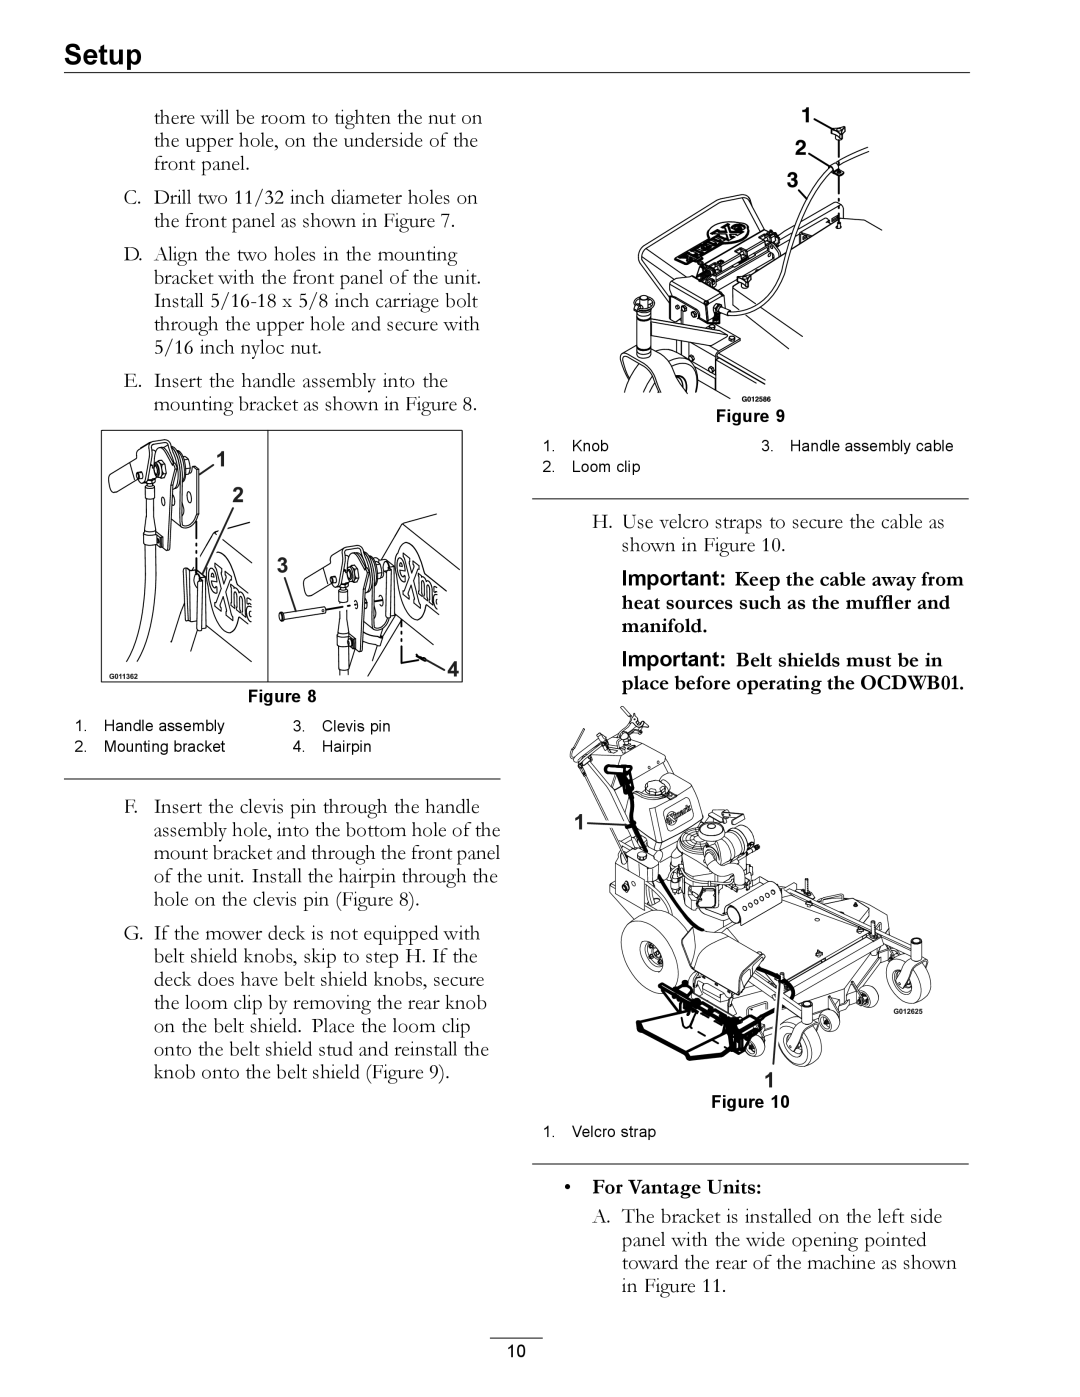
Figure 9
1. Knob | 3. Handle assembly cable |
2.Loom clip
H.Use velcro straps to secure the cable as shown in Figure 10.
Important: Keep the cable away from heat sources such as the muffler and manifold.
Important: Belt shields must be in place before operating the OCDWB01.
F. Insert the clevis pin through the handle assembly hole, into the bottom hole of the mount bracket and through the front panel of the unit. Install the hairpin through the hole on the clevis pin (Figure 8).
G. If the mower deck is not equipped with belt shield knobs, skip to step H. If the deck does have belt shield knobs, secure the loom clip by removing the rear knob on the belt shield. Place the loom clip onto the belt shield stud and reinstall the knob onto the belt shield (Figure 9).
Figure 10
1. Velcro strap
• For Vantage Units:
A. The bracket is installed on the left side panel with the wide opening pointed toward the rear of the machine as shown in Figure 11.
10