4
Maintenance
1
3 2
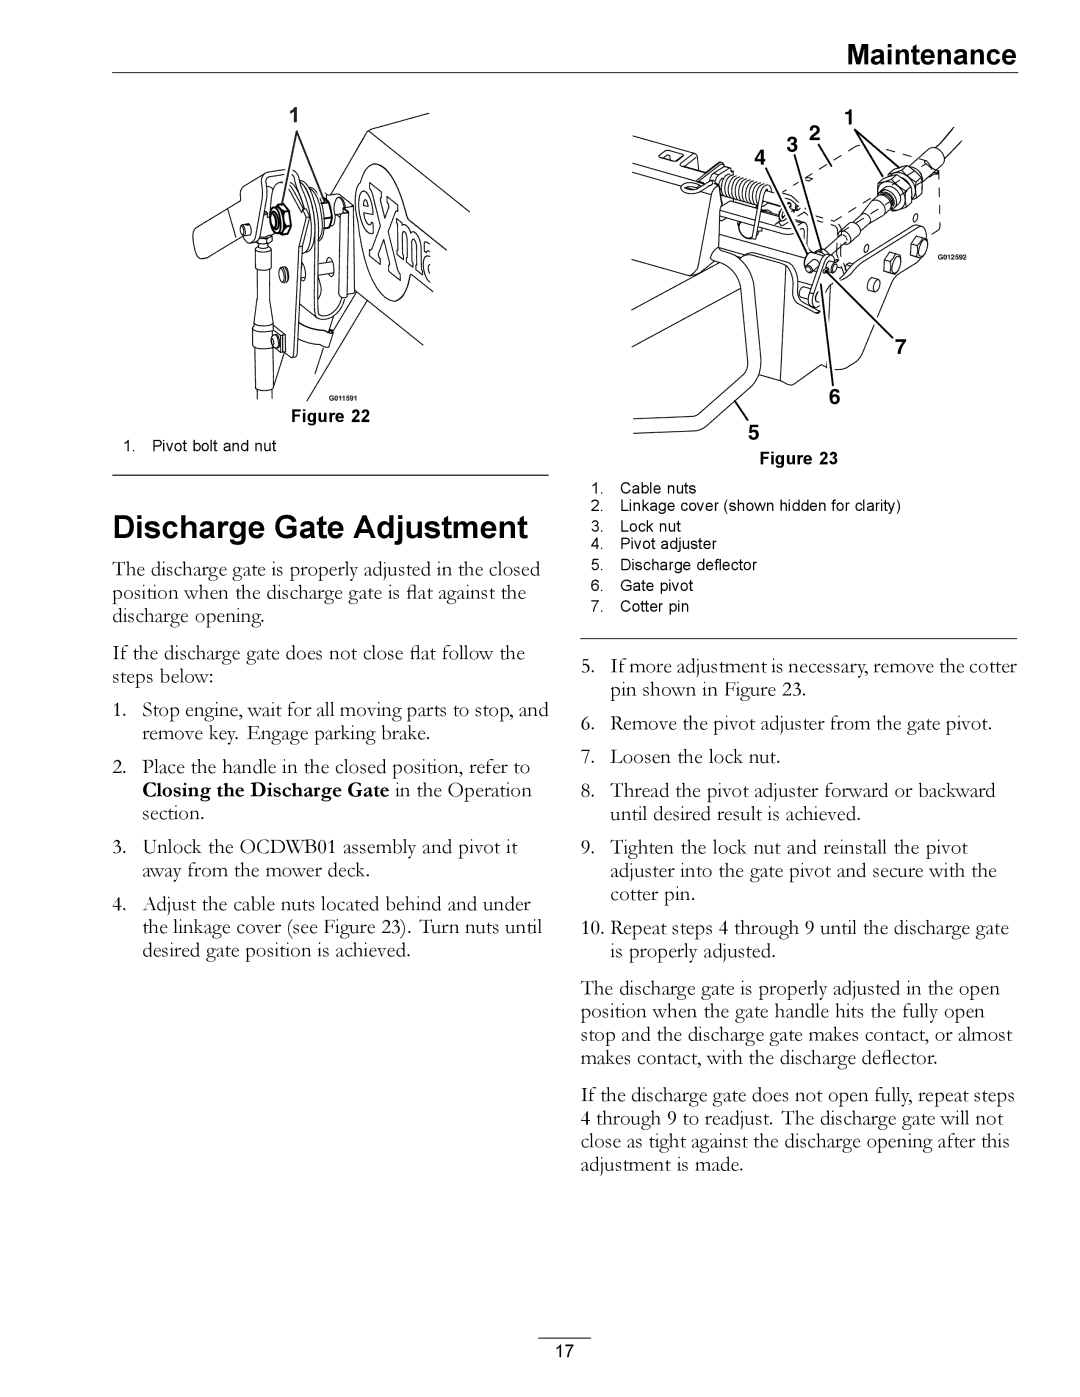
Figure 22
1.Pivot bolt and nut
Discharge Gate Adjustment
The discharge gate is properly adjusted in the closed position when the discharge gate is flat against the discharge opening.
If the discharge gate does not close flat follow the steps below:
1.Stop engine, wait for all moving parts to stop, and remove key. Engage parking brake.
2.Place the handle in the closed position, refer to Closing the Discharge Gate in the Operation section.
3.Unlock the OCDWB01 assembly and pivot it away from the mower deck.
4.Adjust the cable nuts located behind and under the linkage cover (see Figure 23). Turn nuts until desired gate position is achieved.
G012592
7
6
5
Figure 23
1.Cable nuts
2.Linkage cover (shown hidden for clarity)
3.Lock nut
4.Pivot adjuster
5.Discharge deflector
6.Gate pivot
7.Cotter pin
5.If more adjustment is necessary, remove the cotter pin shown in Figure 23.
6.Remove the pivot adjuster from the gate pivot.
7.Loosen the lock nut.
8.Thread the pivot adjuster forward or backward until desired result is achieved.
9.Tighten the lock nut and reinstall the pivot adjuster into the gate pivot and secure with the cotter pin.
10.Repeat steps 4 through 9 until the discharge gate is properly adjusted.
The discharge gate is properly adjusted in the open position when the gate handle hits the fully open stop and the discharge gate makes contact, or almost makes contact, with the discharge deflector.
If the discharge gate does not open fully, repeat steps 4 through 9 to readjust. The discharge gate will not close as tight against the discharge opening after this adjustment is made.
17