
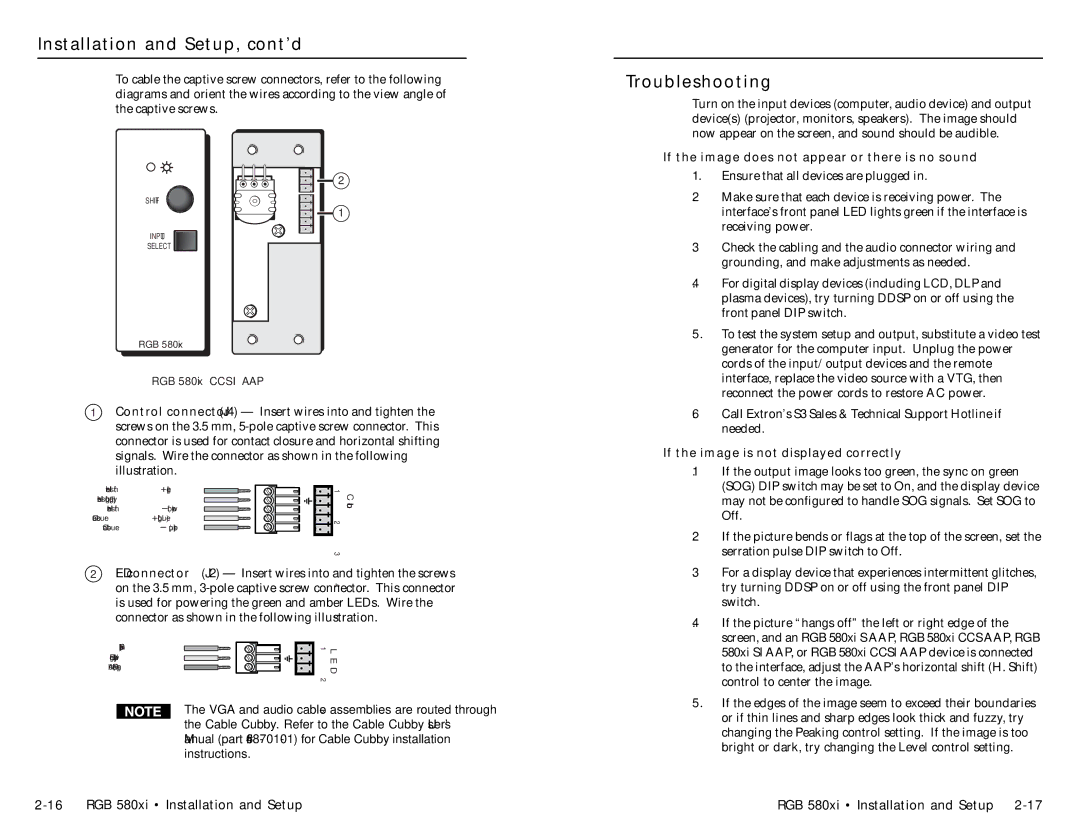
RGB 580XI specifications
Extron Electronic RGB 580XI is a highly regarded device in the world of audio-visual technology. This versatile distribution amplifier is designed to handle RGBHV signals, making it an essential component in various applications such as classrooms, conference rooms, and broadcast environments. The RGB 580XI is equipped to handle multiple video formats and provides exceptional performance, reliability, and flexibility.One of the standout features of the RGB 580XI is its ability to distribute RGBHV signals to multiple outputs without any degradation in quality. This ensures that users can connect several displays or projectors to a single source without compromising the clarity and integrity of the original signal. The unit features five inputs, which can be easily selected through the front panel or remotely controlled via an external device. This flexibility allows for seamless switching between different video sources, making it ideal for dynamic presentation environments.
The RGB 580XI utilizes advanced signal processing technologies to maintain signal quality across long distances. With built-in equalization and re-clocking capabilities, the device can compensate for losses that might occur when signals travel over lengthy cable runs. This ensures that users receive consistent, high-quality video output regardless of cable length.
Another innovative feature of the RGB 580XI is its extensive support for multiple video formats. It can handle resolutions up to 1600x1200 at 75 Hz, making it suitable for high-definition applications. The video bandwidth of 400 MHz allows for clear and vibrant color reproduction, ensuring that visual content is rendered accurately and effectively.
Additionally, the RGB 580XI offers comprehensive integration capabilities. It features a compact design that allows for easy installation into rack systems or as a standalone device. The unit comes with screw terminal connectors for easy wiring and is also compatible with Extron's extensive range of cables and accessories, further enhancing its functionality in sophisticated AV setups.
In conclusion, the Extron RGB 580XI is a versatile and powerful RGBHV distribution amplifier that excels in various audio-visual applications. With its signal processing capabilities, support for multiple video formats, and robust integration options, it stands out as an indispensable tool for ensuring high-quality video distribution in professional settings. Whether used in educational institutions, corporate environments, or broadcasting studios, the RGB 580XI delivers reliable and impressive performance, making it a favorite choice among AV professionals.