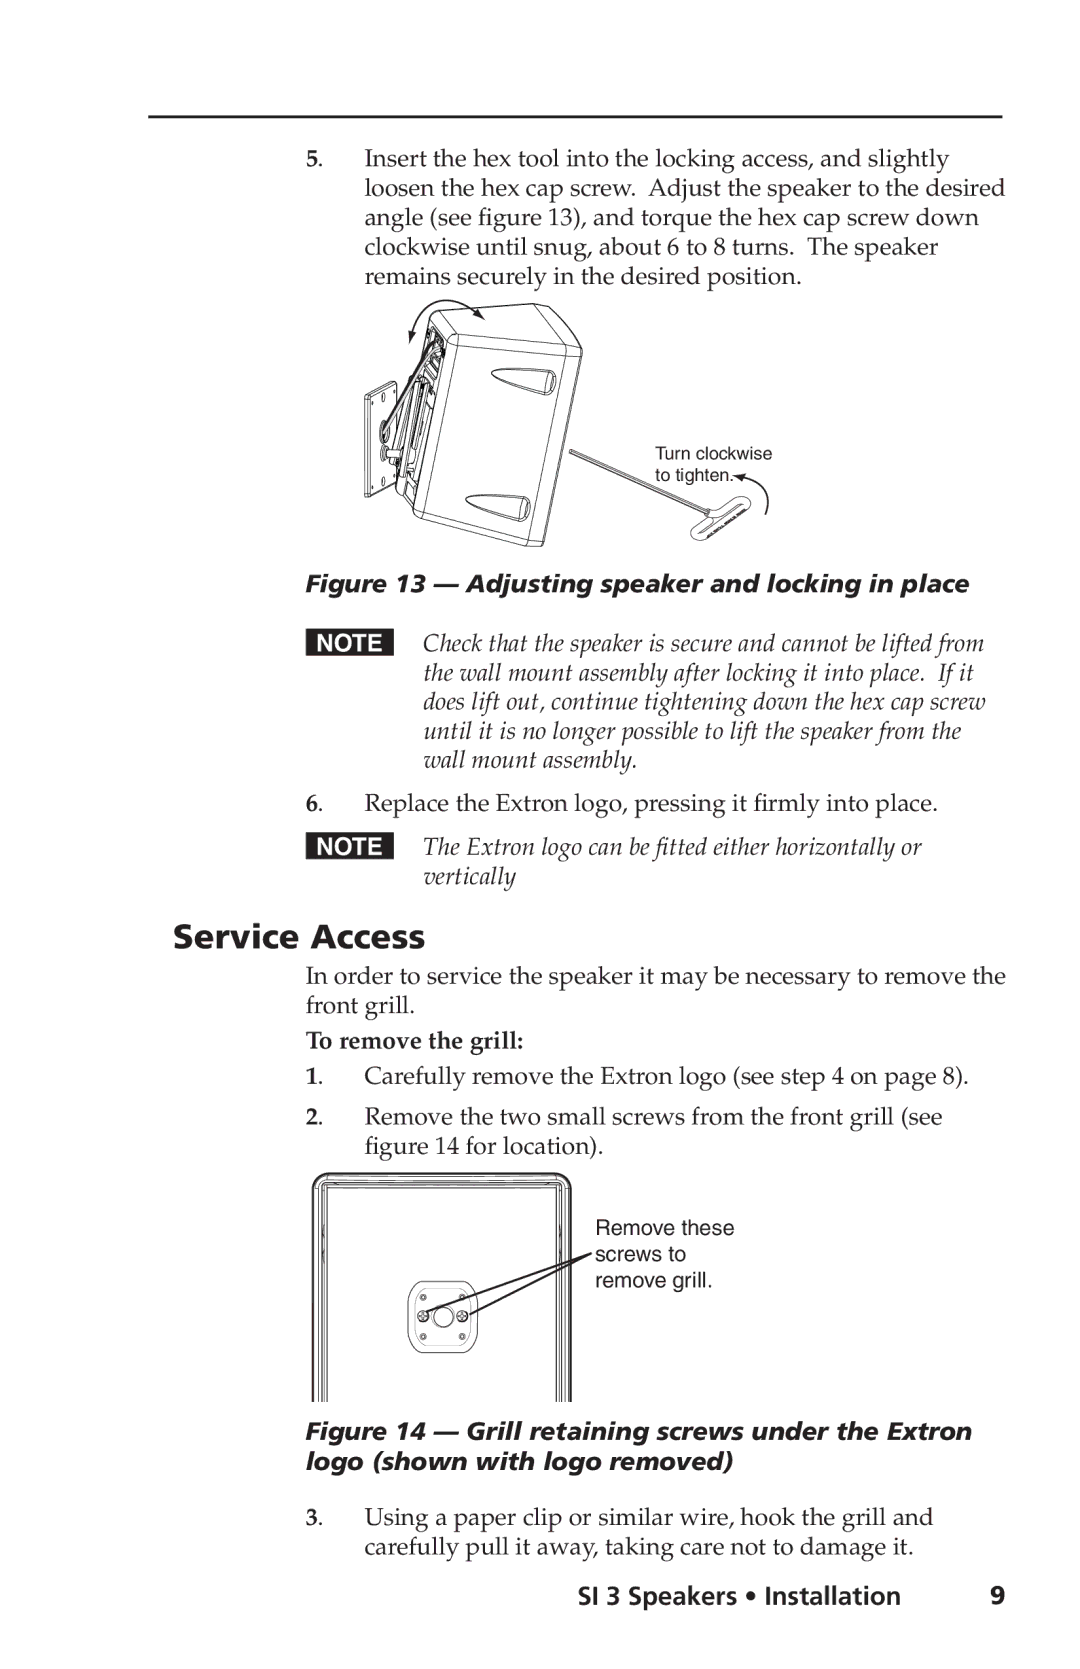
5. | Insert the hex tool into the locking access, and slightly |
| loosen the hex cap screw. Adjust the speaker to the desired |
| angle (see figure 13), and torque the hex cap screw down |
clockwise until snug, about 6 to 8 turns. The speaker remains securely in the desired position.
Turn clockwise to tighten.![]()
Figure 13 — Adjusting speaker and locking in place
NCheck that the speaker is secure and cannot be lifted from the wall mount assembly after locking it into place. If it does lift out, continue tightening down the hex cap screw until it is no longer possible to lift the speaker from the wall mount assembly.
6. | Replace the Extron logo, pressing it firmly into place. |
NThe Extron logo can be fitted either horizontally or vertically
Service Access
In order to service the speaker it may be necessary to remove the front grill.
To remove the grill:
1. | Carefully remove the Extron logo (see step 4 on page 8). | |
2. | Remove the two small screws from the front grill (see | |
| figure 14 for location). | |
|
|
|
Remove these screws to remove grill.
Figure 14 — Grill retaining screws under the Extron logo (shown with logo removed)
3. Using a paper clip or similar wire, hook the grill and
carefully pull it away, taking care not to damage it. |
|
SI 3 Speakers • Installation | 9 |