
SPA 12 AAP specifications
The Extron Electronics SPA 12 AAP is a powerful audio amplifier designed for applications demanding high performance and reliability in a compact format. Known for its advanced technologies and features, the SPA 12 AAP provides professional-grade audio amplification tailored for various environments such as education, corporate, and hospitality settings.One of the primary features of the SPA 12 AAP is its 12-channel capability, allowing users to efficiently manage multiple audio sources. Each channel can deliver up to 25 watts of power into 4-ohm loads, ensuring robust sound delivery in classrooms, conference rooms, and auditorium settings. This amplifier is equipped with Extron's patented output transformer technology, which ensures minimal crosstalk and improved audio clarity, crucial for environments where speech intelligibility is paramount.
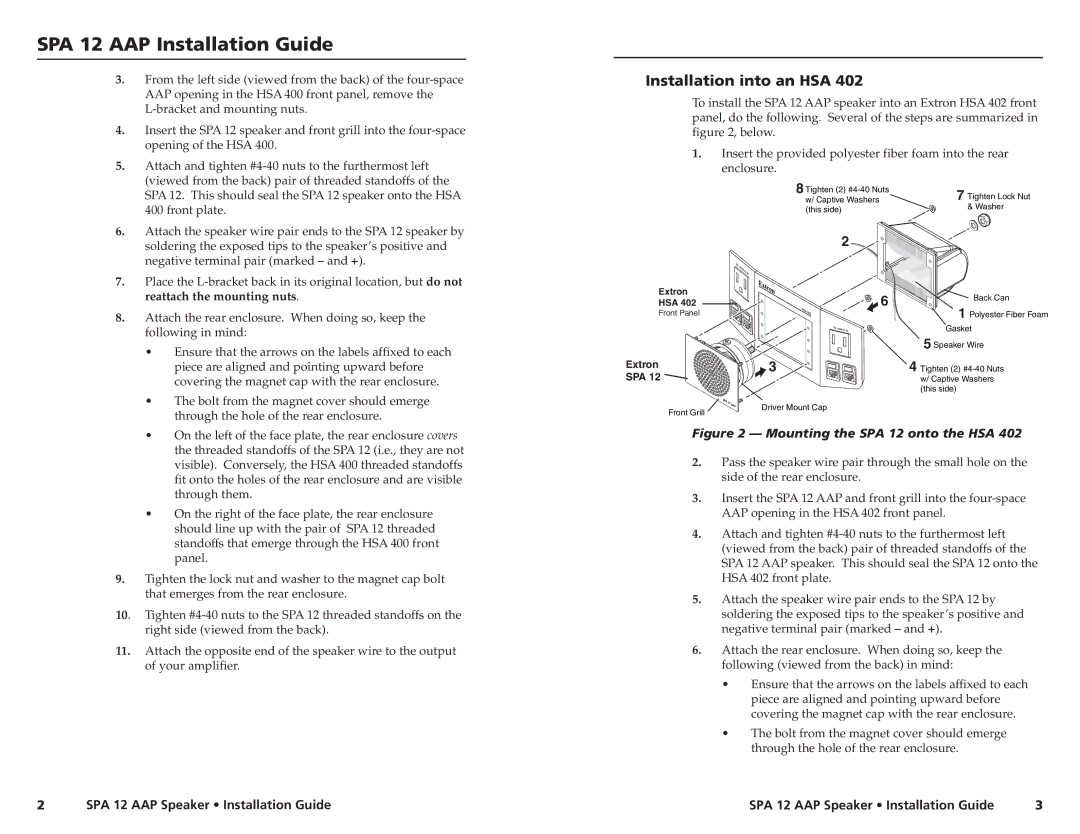
The SPA 12 AAP incorporates advanced digital signal processing (DSP), enabling users to configure the amplifier to meet specific audio requirements. With features such as equalization, compression, and delay, the amplifier can be tailored to ensure optimal performance in any space. This DSP capability is further enhanced by Extron’s easy-to-use software interface, allowing for straightforward setup and monitoring.
Another notable characteristic of the SPA 12 AAP is its versatile connectivity options. It provides multiple input types, including unbalanced RCA and balanced XLR connections, facilitating integration with various audio sources. The amplifier also features a USB port for software updates, ensuring that the unit remains current with the latest enhancements and fixes.
The SPA 12 AAP also emphasizes energy efficiency with its eco-friendly design. It features advanced power management, which not only reduces power consumption when idle but also provides a low standby power mode. This aligns with the increasing demand for sustainable technology solutions in audiovisual applications.
Additionally, the robust build quality of the SPA 12 AAP ensures durability and reliable performance over time. Its compact form factor allows for easy placement in standard audio racks, and the low-profile design blends seamlessly into professional environments.
In summary, the Extron SPA 12 AAP is an exceptional audio amplifier characterized by its 12-channel architecture, advanced DSP capabilities, versatile connectivity, and eco-friendly design. Its focus on high performance makes it an ideal choice for various audio applications, providing users with the confidence that their sound systems will deliver outstanding audio quality. With these features, the SPA 12 AAP stands out as a leading solution in the realm of professional audio amplification.