F80A specifications
The Fedders F80A is a notable air conditioning unit that has gained recognition for its efficiency, performance, and convenience. Designed to cater to both residential and light commercial spaces, it combines robust features with advanced technologies to provide optimal cooling solutions.One of the standout characteristics of the Fedders F80A is its impressive cooling capacity. With a BTU rating that makes it suitable for medium-sized rooms, this unit efficiently maintains comfortable indoor temperatures even during the hottest summer months. Users can benefit from its powerful performance without worrying about energy wastage.
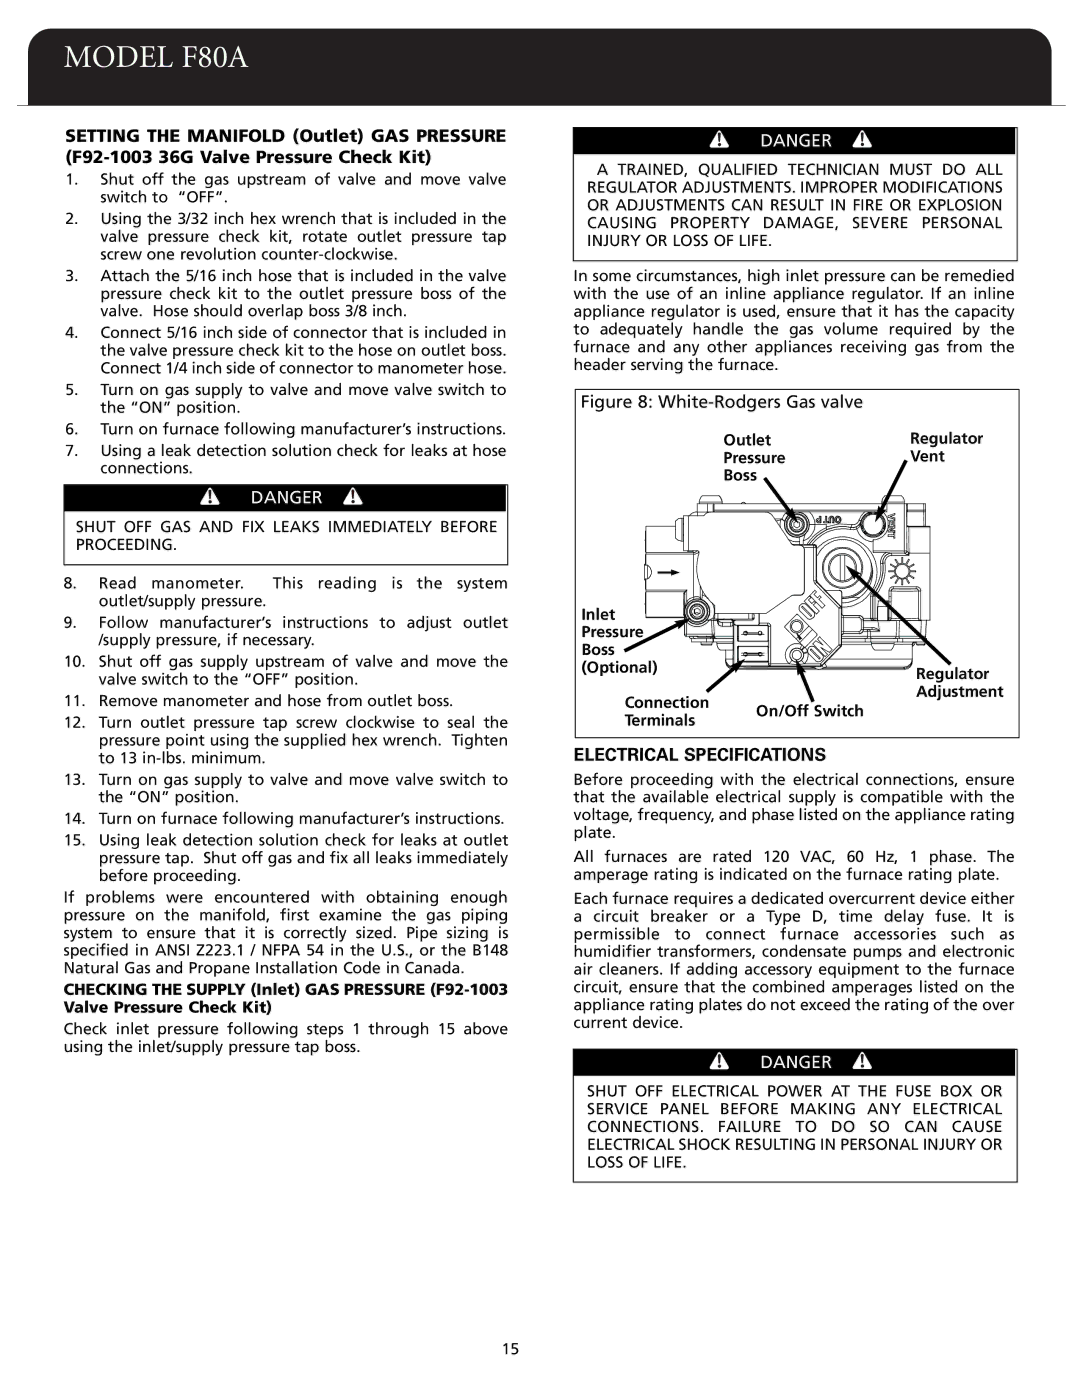
Energy efficiency is a critical aspect of the Fedders F80A. It features an Energy Efficiency Ratio (EER) that meets current regulatory standards, which translates to lower energy bills and a reduced environmental footprint. The inclusion of eco-friendly refrigerants further enhances its appeal, making it a responsible choice for environmentally-conscious consumers.
The Fedders F80A is also equipped with user-friendly controls. An intuitive remote control allows for easy operation from anywhere in the room. Additionally, the unit comes with programmable settings that let users schedule their cooling preferences, ensuring comfort at all times without unnecessary energy expenditure.
Another key feature of this model is its multi-speed fan. The fan operates on various speeds, providing users with flexibility in airflow and noise levels. Whether a quiet night is desired or a powerful cooling burst is needed, the Fedders F80A caters to individual preferences effectively.
Installation and maintenance are also areas where the Fedders F80A shines. Its relatively straightforward installation process allows for quick setup, and its design makes routine maintenance a hassle-free task. Periodic cleaning of the filters ensures continued efficient operation, contributing to the unit's durability and longevity.
Overall, the Fedders F80A combines powerful cooling capabilities with energy efficiency and user-centric features. Its blend of technology and user-friendly design makes it a suitable choice for anyone looking to invest in reliable air conditioning. With its reputation for performance and efficiency, the Fedders F80A stands as a commendable option in the competitive air conditioning market.