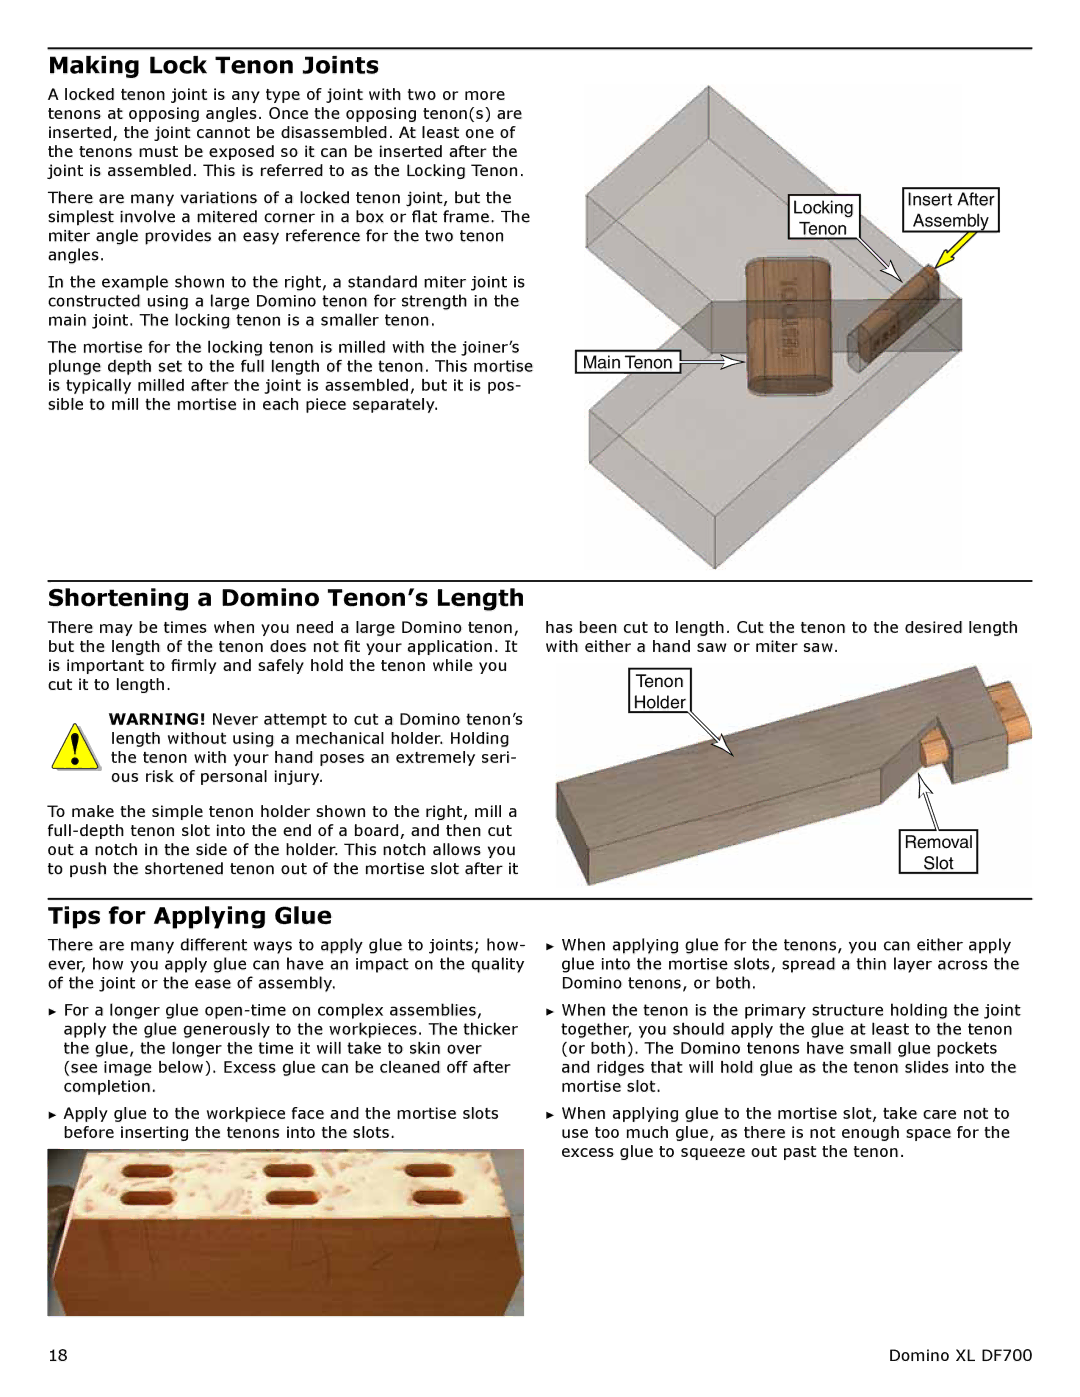
Making Lock Tenon Joints
A locked tenon joint is any type of joint with two or more tenons at opposing angles. Once the opposing tenon(s) are inserted, the joint cannot be disassembled. At least one of the tenons must be exposed so it can be inserted after the joint is assembled. This is referred to as the Locking Tenon.
There are many variations of a locked tenon joint, but the simplest involve a mitered corner in a box or flat frame. The miter angle provides an easy reference for the two tenon angles.
In the example shown to the right, a standard miter joint is constructed using a large Domino tenon for strength in the main joint. The locking tenon is a smaller tenon.
The mortise for the locking tenon is milled with the joiner’s plunge depth set to the full length of the tenon. This mortise is typically milled after the joint is assembled, but it is pos- sible to mill the mortise in each piece separately.
Locking
Tenon
Main Tenon ![]()
Insert After
Assembly
Shortening a Domino Tenon’s Length
There may be times when you need a large Domino tenon, but the length of the tenon does not fit your application. It is important to firmly and safely hold the tenon while you cut it to length.
WARNING! Never attempt to cut a Domino tenon’s length without using a mechanical holder. Holding the tenon with your hand poses an extremely seri- ous risk of personal injury.
To make the simple tenon holder shown to the right, mill a
has been cut to length. Cut the tenon to the desired length with either a hand saw or miter saw.
Tenon
Holder
Removal
Slot
Tips for Applying Glue
There are many different ways to apply glue to joints; how- ever, how you apply glue can have an impact on the quality of the joint or the ease of assembly.
►► For a longer glue
►► Apply glue to the workpiece face and the mortise slots before inserting the tenons into the slots.
►► When applying glue for the tenons, you can either apply glue into the mortise slots, spread a thin layer across the Domino tenons, or both.
►► When the tenon is the primary structure holding the joint together, you should apply the glue at least to the tenon (or both). The Domino tenons have small glue pockets and ridges that will hold glue as the tenon slides into the mortise slot.
►► When applying glue to the mortise slot, take care not to use too much glue, as there is not enough space for the excess glue to squeeze out past the tenon.
18 | Domino XL DF700 |