Setting the Fence Height
The height of the fence needs to be adjusted depending on the type of joint being made and the thickness of the mate- rial being joined. Refer to the ”Applications” section begin- ning on page 13 for more information about the optimal fence height for the specific application. There are two features available for setting the fence height; the height gauge and the height stop.
Note: It is not necessary to set the mortise height to be exactly in the center of a board. Attempting to do so can be difficult, and may actually lead to assembly errors. It is more important to always ensure that the same surface is referenced for each workpiece.
Height Stop
The height stop provides quick access to repeatable height settings. This can be especially beneficial in applications where you need to continually change the fence height from one mortise to another, such as an offset joint with a reveal between the pieces.
Height Gauge
The height gauge shows the distance between the bottom of the fence face and the centerline of the mortising bit. Use this gauge to set the mortise height relative to the surface of the workpiece.
Note: Make sure to retract the Height Stop to its lowest setting when using the Height Gauge.
Setting the height
1.Loosen the fence height locking lever by turning it
2.To use the Height Stop:
a. Raise the fence above the desired setting.
b.Slide the stop in or out until the desired setting (in
mm)is shown in the window.
c.Lower the fence down until it touches the stop.
d.Tighten the locking lever.
3.To use the height gauge:
a.Make sure the Height Stop is retracted out of the way.
b.Raise or lower the fence until the pointer is pointing to the desired height on the gauge.
c.Tighten the locking lever.
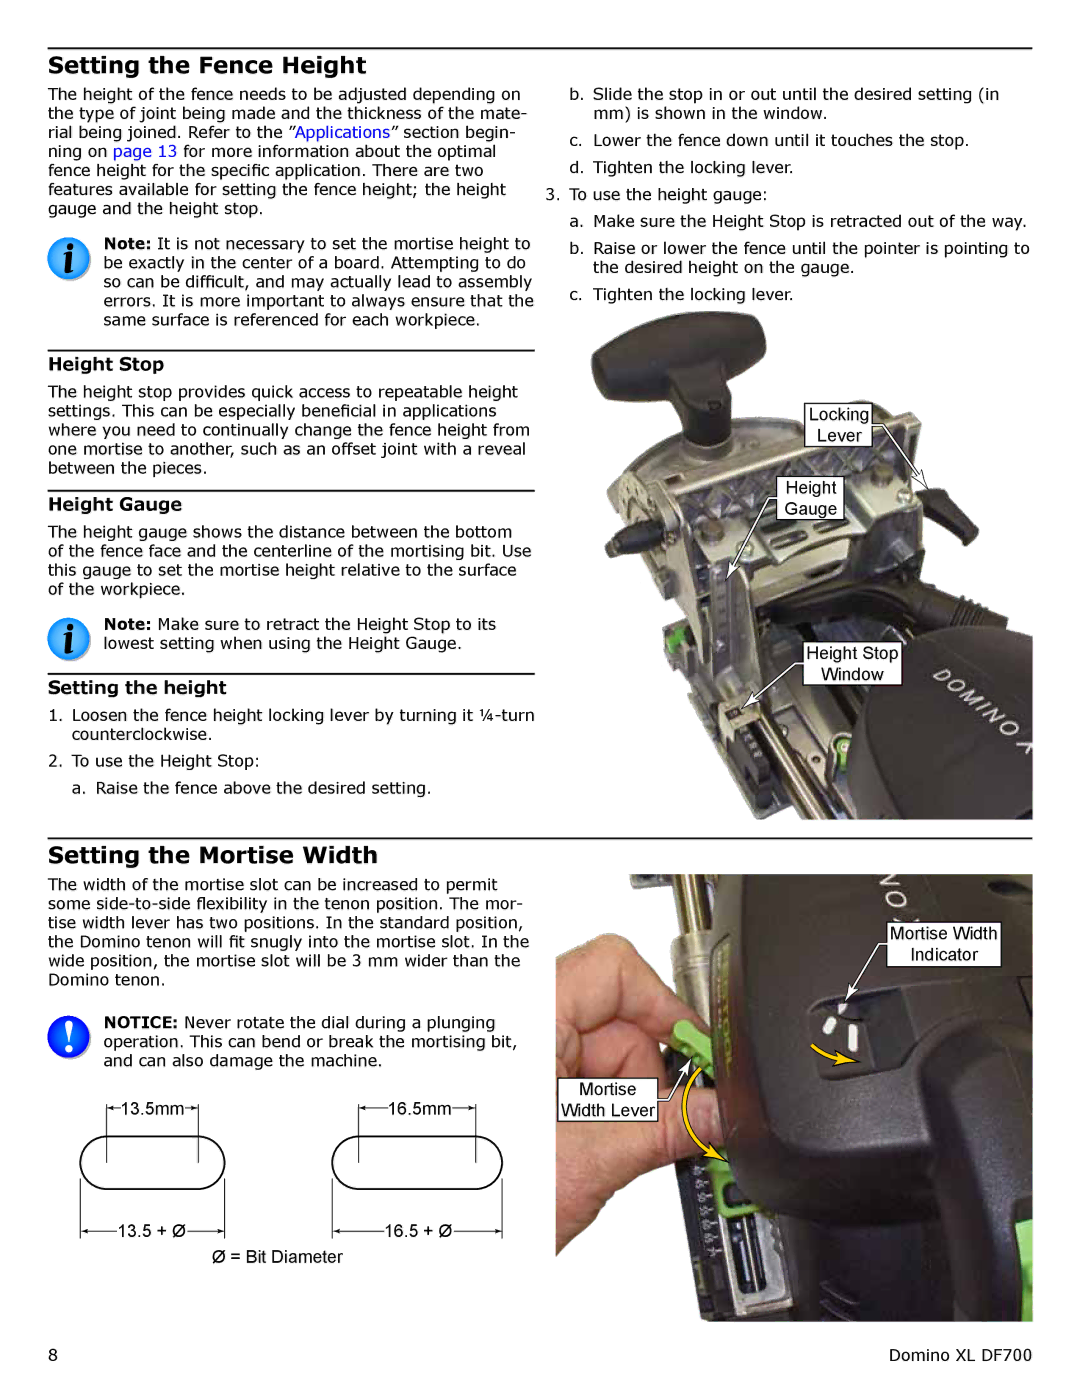
Locking
Lever
Height
Gauge
Height Stop
Window
Setting the Mortise Width
The width of the mortise slot can be increased to permit some
NOTICE: Never rotate the dial during a plunging operation. This can bend or break the mortising bit, and can also damage the machine.
![]()
![]() 13.5mm
13.5mm![]()
![]()
![]()
![]() 16.5mm
16.5mm![]()
![]()
|
|
|
|
|
|
|
13.5 + Ø |
|
|
|
|
| 16.5 + Ø |
|
| |||||
|
|
|
|
|
|
|
Ø = Bit Diameter
Mortise
Width Lever
Mortise Width ![]() Indicator
Indicator
8 | Domino XL DF700 |