
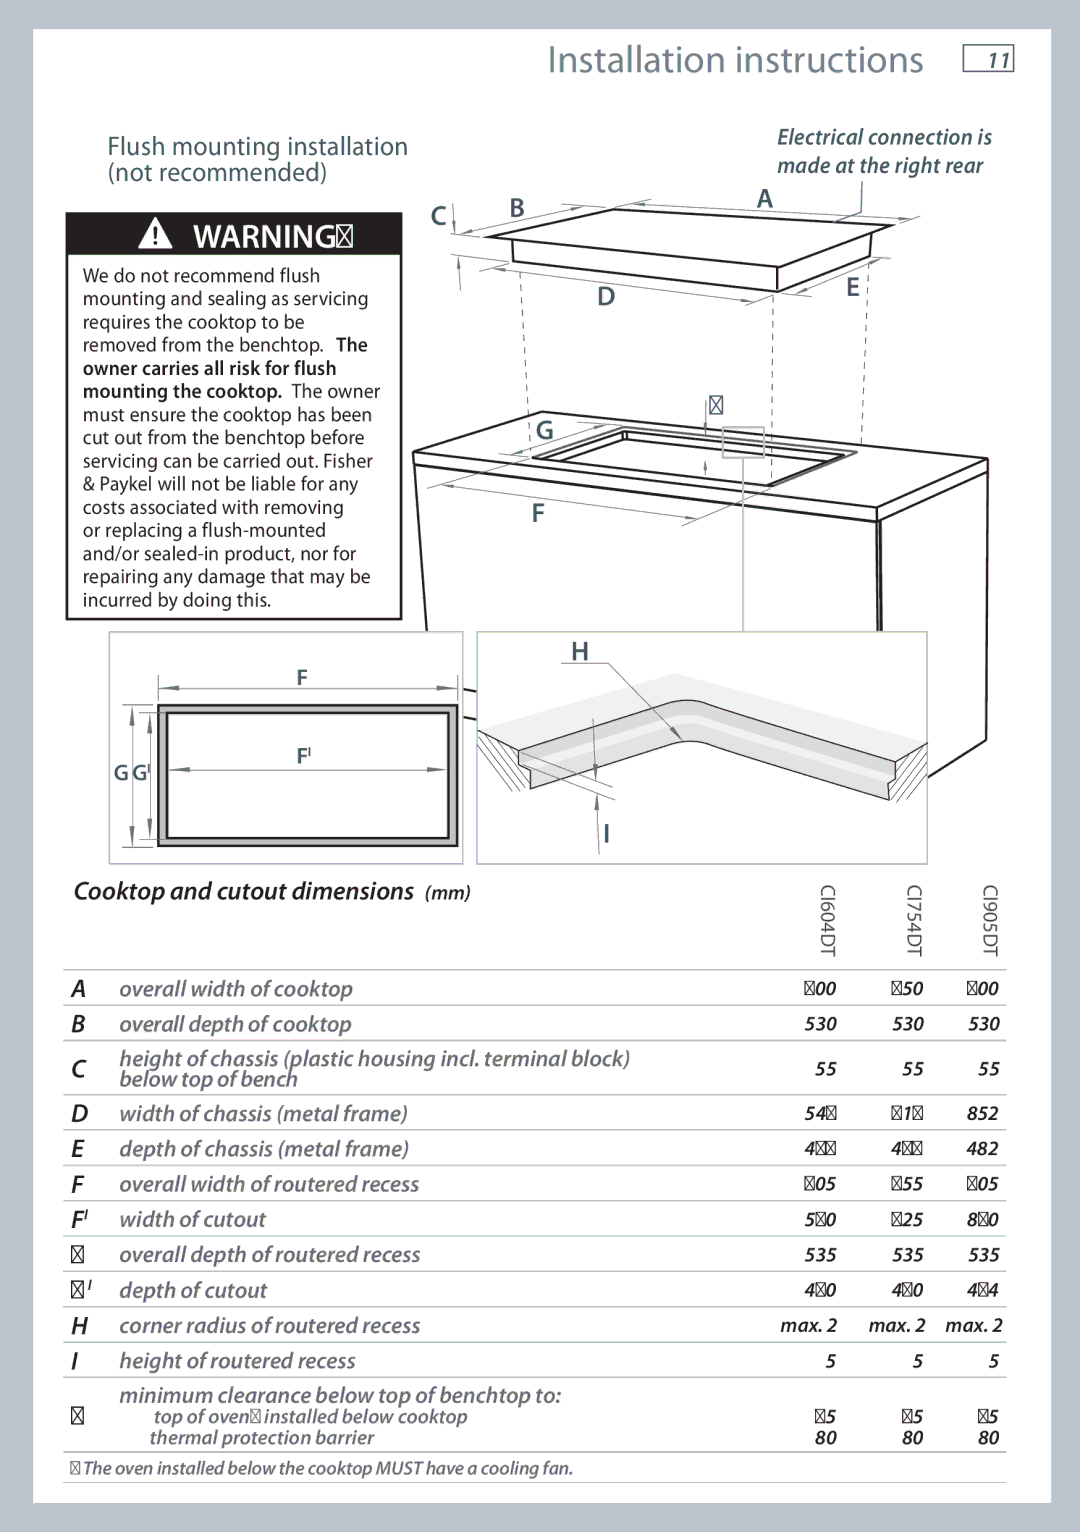
CI604DT, CI905DT, CI754DT specifications
Fisher & Paykel is renowned for its innovative kitchen appliances, and its series of induction cooktops, namely the CI754DT, CI905DT, and CI604DT, exemplifies cutting-edge design and technology. These induction cooktops are engineered to enhance cooking precision, safety, and efficiency, making them an ideal choice for modern kitchens.The CI754DT is a 75 cm wide model featuring five cooking zones, providing ample space for multiple pots and pans. It boasts an intuitive touch control system that allows for precise heat adjustments, while its powerful induction technology ensures that heat is generated directly in the cookware, leading to faster cooking times and less energy loss. This model also includes a boost function for rapid boiling, making it perfect for those busy cooking moments.
The CI905DT is a wider 90 cm model that further enhances the cooking experience with its six cooking zones. It offers a larger surface area for multitasking, allowing chefs to prepare multiple dishes simultaneously. The CI905DT features SmartZone technology, which allows two cooking zones to be combined into one larger zone for griddles or oversized cookware. This flexibility makes it an exceptional choice for diverse culinary applications. Additionally, the safety features include a pan detection system that only activates the heating element when compatible cookware is in use.
The CI604DT, designed for compact spaces, measures 60 cm and includes four cooking zones. It perfectly blends style and functionality, making it suitable for smaller kitchens without compromising on performance. The induction technology allows for quick and efficient cooking while remaining cool to the touch, minimizing the risk of burns. This model also highlights safety features like an automatic shut-off and child lock, ensuring peace of mind in busy households.
All three models share a sleek, frameless design that enhances the aesthetics of any kitchen. Featuring a ceramic glass surface, they are easy to clean and maintain. With a range of precise heat settings, integrated timers, and safety features, Fisher & Paykel's induction cooktops offer an advanced cooking experience, catering to both amateur cooks and seasoned chefs alike. By incorporating modern technology with user-friendly features, these cooktops reflect Fisher & Paykel's commitment to quality, innovation, and sophistication in kitchen appliances.