1
INSTALLING THE COOKTOP FRONT GUARD
To increase the clearance between the front edge of the cooktop and the burners it is possible to install the cooktop front guard supplied with the appliance.
IMPORTANT: To install/remove the guard it is necessary to remove the cooktop.
Attempting to install/remove the guard without disassembling the cooktop will result in permanent damage to the appliance.
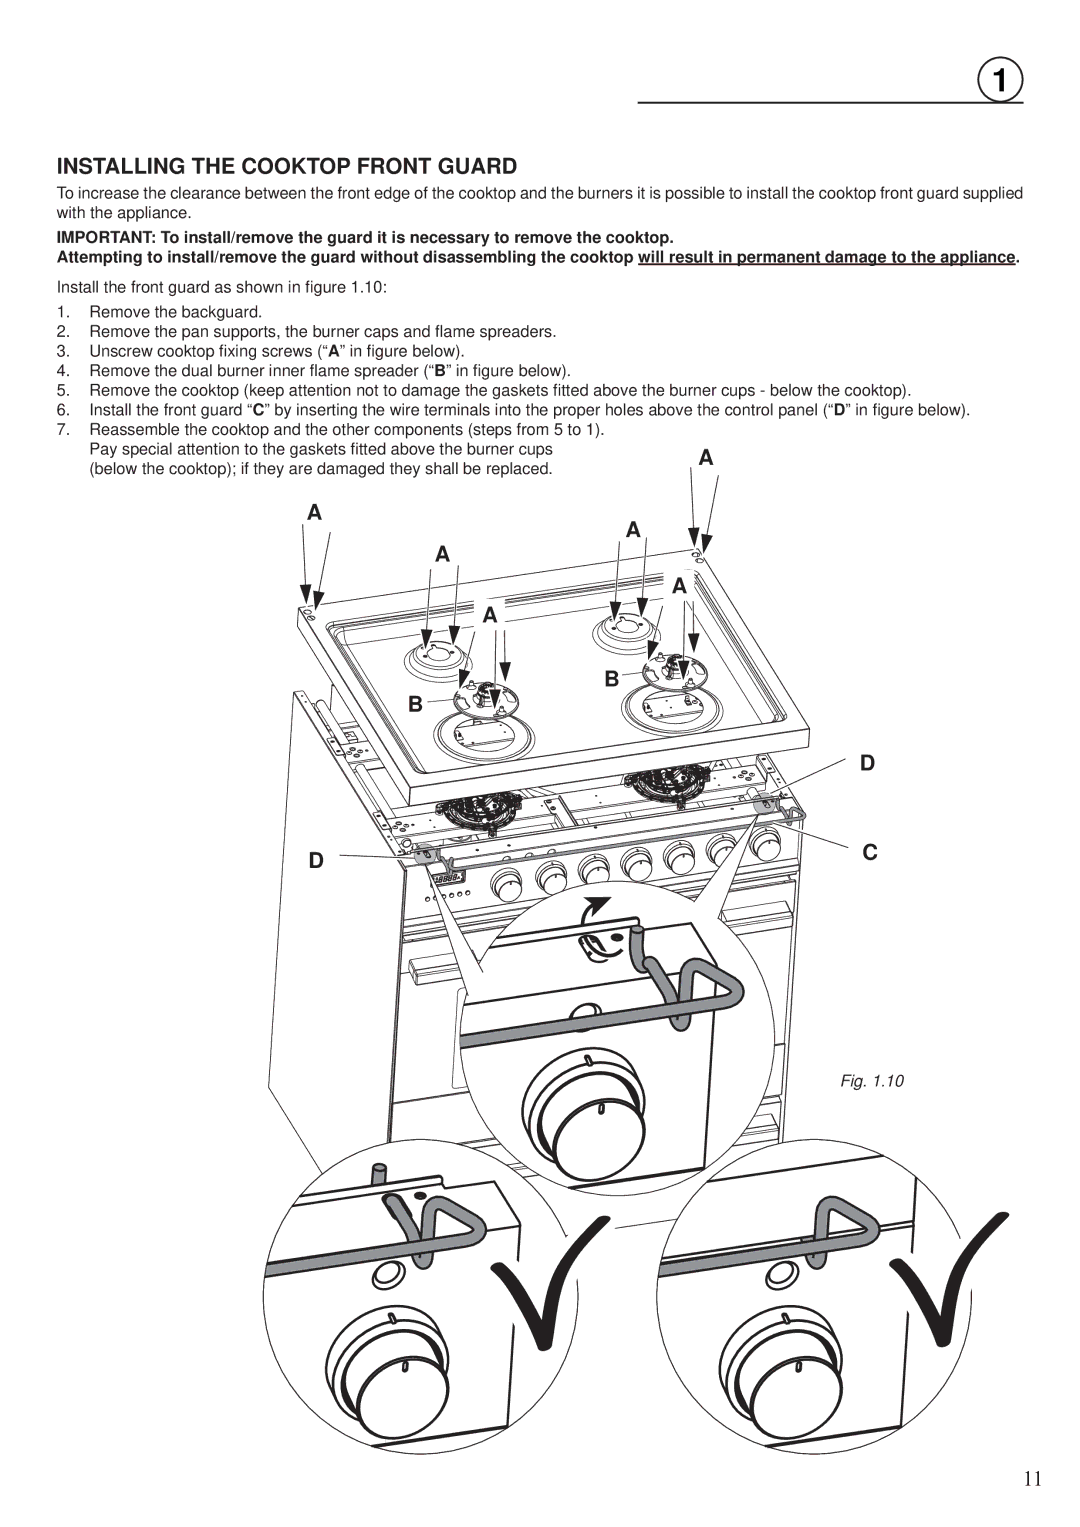
Install the front guard as shown in figure 1.10:
1.Remove the backguard.
2.Remove the pan supports, the burner caps and flame spreaders.
3.Unscrew cooktop fixing screws (“A” in figure below).
4.Remove the dual burner inner flame spreader (“B” in figure below).
5.Remove the cooktop (keep attention not to damage the gaskets fitted above the burner cups - below the cooktop).
6.Install the front guard “C” by inserting the wire terminals into the proper holes above the control panel (“D” in figure below).
7.Reassemble the cooktop and the other components (steps from 5 to 1).
Pay special attention to the gaskets fitted above the burner cups | A | |
(below the cooktop); if they are damaged they shall be replaced. | ||
| ||
A | A | |
A | ||
| ||
A | A | |
| ||
B | B | |
|
D
D ![]()
![]()
![]()

![]()
![]()
![]()
![]()
![]()
![]()
![]()
![]()
![]()
![]()
![]()
![]()
![]()
![]()
![]()
![]()
![]()
![]()
![]()
![]()
![]()
![]()
![]()
![]()
![]()
![]()
![]() C
C
Fig. 1.10
11
