Installation instructions
9
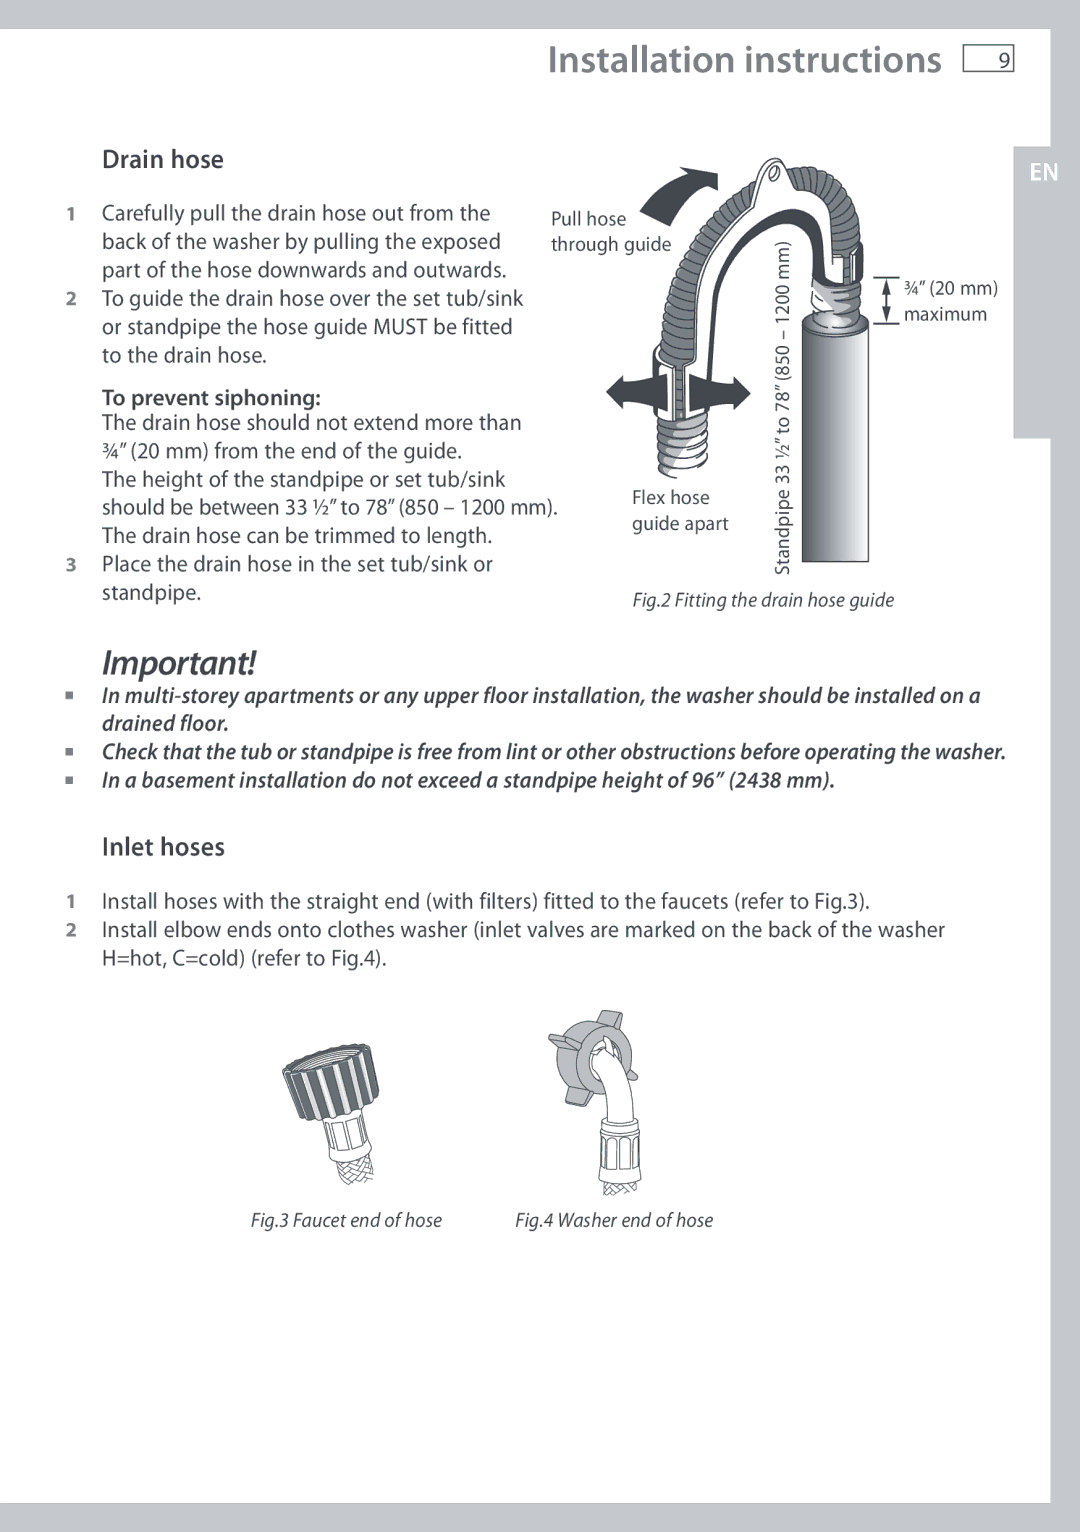
Drain hose | EN |
|
1 Carefully pull the drain hose out from the | Pull hose |
|
|
back of the washer by pulling the exposed | through guide | mm) | |
part of the hose downwards and outwards. |
|
| |
2 To guide the drain hose over the set tub/sink |
|
| – 1200 |
or standpipe the hose guide MUST be fitted |
|
| |
to the drain hose. |
|
| (850 |
|
|
| |
To prevent siphoning: |
|
| to 78” |
The drain hose should not extend more than |
|
| |
¾” (20 mm) from the end of the guide. |
|
| ½” |
The height of the standpipe or set tub/sink |
|
| 33 |
| Flex hose | Standpipe | |
3 Place the drain hose in the set tub/sink or |
| ||
should be between 33 ½” to 78” (850 – 1200 mm). | guide apart |
| |
The drain hose can be trimmed to length. |
|
| |
|
|
| |
standpipe. |
| Fig.2 Fitting the drain hose guide | |
¾” (20 mm) maximum
Important!
In
Check that the tub or standpipe is free from lint or other obstructions before operating the washer. In a basement installation do not exceed a standpipe height of 96” (2438 mm).
Inlet hoses
1Install hoses with the straight end (with filters) fitted to the faucets (refer to Fig.3).
2Install elbow ends onto clothes washer (inlet valves are marked on the back of the washer H=hot, C=cold) (refer to Fig.4).
Fig.3 Faucet end of hose | Fig.4 Washer end of hose |
