Assembly
•Please wipe each part with a clean, dry cloth before assembly.
•Save all packaging material until assembly is complete to ensure that parts are not discarded.
Before First Use | 2 |
|
The cooling drawer must be filled with water | Tabs | |
and frozen. The drawer lets the kitchen "bake" |
|
|
the color change treats. |
|
|
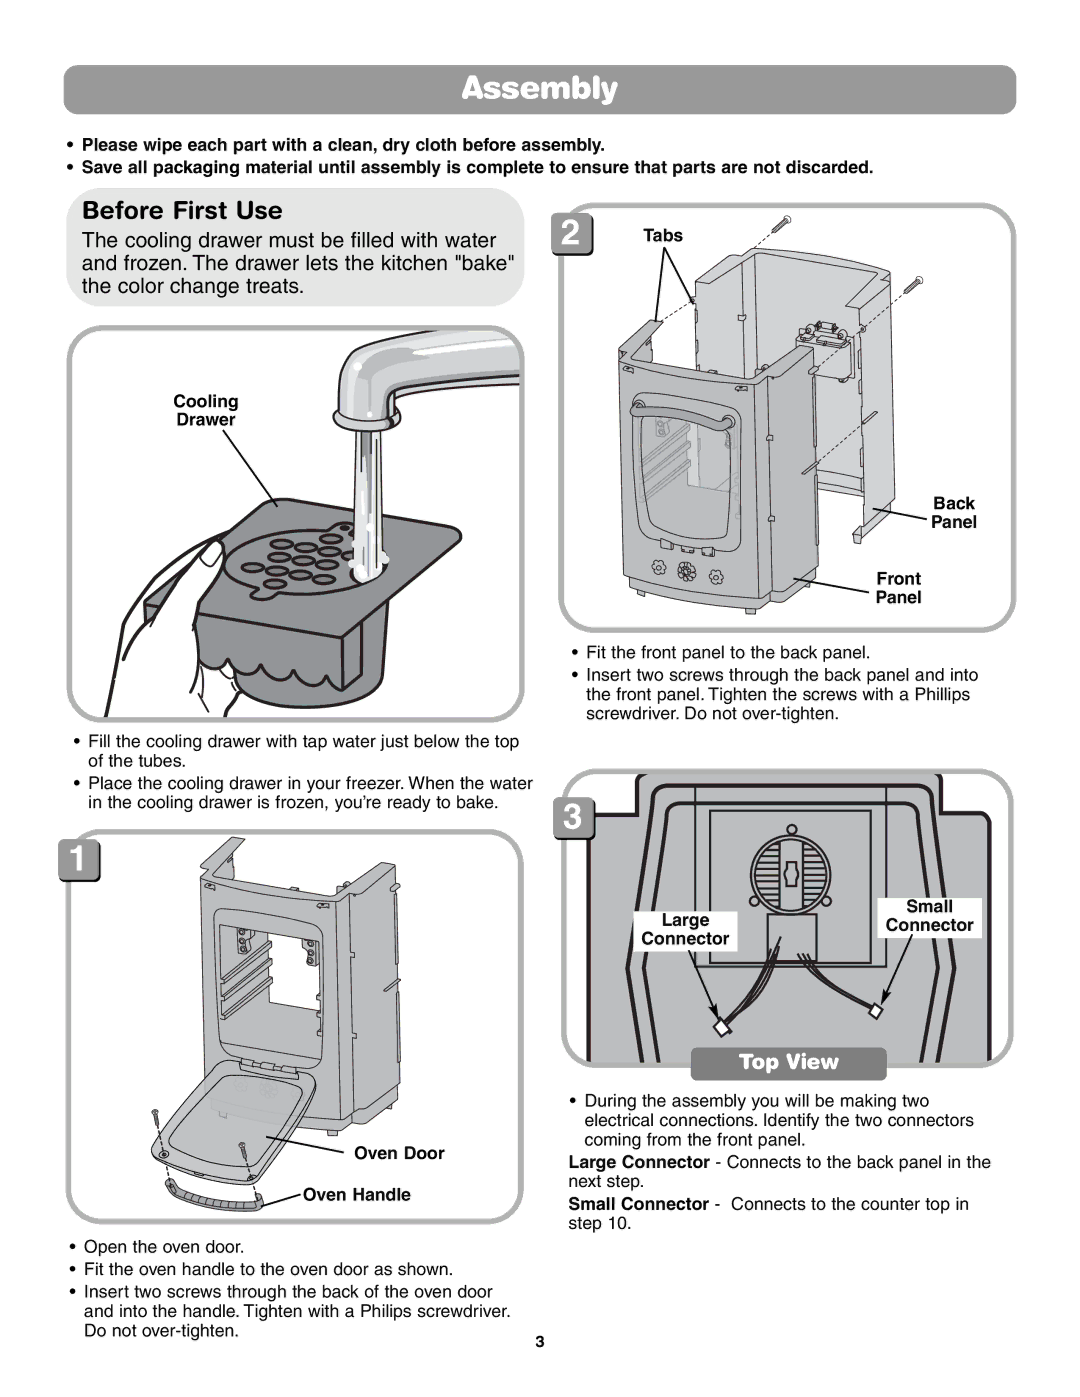
Cooling
Drawer
Back
Panel
Front
Panel
•Fill the cooling drawer with tap water just below the top of the tubes.
•Place the cooling drawer in your freezer. When the water in the cooling drawer is frozen, you’re ready to bake.
1
•Fit the front panel to the back panel.
•Insert two screws through the back panel and into the front panel. Tighten the screws with a Phillips screwdriver. Do not
3
Oven Door
 Oven Handle
• Open the oven door.
• Fit the oven handle to the oven door as shown.
• Insert two screws through the back of the oven door and into the handle. Tighten with a Philips screwdriver. Do not
3
Small
LargeConnector
Connector
Top View
•During the assembly you will be making two electrical connections. Identify the two connectors coming from the front panel.
Large Connector - Connects to the back panel in the next step.
Small Connector - Connects to the counter top in step 10.
