F
Assembly
Do Not Omit Any Steps
1 | 3 | |
|
| |
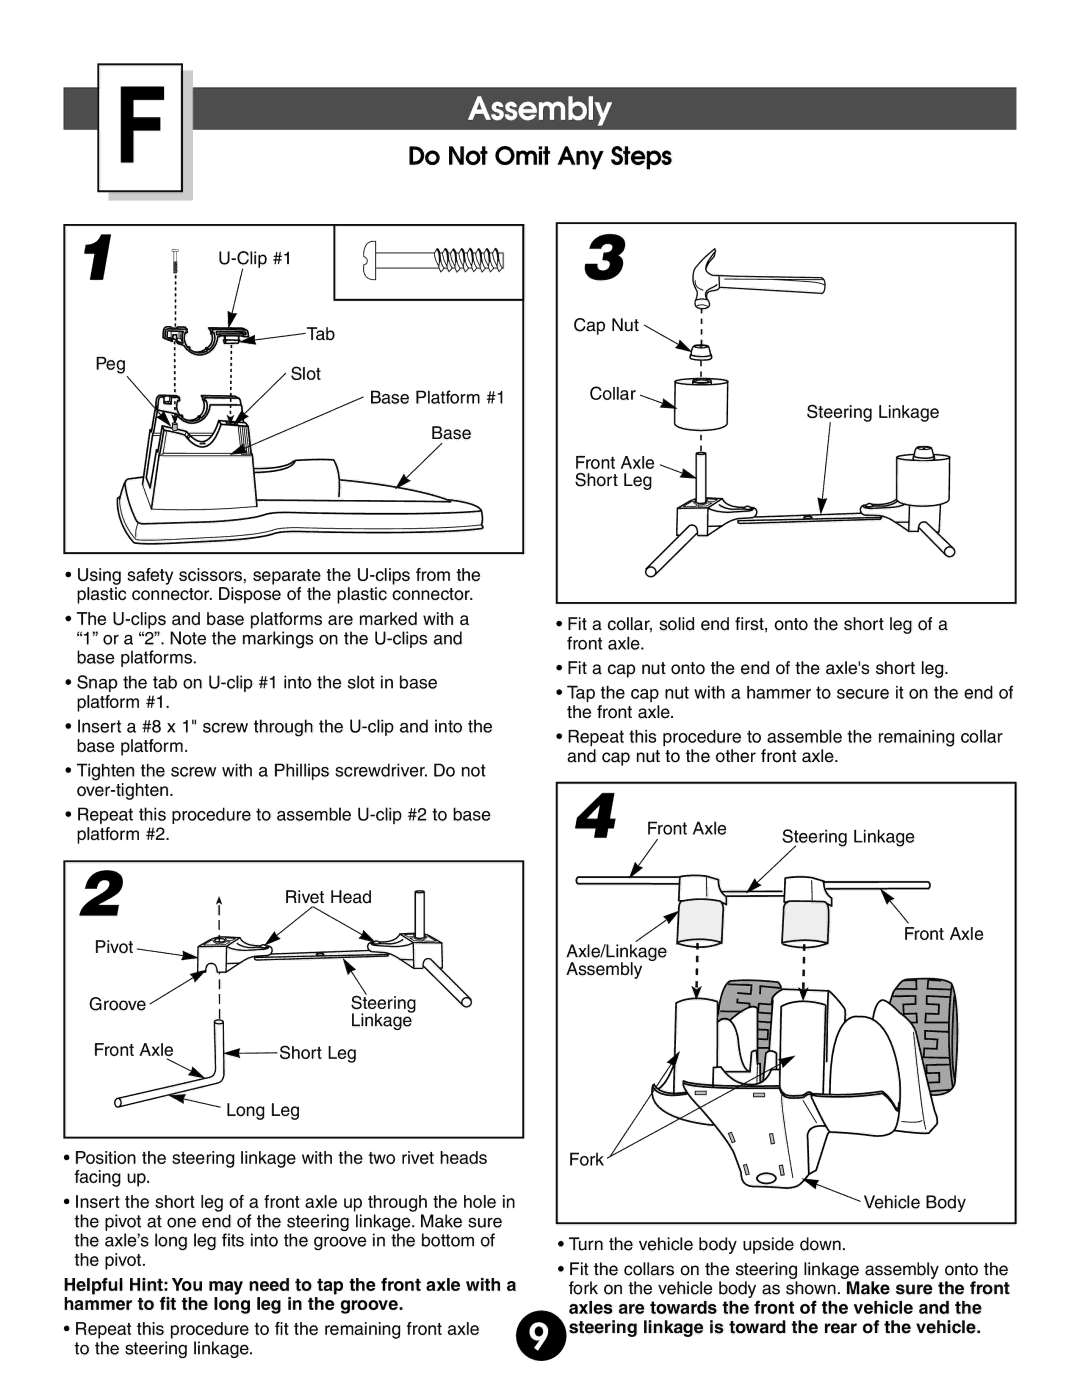
| Tab | Cap Nut |
|
| |
Peg | Slot |
|
| Collar | |
| Base Platform #1 | |
|
| Steering Linkage |
| Base |
|
| 1 |
|
|
| Front Axle |
|
| Short Leg |
•Using safety scissors, separate the
• The | • Fit a collar, solid end first, onto the short leg of a | |
“1” or a “2”. Note the markings on the | ||
front axle. | ||
base platforms. | ||
• Fit a cap nut onto the end of the axle's short leg. | ||
|
• Snap the tab on
platform #1.• Tap the cap nut with a hammer to secure it on the end of the front axle.
• Insert a #8 x 1" screw through the
base platform.• Repeat this procedure to assemble the remaining collar and cap nut to the other front axle.
• Tighten the screw with a Phillips screwdriver. Do not |
| 4 |
|
| |
|
|
|
| ||
• Repeat this procedure to assemble |
| Front Axle |
| ||
platform #2. |
|
| Steering Linkage | ||
|
|
| |||
2 | Rivet Head |
|
|
|
|
|
|
|
|
| |
Pivot |
|
| Axle/Linkage | Front Axle | |
|
|
| |||
|
|
| Assembly |
|
|
Groove | Steering |
|
|
|
|
| Linkage |
|
|
|
|
Front Axle | Short Leg |
|
|
|
|
| Long Leg |
|
|
|
|
• Position the steering linkage with the two rivet heads |
| Fork |
|
| |
facing up. |
|
|
|
|
|
• Insert the short leg of a front axle up through the hole in |
|
|
| Vehicle Body | |
the pivot at one end of the steering linkage. Make sure |
|
|
|
| |
the axle’s long leg fits into the groove in the bottom of |
| • Turn the vehicle body upside down. | |||
the pivot. |
|
| • Fit the collars on the steering linkage assembly onto the | ||
Helpful Hint: You may need to tap the front axle with a |
| ||||
| fork on the vehicle body as shown. Make sure the front | ||||
hammer to fit the long leg in the groove. | 9 | axles are towards the front of the vehicle and the | |||
• Repeat this procedure to fit the remaining front axle | steering linkage is toward the rear of the vehicle. | ||||
to the steering linkage. |
|
|
| ||