INSTALLATION
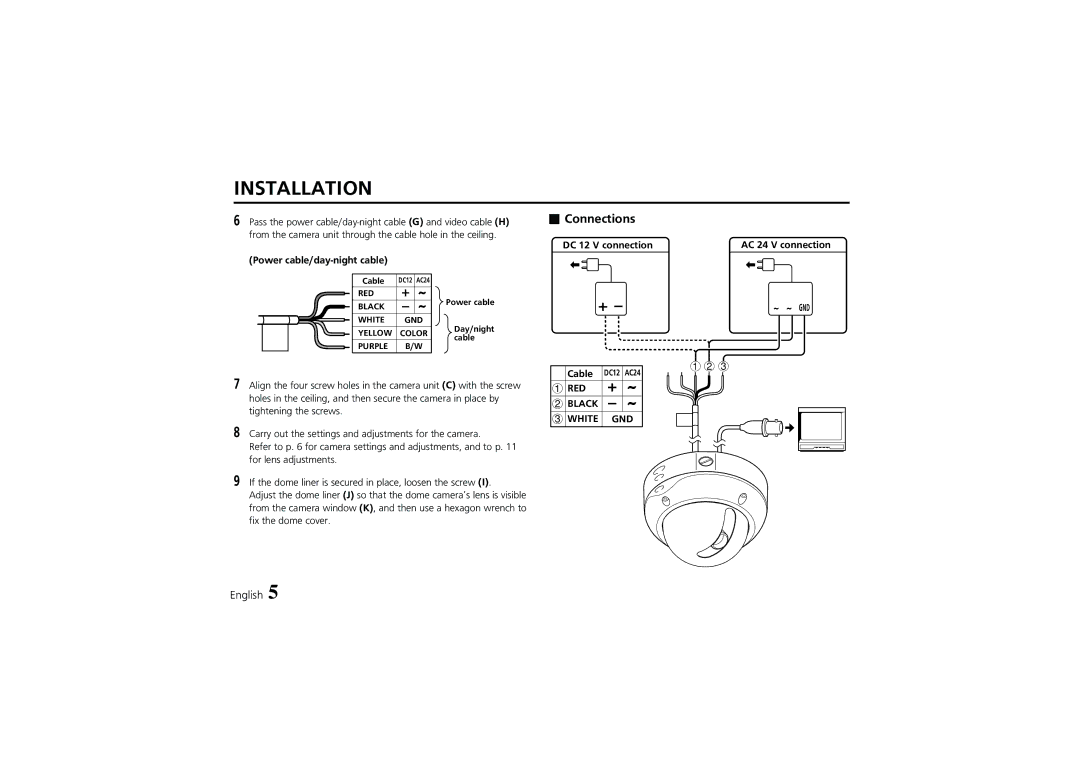
6Pass the power
(Power cable/day-night cable)
Cable | DC12 | AC24 |
| |
RED | + | ~ | Power cable | |
BLACK | – | ~ | ||
| ||||
WHITE | GND | Day/night | ||
|
|
| ||
YELLOW | COLOR | |||
cable | ||||
|
|
| ||
PURPLE | B/W |
| ||
|
|
|
| |
7Align the four screw holes in the camera unit (C) with the screw holes in the ceiling, and then secure the camera in place by tightening the screws.
8Carry out the settings and adjustments for the camera.
Refer to p. 6 for camera settings and adjustments, and to p. 11 for lens adjustments.
9If the dome liner is secured in place, loosen the screw (I).
Adjust the dome liner (J) so that the dome camera’s lens is visible from the camera window (K), and then use a hexagon wrench to fix the dome cover.
 Connections
DC 12 V connection | AC 24 V connection | ||
| + – |
| ~ ~ GND |
Cable | DC12 | AC24 | 123 |
| |||
1 RED | + | ~ |
|
2 BLACK | – | ~ |
|
3 WHITE | GND |
| |
English 5