General
1.Never allow children or people unfamiliar with these instructions to use the product. Local regulations may restrict the age of the operator.
2.Only use the product in the manner and for the functions described in these instructions.
3.Never operate the product when you are tired, ill or under the influence of alcohol, drugs or medicine.
4.The operator or user is responsible for accidents or hazards occurring to other people or their prop- erty.
5.Keep bystanders away. Do not operate whilst people, especially children or pets are in the area.
Battery
Cordless Battery Powered Products require special care.
1.AVOID ACCIDENTAL STARTING
KEEP HANDS AND FINGERS AWAY FROM THE SWITCH LEVER WHILE CARRYING THE PROD- UCT.
2.Do not attempt to repair the unit including the battery. Nylon line replacement and cleaning the unit are the only items suitable for user maintenance.
3.Do not insert any object into the motor area.
Keep free of debris to avoid overheating.
Preparation
1.While using your product always wear substantial footwear and long trousers.
2.Before using the machine and after any impact, check for signs of wear or damage and repair as necessary.
3.Inspect the area to be cut before each use. Remove all objects such as stones, broken glass, nails, wire, string etc, which can be thrown or become entangled in the trimmer head.
4.Check that the cutting head, spool and cap are
fitted correctly.
Use
1.Use the trimmer only in daylight or good artificial light.
2.Avoid operating your trimmer in wet grass, where feasi- ble.
3.Take care in wet grass, you may lose your foot- ing.
4.On slopes, be extra careful of your footing and wear
5.Do not walk backwards when trimming, you could trip. Walk, never run.
6.Switch off before pushing the trimmer over sur- faces other than grass.
7.Never operate the trimmer with damaged guards or without guards in place.
8.Never fit metal cutting elements.
9.Keep hands and feet away from the cutting means at all times and especially when switching on the motor.
10.Keep cutting head below waist level.
11.Do not lean over the trimmer guard whilst trimming or edging - objects may be thrown by the cutting line.
12.Beware of
13.If you hit an object, do not use your trimmer until you are sure that the entire trimmer is in a safe operating condition.
14.If the trimmer starts to vibrate abnormally, check immediately. Excessive vibration can cause
injury.
Maintenance and storage
1.Keep all nuts, bolts and screws tight to be sure the trimmer is in safe working condition.
2.Replace worn or damaged parts for safety.
3.Only use the replacement cutting line specified for this product.
4.Only use replacement parts and accessories recom- mended by Husqvarna Outdoor Products.
5.To avoid the risk of injury keep fingers and hands clear of the line cutter on the leading edge of the guard.
6.Clean unit with a dry cloth. Never use metal objects to clean the unit.
7.Inspect and maintain the trimmer regularly. Any repairs must be carried out by an authorised repair- er.
Assembly Instructions
A |
1 |
2 |
C |
B |
D |
1 |
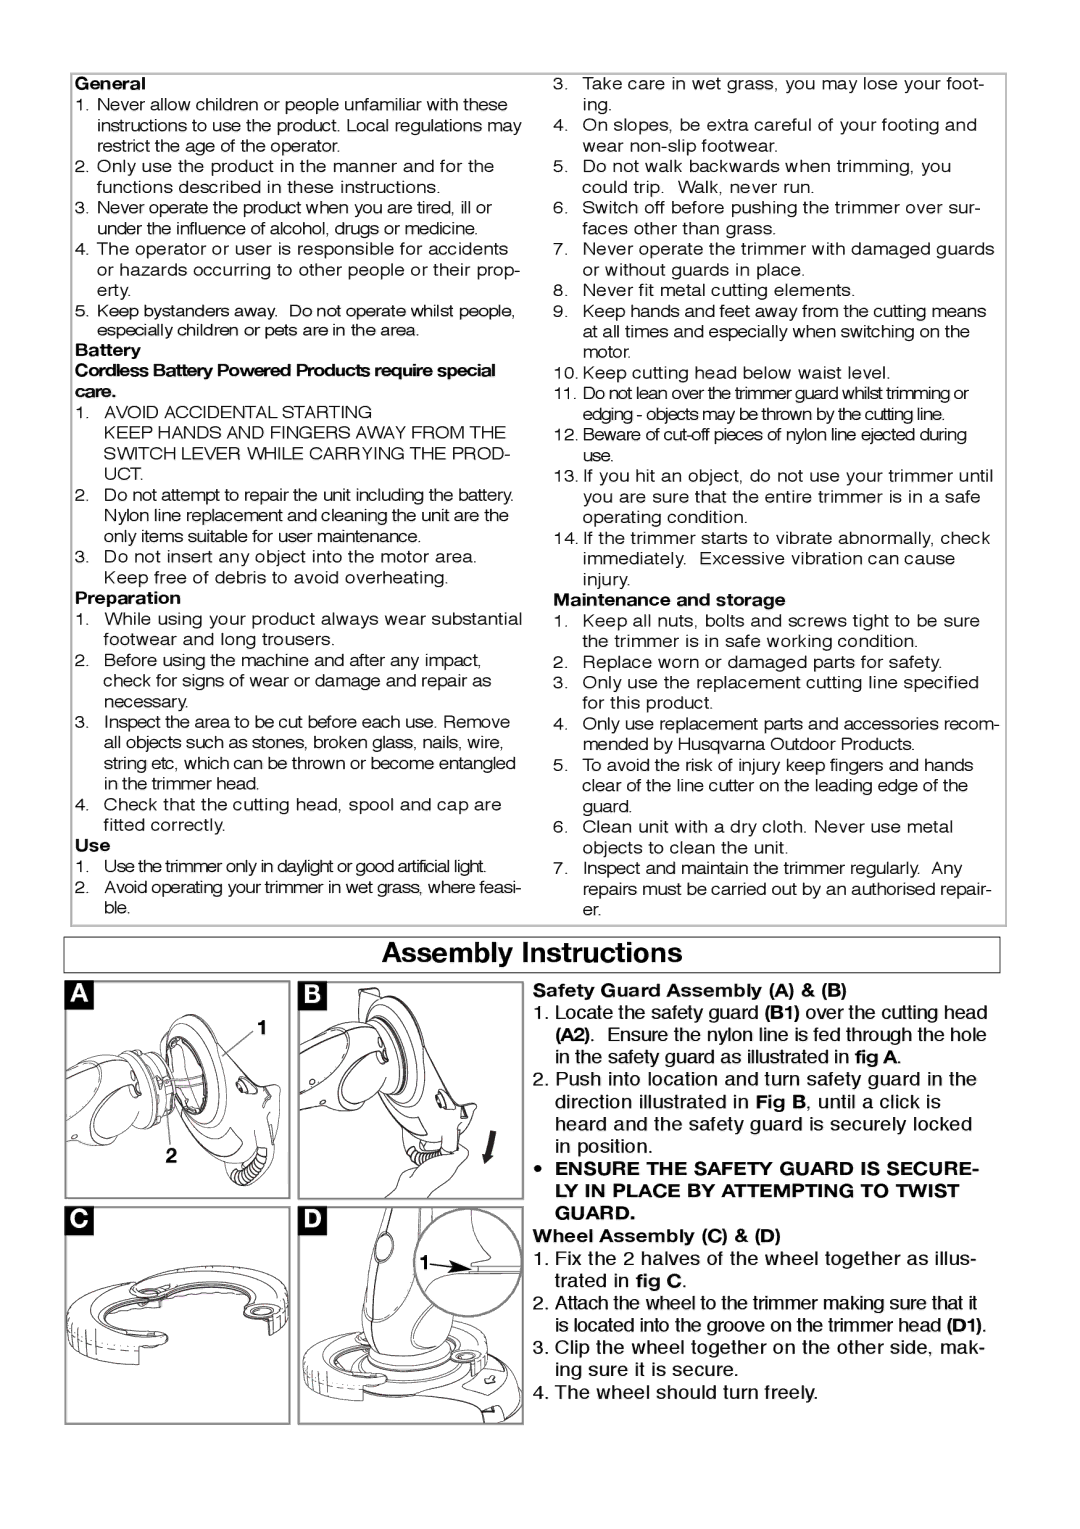
Safety Guard Assembly (A) & (B)
1.Locate the safety guard (B1) over the cutting head (A2). Ensure the nylon line is fed through the hole in the safety guard as illustrated in fig A.
2.Push into location and turn safety guard in the direction illustrated in Fig B, until a click is heard and the safety guard is securely locked
in position.
• ENSURE THE SAFETY GUARD IS SECURE- LY IN PLACE BY ATTEMPTING TO TWIST GUARD.
Wheel Assembly (C) & (D)
1.Fix the 2 halves of the wheel together as illus- trated in fig C.
2.Attach the wheel to the trimmer making sure that it is located into the groove on the trimmer head (D1).
3.Clip the wheel together on the other side, mak- ing sure it is secure.
4.The wheel should turn freely.