Vac1050 specifications
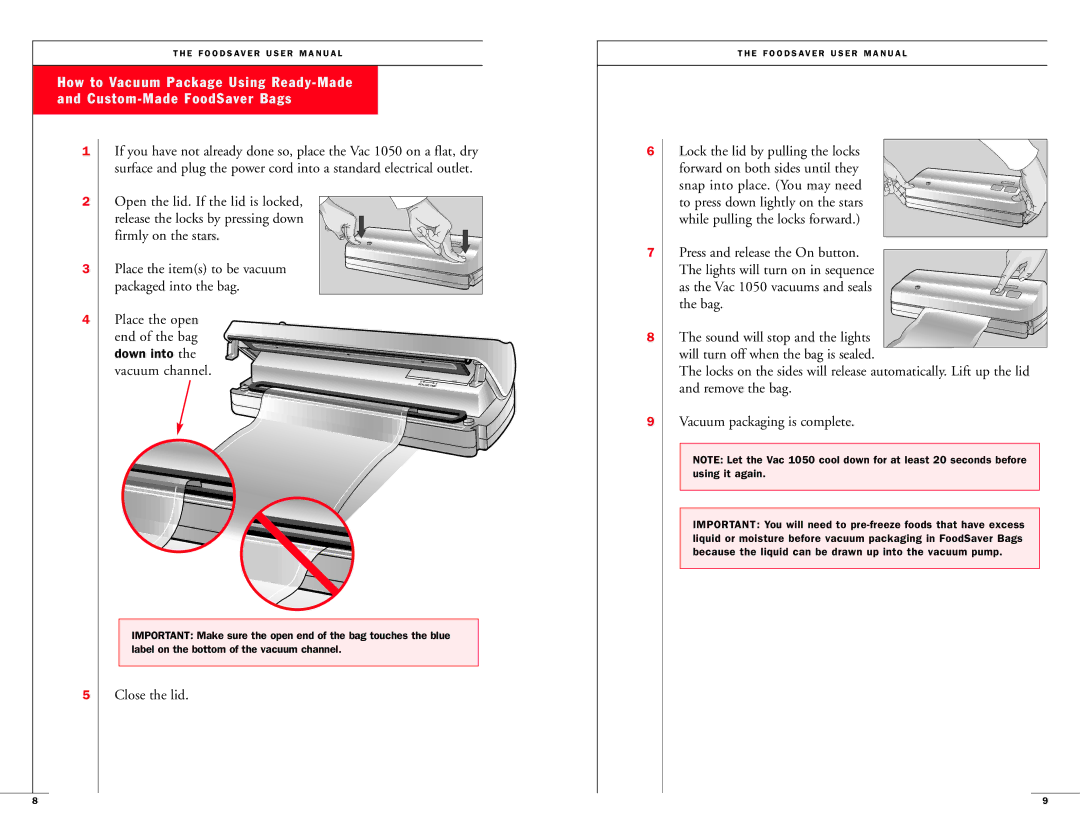
The FoodSaver Vac1050 is a leading vacuum sealing system designed to enhance food preservation and minimize waste. With state-of-the-art features and technologies, it stands out as a favorite among home cooks and meal preppers. This vacuum sealer employs an advanced sealing mechanism that creates an airtight seal, effectively prolonging the shelf life of food items.One of the main features of the FoodSaver Vac1050 is its user-friendly design. It operates with a simple one-touch vacuum and seal function, streamlining the sealing process for users of all skill levels. The machine is equipped with an indicator light that signals when the vacuuming and sealing process is complete, ensuring optimal operation and preventing user errors. Its compact size makes it easy to store, perfect for kitchens with limited space.
The Vac1050 utilizes cutting-edge technology to provide superior vacuum sealing capabilities. It features a powerful motor that removes air from vacuum bags quickly and efficiently, preserving food's freshness and preventing freezer burn. Compatible with a wide array of FoodSaver bags and rolls, this vacuum sealer allows users to customize the size of the bags according to their needs, offering added versatility.
Another notable characteristic of the FoodSaver Vac1050 is its built-in roll storage and cutter, enabling users to create custom bag sizes effortlessly. This eliminates the hassle of measuring and cutting bags manually, making the process even more convenient. Additionally, the machine offers a moist/dry food setting, allowing for proper sealing of both dry items and delicate or juicy foods, ensuring that all food types can be vacuum sealed effectively.
Ease of cleaning is another advantage of the Vac1050, as it features a removable drip tray that catches any excess liquid during the sealing process, making cleanup straightforward. Furthermore, the device includes a one-year limited warranty, providing consumers with peace of mind regarding their purchase.
In summary, the FoodSaver Vac1050 is a versatile and efficient vacuum sealing solution that combines user-friendly features, advanced technology, and a compact design. Whether for preserving leftovers, bulk purchasing, or sous-vide cooking, this vacuum sealer proves to be an invaluable tool for enhancing the culinary experience and maintaining food quality over time.

