Model D2424LV Quick Operation Guide 

• Connecting cables
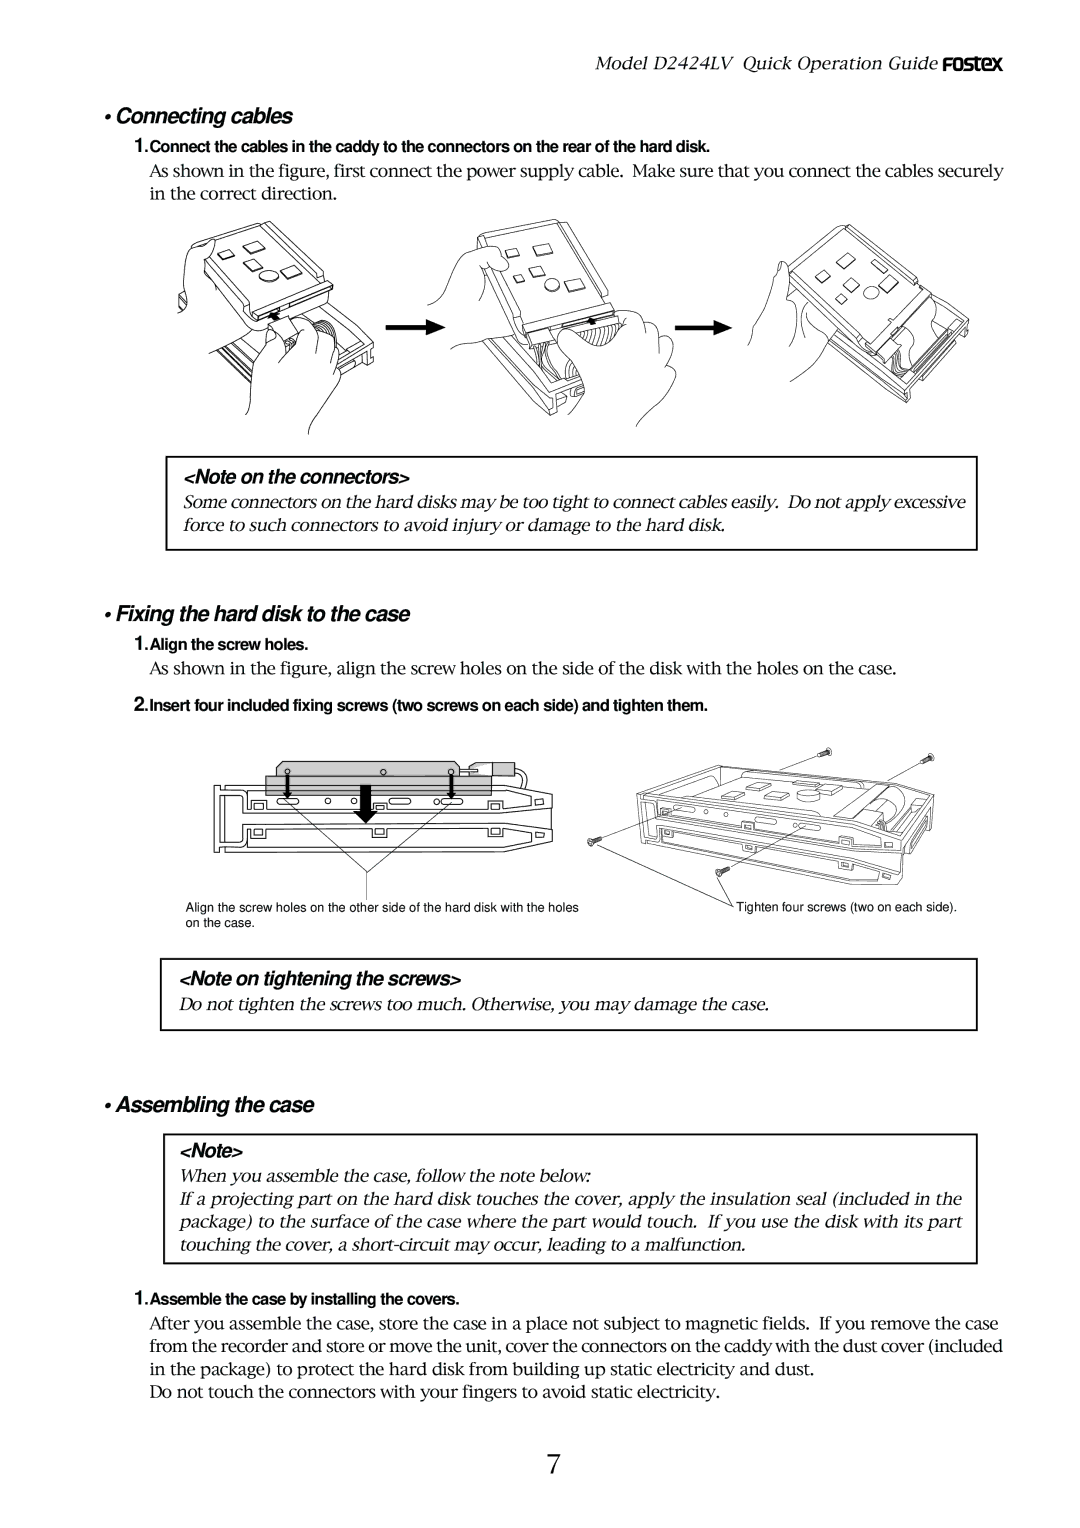
1.Connect the cables in the caddy to the connectors on the rear of the hard disk.
As shown in the figure, first connect the power supply cable. Make sure that you connect the cables securely in the correct direction.
<Note on the connectors>
Some connectors on the hard disks may be too tight to connect cables easily. Do not apply excessive force to such connectors to avoid injury or damage to the hard disk.
• Fixing the hard disk to the case
1.Align the screw holes.
As shown in the figure, align the screw holes on the side of the disk with the holes on the case.
2.Insert four included fixing screws (two screws on each side) and tighten them.
Align the screw holes on the other side of the hard disk with the holes on the case.
Tighten four screws (two on each side).
<Note on tightening the screws>
Do not tighten the screws too much. Otherwise, you may damage the case.
• Assembling the case
<Note>
When you assemble the case, follow the note below:
If a projecting part on the hard disk touches the cover, apply the insulation seal (included in the package) to the surface of the case where the part would touch. If you use the disk with its part touching the cover, a
1.Assemble the case by installing the covers.
After you assemble the case, store the case in a place not subject to magnetic fields. If you remove the case from the recorder and store or move the unit, cover the connectors on the caddy with the dust cover (included in the package) to protect the hard disk from building up static electricity and dust.
Do not touch the connectors with your fingers to avoid static electricity.
7