D824/D1624 Quick Operation Guide 

Basic analog recording
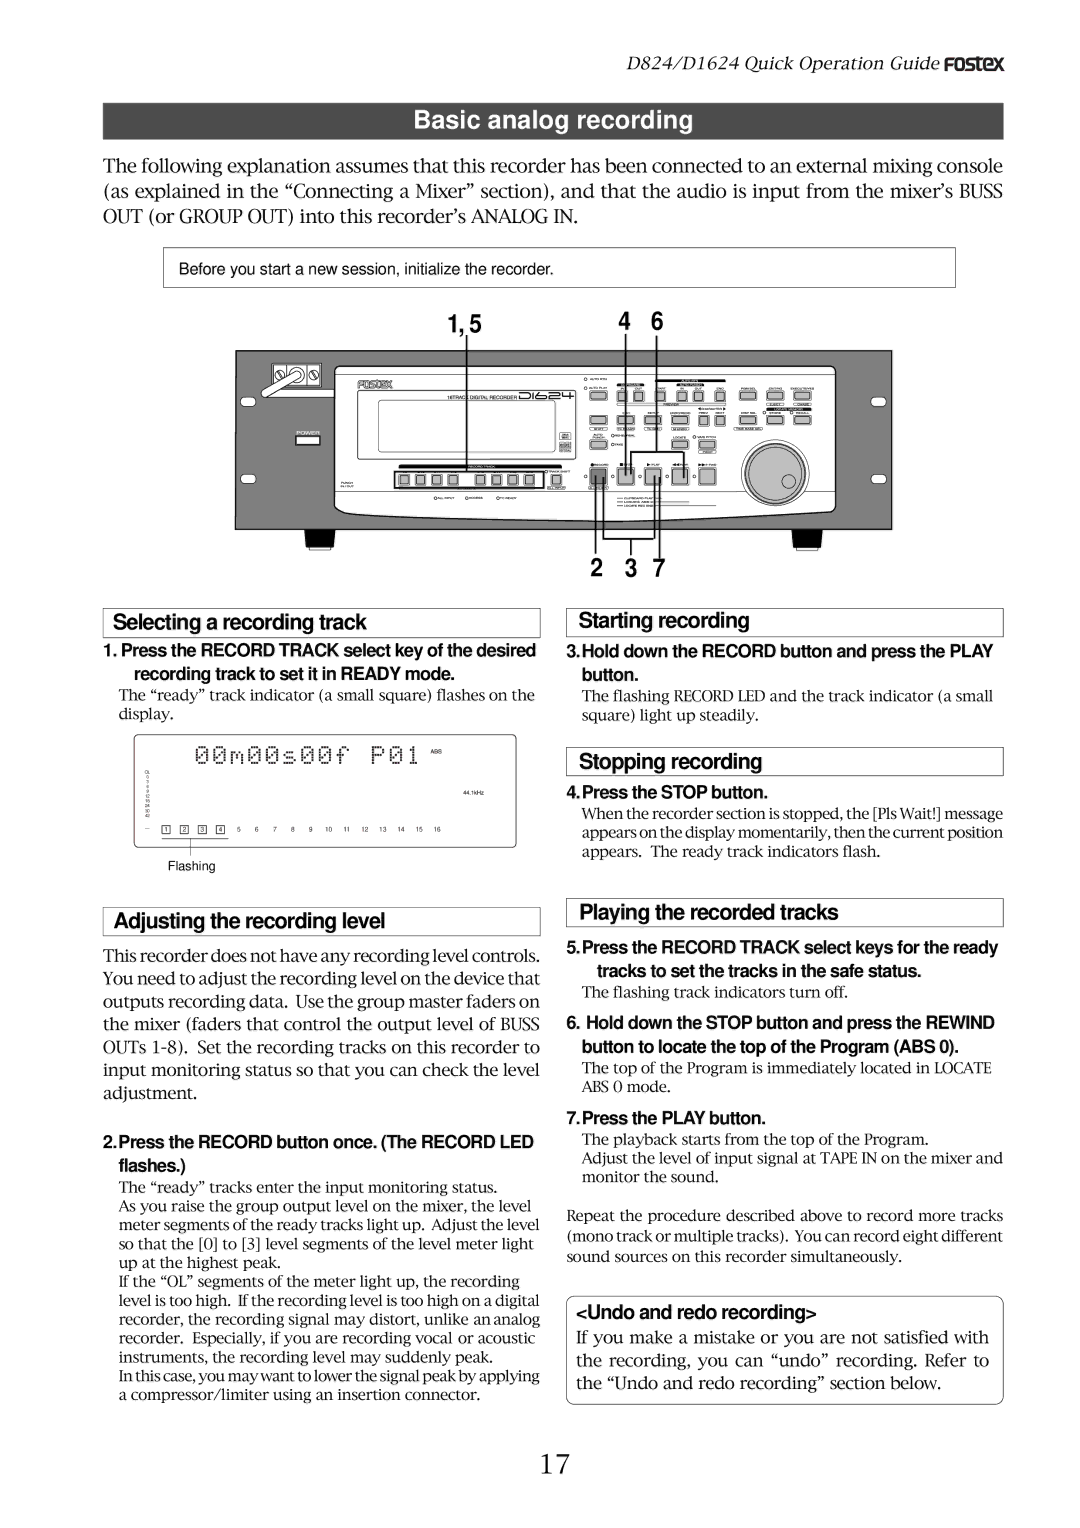
The following explanation assumes that this recorder has been connected to an external mixing console (as explained in the “Connecting a Mixer” section), and that the audio is input from the mixer’s BUSS OUT (or GROUP OUT) into this recorder’s ANALOG IN.
Before you start a new session, initialize the recorder.
1, 5 | 4 | 6 |
Selecting a recording track
1. Press the RECORD TRACK select key of the desired recording track to set it in READY mode.
The “ready” track indicator (a small square) flashes on the display.
2 3 7
Starting recording
3.Hold down the RECORD button and press the PLAY button.
The flashing RECORD LED and the track indicator (a small square) light up steadily.
OL |
|
|
|
|
|
|
|
|
|
|
|
|
|
|
|
|
0 |
|
|
|
|
|
|
|
|
|
|
|
|
|
|
|
|
3 |
|
|
|
|
|
|
|
|
|
|
|
|
|
|
|
|
6 |
|
|
|
|
|
|
|
|
|
|
|
|
|
|
|
|
9 |
|
|
|
|
|
|
|
|
|
|
|
|
|
|
|
|
12 |
|
|
|
|
|
|
|
|
|
|
|
|
|
|
|
|
18 |
|
|
|
|
|
|
|
|
|
|
|
|
|
|
|
|
24 |
|
|
|
|
|
|
|
|
|
|
|
|
|
|
|
|
30 |
|
|
|
|
|
|
|
|
|
|
|
|
|
|
|
|
42 |
|
|
|
|
|
|
|
|
|
|
|
|
|
|
|
|
∞ |
|
|
|
|
|
|
|
|
|
|
|
|
|
|
|
|
_ | 1 | 2 | 3 | 4 | 5 | 6 | 7 | 8 | 9 | 10 | 11 | 12 | 13 | 14 | 15 | 16 |
|
Flashing
Stopping recording
4.Press the STOP button.
When the recorder section is stopped, the [Pls Wait!] message appears on the display momentarily, then the current position appears. The ready track indicators flash.
Adjusting the recording level
This recorder does not have any recording level controls. You need to adjust the recording level on the device that outputs recording data. Use the group master faders on the mixer (faders that control the output level of BUSS OUTs
2.Press the RECORD button once. (The RECORD LED flashes.)
The “ready” tracks enter the input monitoring status.
As you raise the group output level on the mixer, the level meter segments of the ready tracks light up. Adjust the level so that the [0] to [3] level segments of the level meter light up at the highest peak.
If the “OL” segments of the meter light up, the recording level is too high. If the recording level is too high on a digital recorder, the recording signal may distort, unlike an analog recorder. Especially, if you are recording vocal or acoustic instruments, the recording level may suddenly peak.
In this case, you may want to lower the signal peak by applying a compressor/limiter using an insertion connector.
Playing the recorded tracks
5.Press the RECORD TRACK select keys for the ready tracks to set the tracks in the safe status.
The flashing track indicators turn off.
6. Hold down the STOP button and press the REWIND button to locate the top of the Program (ABS 0).
The top of the Program is immediately located in LOCATE ABS 0 mode.
7.Press the PLAY button.
The playback starts from the top of the Program.
Adjust the level of input signal at TAPE IN on the mixer and monitor the sound.
Repeat the procedure described above to record more tracks (mono track or multiple tracks). You can record eight different sound sources on this recorder simultaneously.
<Undo and redo recording>
If you make a mistake or you are not satisfied with the recording, you can “undo” recording. Refer to the “Undo and redo recording” section below.
17