WARNING
• A stud MUST be located and used for at least one side of the diaper changing station.
• The diaper changing station is no stronger than the anchors or walls to which they are attached and, therefore, MUST be firmly secured in order to support the weight they are intended to support. Contact an architect or building contractor if any questions.
INSTALLATION
NOTE: If using a backer plate, go to “Using Backer Plate Mounting System” section.
1. Locate wood stud where left side of changing station will be mounted to the wall.
2. Measure up 46” (117 cm) from the floor and mark the wall. This locates the position for the top left attachment hole.
NOTE: Mark on wall MUST be in center of wood stud.
3. Align hole in top left corner of changing station with mark on wall and hold in place.
4. Using a level and measuring tape, mark the remaining three (3) holes. After marking holes, set changing station down on ground.
5. Use a power drill and appropriate bit to drill four (4) holes in the wall. This may require 2 people.
NOTE 1: For wood studs:
- If finished wall surface is tile or masonry over wood studs, use a 7/32” masonry bit for the pilot hole until you hit the wood stud, then change to 1/8” bit.
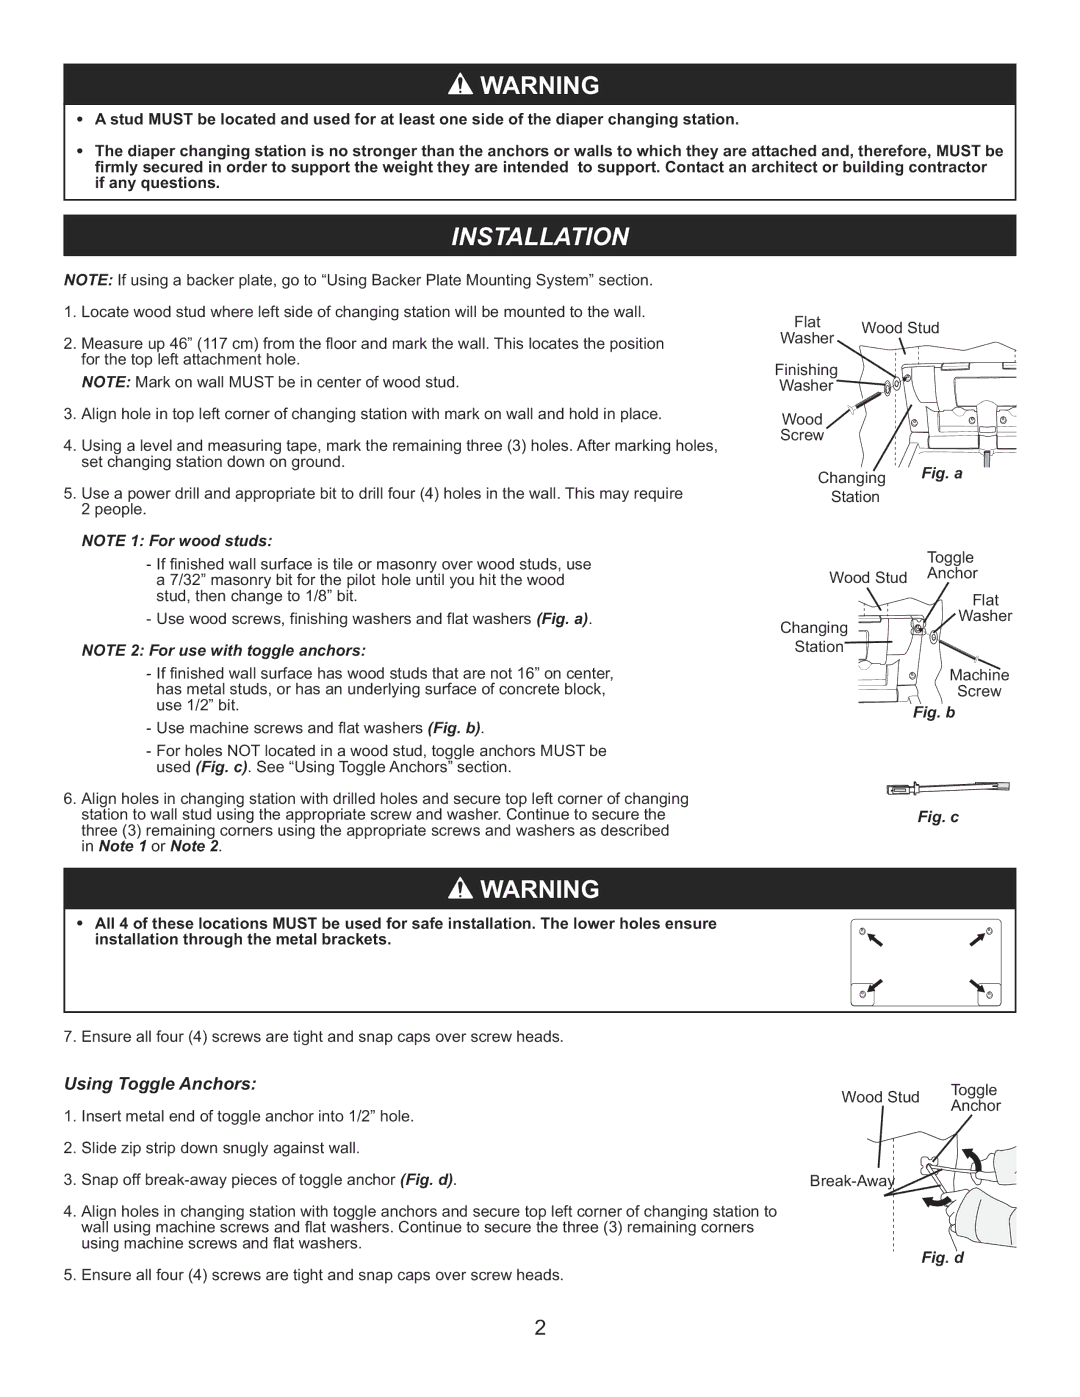
- Use wood screws, finishing washers and flat washers (Fig. a).
NOTE 2: For use with toggle anchors:
- If finished wall surface has wood studs that are not 16” on center, has metal studs, or has an underlying surface of concrete block, use 1/2” bit.
- Use machine screws and flat washers (Fig. b).
- For holes NOT located in a wood stud, toggle anchors MUST be used (Fig. c). See “Using ToggleAnchors” section.
6. Align holes in changing station with drilled holes and secure top left corner of changing station to wall stud using the appropriate screw and washer. Continue to secure the three (3) remaining corners using the appropriate screws and washers as described in Note 1 or Note 2.
WARNING
• All 4 of these locations MUST be used for safe installation. The lower holes ensure installation through the metal brackets.
Flat | Wood Stud | |
Washer | ||
Finishing |
|
|
Washer |
|
|
Wood |
|
|
Screw |
| Fig. a |
Changing | ||
Station |
| |
Wood Stud | Toggle | |
Anchor | ||
Changing |
| Flat |
| Washer | |
Station |
|
|
Machine

 Fig. b Screw
 Fig. c
7. Ensure all four (4) screws are tight and snap caps over screw heads.
Using Toggle Anchors:
1. Insert metal end of toggle anchor into 1/2” hole.
2. Slide zip strip down snugly against wall.
3. Snap off
4. Align holes in changing station with toggle anchors and secure top left corner of changing station to wall using machine screws and flat washers. Continue to secure the three (3) remaining corners using machine screws and flat washers.
5. Ensure all four (4) screws are tight and snap caps over screw heads.
Wood Stud | Toggle |
Anchor | |
|
Fig. d
2