Manuals
/
Friedrich
/
Household Appliance
/
Air Conditioner
Friedrich
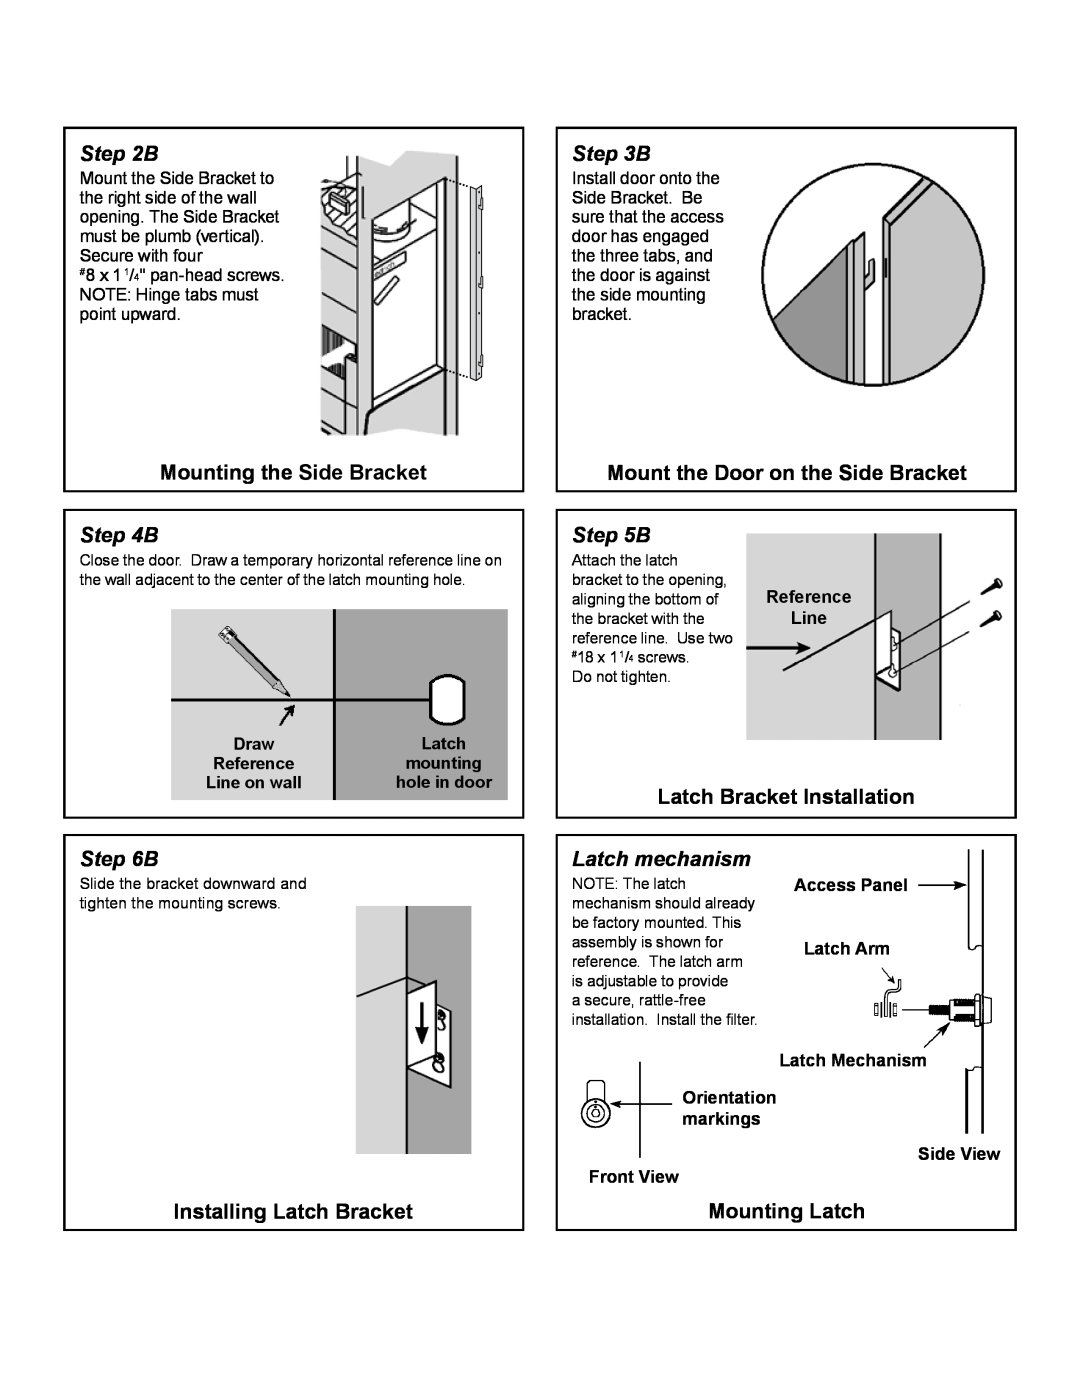
VPRG4 Mounting the Side Bracket, Mount the Door on the Side Bracket, Mounting Latch
Models:
VPRG4
1
5
5
Download
5 pages
45.85 Kb
1
2
3
4
5
Install
Return Air Grille/Access Panel
Page 5
Image 5
Page 4
Page 5
Page 5
Image 5
Page 4
Page 5
Contents
Return Air Grille/Access Panel
Installation Instructions
Return Air Grille Access Panel
VPRG4
Return Air Grille/Access Panel
Installation Instructions
Return Air Grille Access Panel
VPRG4
View A Left hinge View B Right hinge
Step
Installing Latch Bracket
Latch Bracket Installation
Access Panel Latch Arm
Step 2A
Step 4B
Step 2B
Step 3B
Step 5B
Top
Page
Image
Contents