1.7.1 Replacing the Operating Thermostat (cont.)
6.First, loosen the capillary tube compression fitting until it slides freely on the capillary tube. Second, loosen the frypot
7.Install the replacement thermostat capillary tube and bulb in the frypot. Apply a small amount of Loctite PST567 compound or equivalent to the threads of the frypot
8.Position the thermostat bulb in
9.Tighten the capillary tube compression nut once the capillary tube is properly positioned. NOTE: Once the compression nut is tightened, the capillary tube cannot be repositioned. If a mistake in installation has been made, a new thermostat will have to be installed.
10.Mount the thermostat control to the mounting bracket using the screws removed in Step 4.
11.Connect the wires disconnected in Step 3 to the thermostat.
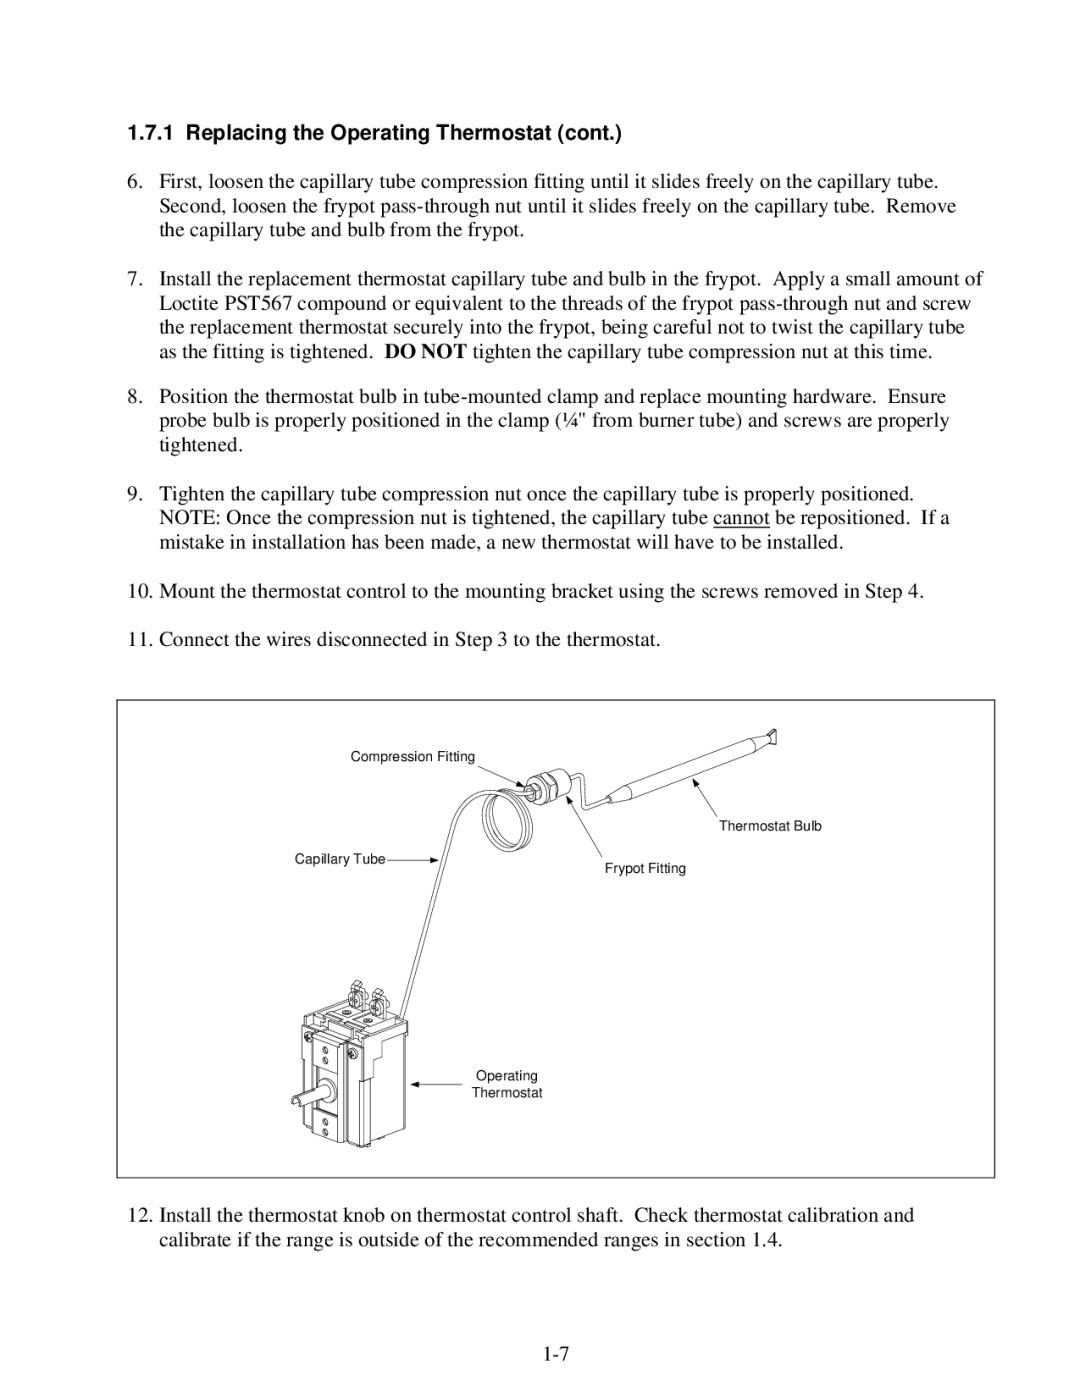
Compression Fitting |
|
| Thermostat Bulb |
Capillary Tube | Frypot Fitting |
| |
Operating |
|
Thermostat |
|
12.Install the thermostat knob on thermostat control shaft. Check thermostat calibration and calibrate if the range is outside of the recommended ranges in section 1.4.