Colour monitor 4312 FA
Changing the monitor settings
When putting the monitor into operation for the first time, the screen display should be optimally adapted to the screen controller used and adjusted in accordance with your needs.
Basic monitor settings with the floppy disk supplied
If one of the operating systems Windows for Workgroups, Windows 95/98, Windows NT or OS/2 (with Windows emulation installed) is used, the basic monitor settings can be set with the floppy disk supplied.
ÊInsert the supplied floppy disk into the floppy disk drive.
ÊOpen the Readme file on the floppy disk and follow the instructions in the file.
Your monitor should now already be properly adjusted. If none of the above operating systems is used or minor corrections are to be made to the screen display, then change the monitor settings with the OSD menu.
Monitor settings using the OSD menu
You can use the buttons on the control panel to set the screen display via an integrated OSD menu
The OSD menu is available in five languages (default setting: English). How you set a
i different language for the OSD menu is described in the section "Setting the language for the OSD menu".
AUTO | EXIT |
| MENU | |||||
A |
|
|
|
|
|
|
| 1 |
|
|
|
|
|
|
| ||
B |
|
|
|
|
|
| ||
|
|
|
|
|
|
|
| |
|
|
|
|
|
|
|
| |
|
|
|
|
| ||||
|
|
|
|
|
| |||
|
| 2 |
|
| ||||
|
|
|
|
|
|
|
|
|
1 = Power button |
|
| 2 = Power indicator | |||||
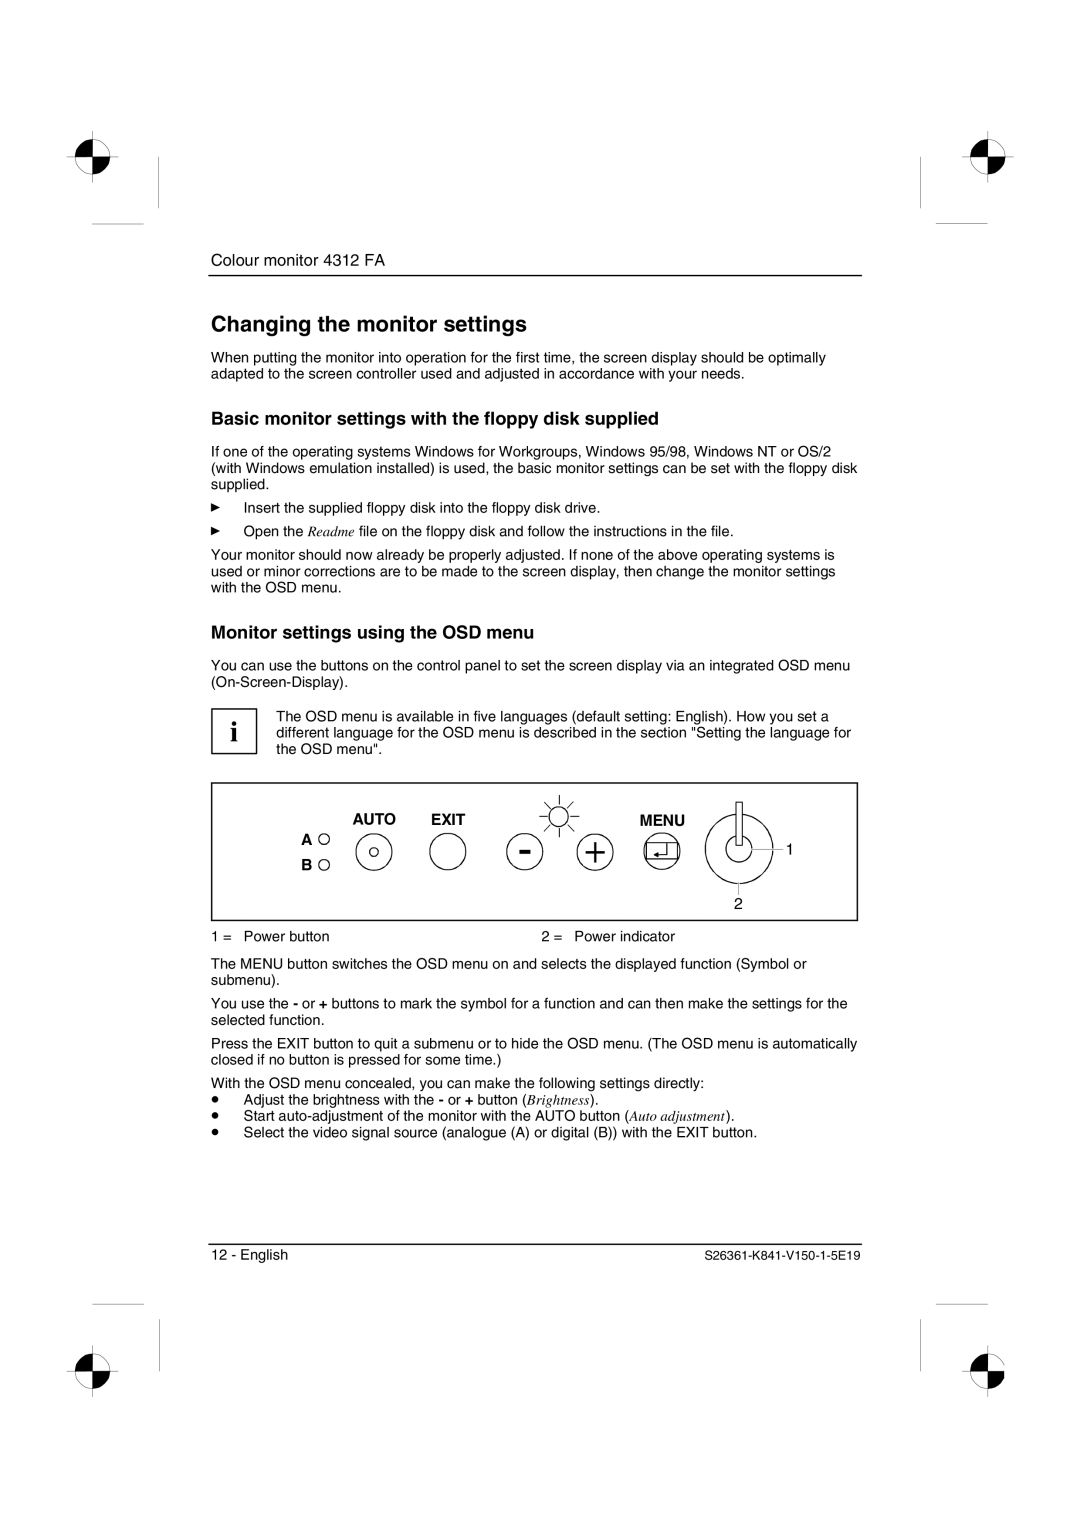
The MENU button switches the OSD menu on and selects the displayed function (Symbol or submenu).
You use the - or + buttons to mark the symbol for a function and can then make the settings for the selected function.
Press the EXIT button to quit a submenu or to hide the OSD menu. (The OSD menu is automatically closed if no button is pressed for some time.)
With the OSD menu concealed, you can make the following settings directly:
•Adjust the brightness with the - or + button (Brightness).
•Start
•Select the video signal source (analogue (A) or digital (B)) with the EXIT button.
12 - English |
