Setup
Connections
Please refer to “Basic TV Connection” on the front page before you use this unit.
RF Output Channel
If channel 3 has been already occupied for broadcasting,
1)Set your TV to channel 4.
2)Insert a
3)Press [SOURCE] on the unit so that the VCR SOURCE light is lit.
•If noise appears on the TV screen, press [VCR/ TV] on the remote control.
4)Press [PLAY B] once.
5)After a few seconds, press and hold [PLAY B] on the unit for 3 seconds.
•The RF output channel will change to chan- nel 4 from channel 3 and you will see a playback picture.
•When a picture does not appear on the TV screen, repeat step 4.
6)Press [STOP C] to stop playback.
Hint
•The RF output channel does not change when you adjust tracking during playback. In case RF output channel changes, you can easily switch it back. Start the playback again then press and hold
[PLAY B] on the unit for 3 seconds.
Setup
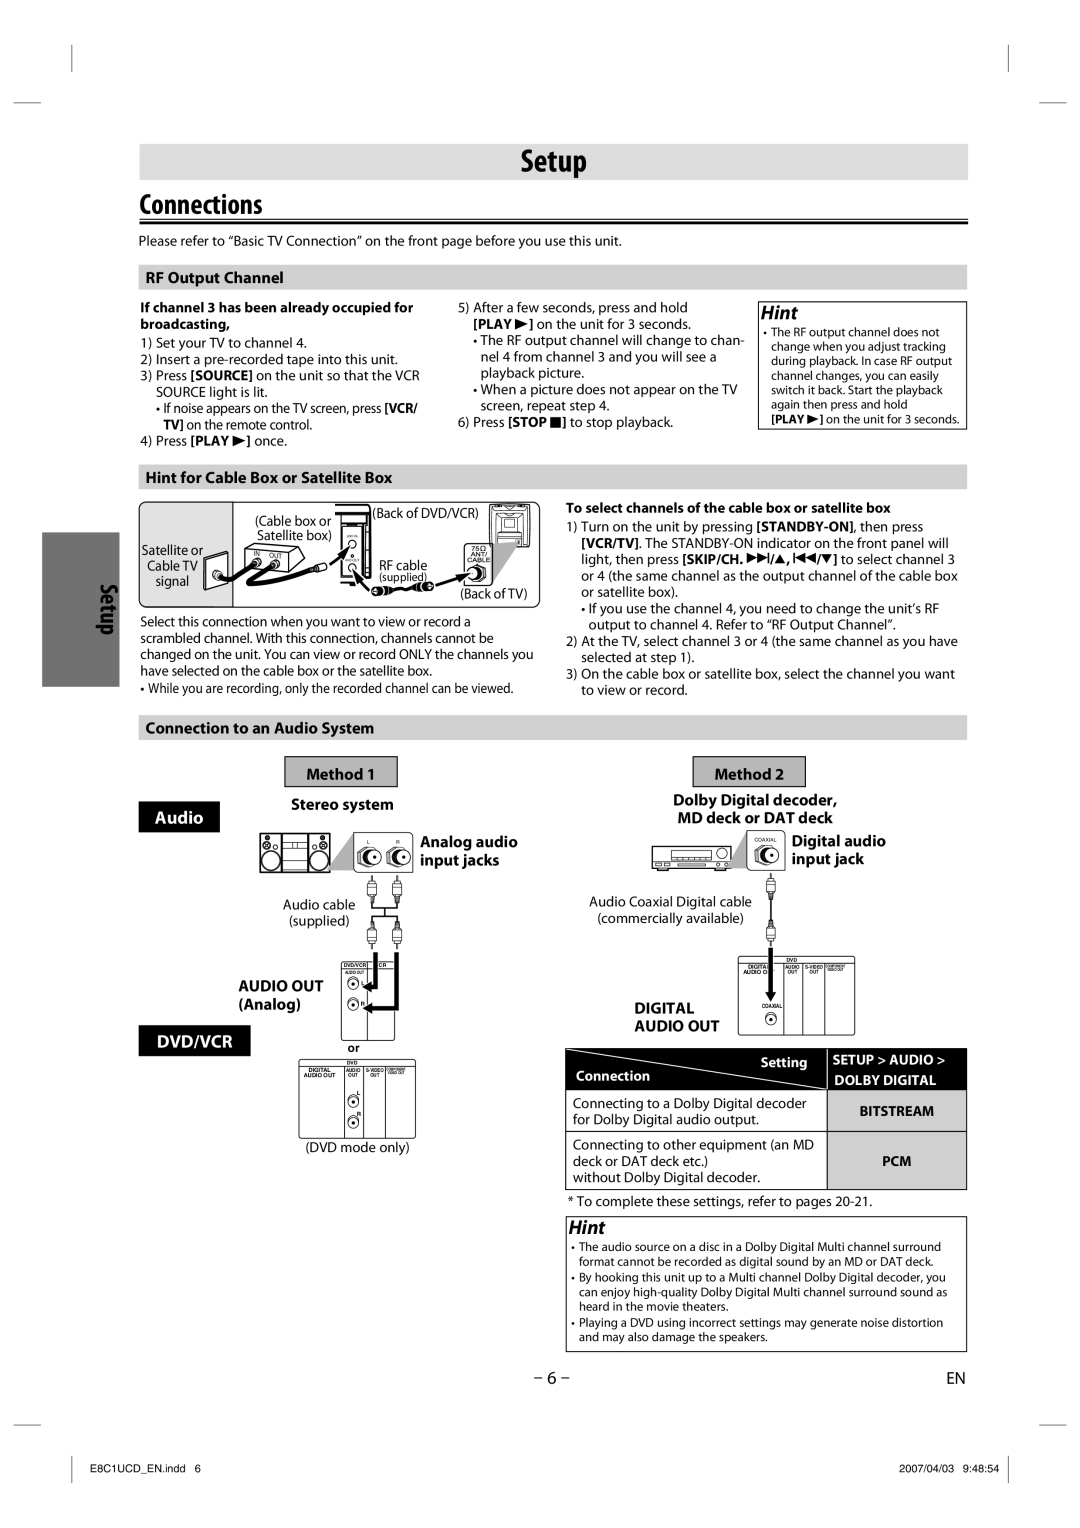
Hint for Cable Box or Satellite Box
| (Cable box or |
| (Back of DVD/VCR) | |
| Satellite box) |
| ||
Satellite or | IN | OUT | RF cable | |
Cable TV |
|
| ||
|
|
| ||
signal |
|
|
| (supplied) |
(Back of TV)
Select this connection when you want to view or record a scrambled channel. With this connection, channels cannot be changed on the unit. You can view or record ONLY the channels you have selected on the cable box or the satellite box.
• While you are recording, only the recorded channel can be viewed.
To select channels of the cable box or satellite box
1)Turn on the unit by pressing
•If you use the channel 4, you need to change the unit’s RF output to channel 4. Refer to “RF Output Channel”.
2)At the TV, select channel 3 or 4 (the same channel as you have selected at step 1).
3)On the cable box or satellite box, select the channel you want to view or record.
Connection to an Audio System
Method 1
Stereo system
Audio
L R | Analog audio |
| input jacks |
Audio cable |
| |
(supplied) |
| |
| DVD/VCR | VCR |
AUDIO OUT | AUDIO OUT |
|
L |
| |
(Analog) | R |
|
DVD/VCRor
DVD
DIGITAL | AUDIO | COMPONENT | |
VIDEO OUT | |||
AUDIO OUT | OUT | OUT |
|
L
R
(DVD mode only)
Method 2
Dolby Digital decoder, MD deck or DAT deck
COAXIAL Digital audio ![]()
![]() input jack
input jack
Audio Coaxial Digital cable (commercially available)
|
| DVD |
|
|
DIGITAL |
| AUDIO | COMPONENT | |
| VIDEO OUT | |||
AUDIO OUT | OUT | OUT |
| |
DIGITAL COAXIAL
AUDIO OUT
Setting | SETUP > AUDIO > |
Connection | DOLBY DIGITAL |
Connecting to a Dolby Digital decoder | BITSTREAM | |
for Dolby Digital audio output. | ||
| ||
|
| |
Connecting to other equipment (an MD | PCM | |
deck or DAT deck etc.) | ||
without Dolby Digital decoder. |
|
* To complete these settings, refer to pages
Hint
•The audio source on a disc in a Dolby Digital Multi channel surround format cannot be recorded as digital sound by an MD or DAT deck.
•By hooking this unit up to a Multi channel Dolby Digital decoder, you can enjoy
•Playing a DVD using incorrect settings may generate noise distortion and may also damage the speakers.
– 6 – | EN |
E8C1UCD_EN.indd 6 | 2007/04/03 9:48:54 |